


How to use OneDrive Files On Demand in Windows 11
The OneDrive app on your Windows system allows you to store your files in the cloud up to 5 GB. There is also another feature in the OneDrive app that allows users to choose an option to keep their files in their system space or make it available online that doesn’t take up their system storage. This feature is called Files on Demand. In this post, we explore this feature a bit more and explain several options on how to use Files On-Demand in OneDrive on your Windows 11 PC.
How to use OneDrive Files On Demand in Windows 11 using OneDrive folder
Step 1: Go to taskbar rightmost corner and click OneDrive application icon once.
Step 2: Then select open folder option at the bottom of the OneDrive app as shown below.
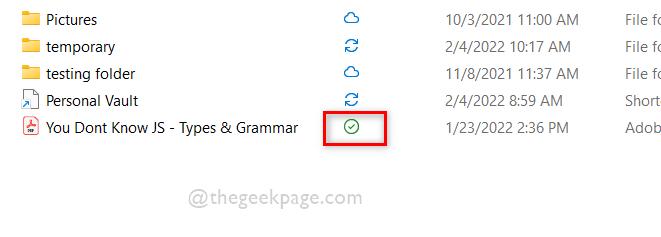
Step 3: In the OneDrive folder, the files whose status is shown as green circle with green check markis actually locally available. This means that the file is available locally and you do not need to download it to use it.
Step 4: Right click on the file and select Always keep on this device from the context menu as shown below.
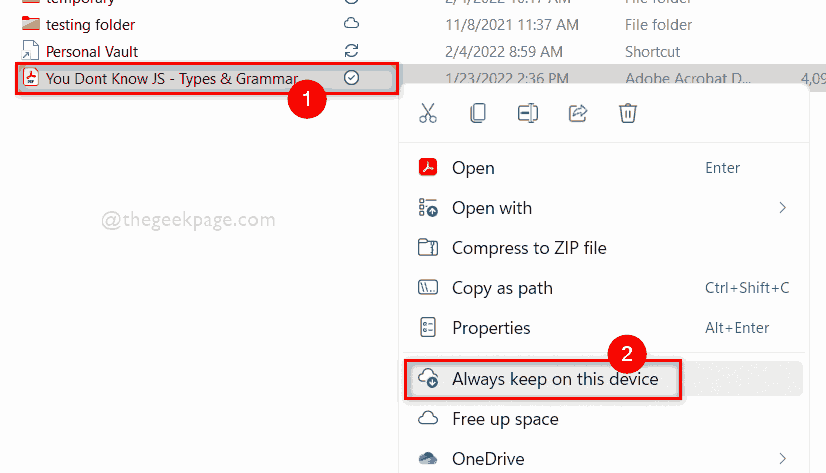
Step 5: This will display the file as Always available (Green circle with a white checkmark) on your device that will occupy your hard drive storage space as shown below.
NOTE: This means that you can also access this file on your system when you are offline.

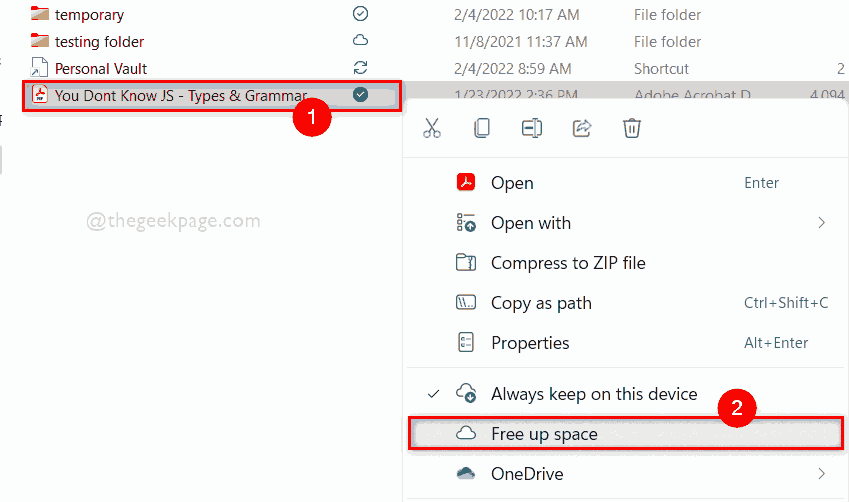
Step 6 – Again right click on the file and click free up space from the context menu as shown below.
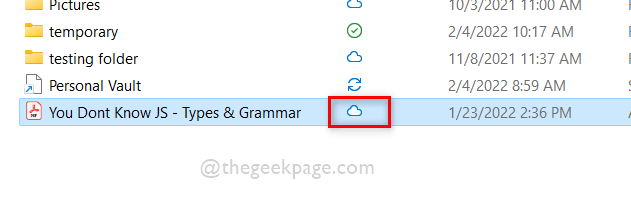
Step 7: After freeing the file from your space, you can see there is a cloud symbol below the status, which means the file has been deleted from your device and is now available online.
NOTE: You now need to be online to access this file. This means that you need to download the file and then you can access it.
Step 8 – Close the OneDrive app folder.
That’s it.
How to use OneDrive Files On-Demand in Windows 11 using PowerShell
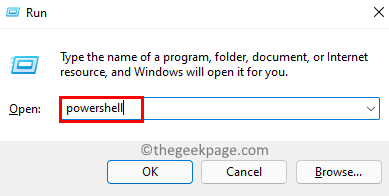
Step 1: Press Windows + R keys together on your keyboard to open To run dialog box.
Step 2: Then type potencia Shell in the run box and press Get into key to open Potencia Shell request.
Step 3: To view the status of the file on your OneDrive, copy and paste the following command and press the button Get into wrench.
NOTE: Please replace C:Users%username%OneDriveYou Dont Know JS – Tipos y gramática.pdf with your File route.
attrib "C:Users%username%OneDriveYou Dont Know JS - Types & Grammar.pdf"
Step 4: Here as you can see if there is you is shown in the output, then it means the file is Online only.

Step 5: If there is PAGS written in the output, it means that the file is always available on your device.
Step 6: If there is any written in the output, it means that the file is locally available.

Step 7: Now, to change the status of the file, run the following command explained as shown below.
NOTE: Please replace C:Users%username%OneDriveYou Dont Know JS – Tipos y gramática.pdf with your File route.
To make the file status online-only:
attrib +u "C:Users%username%OneDriveYou Dont Know JS - Types & Grammar.pdf"
To make file status always available:
attrib +p "C:Users%username%OneDriveYou Dont Know JS - Types & Grammar.pdf"
To make file status available locally:
attrib -p "C:Users%username%OneDriveYou Dont Know JS - Types & Grammar.pdf"
Step 8: The output shown below is to change the status of the file to Online only. You can run the other commands above to change the state of the file to whatever you want.

Step 9 – Close the PowerShell app after viewing and setting the status of the file.
This is how you can view and change the file status in the OneDrive folder using the PowerShell app on your system.
That’s all guys.
I hope this article has been informative.
Let us know in the comment section below for any queries.
Thank you for reading!
Related posts:
 How to access Steam games without an internet connection
  How to view FPS with Xbox Game Bar in Windows 10: Steps Made Easy
  Hacked account? How to check and remedy
  How to make video calls from WhatsApp Web
  How to increase the RAM memory of a desktop or laptop + Tips and Tricks
  How to organize your YouTube subscriptions into categories
+ Tips and Tricks
How to organize your YouTube subscriptions into categories
+ Tips and Tricks


