


How to fix error 0x000021a in Windows 11, 10
The CSRSS or Client Server Runtime Subsystem is a Windows component that is responsible for handling Win32 console operations. When this critical operation fails or completes incorrectly, the system hangs on the blue screen of death with error code 0x0000021a. Starting from a bad app to corrupted system files, this error can occur for any reason. Follow these solutions and the CSRSS will work again.
NOTE –
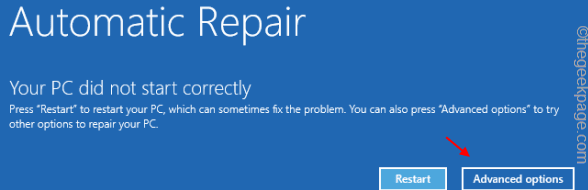
When this error occurs, you will see that Windows automatically starts in the automatic repair mode.
It should appear on this screen in automatic repair mode:
Solution 1 – Run DISM rollback command
Corruption in the main Windows file can cause this problem. So, try running DISM commands.
1. When your system boots to the Automatic Repair window, tap on the «advanced options».
2. Now, click on the button “Solve problems” to continue.
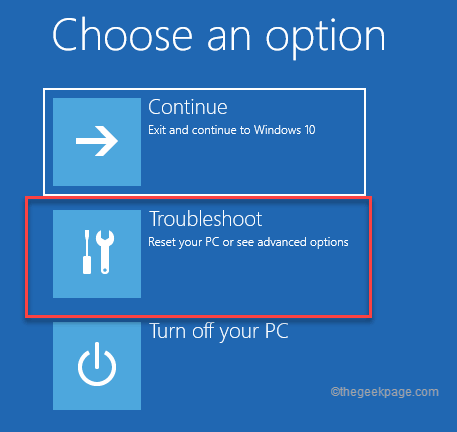
3. In the next step, tap «Advanced Options“.
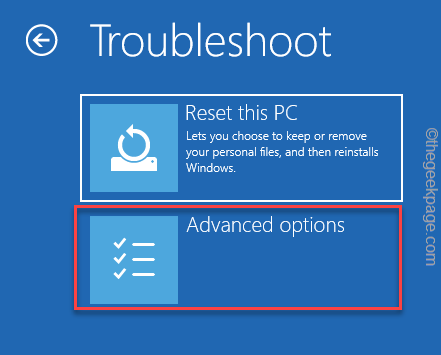
4. In the next step, tap «Symbol of the system“.

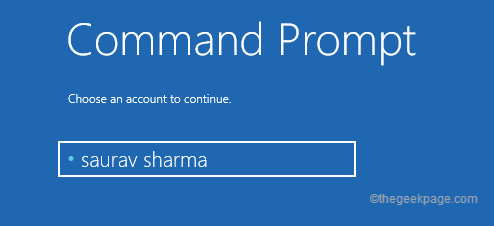
Now, your computer will boot into the command prompt terminal.
6. On the next screen, select your account and tap «Continue” to finally gain access to the terminal.
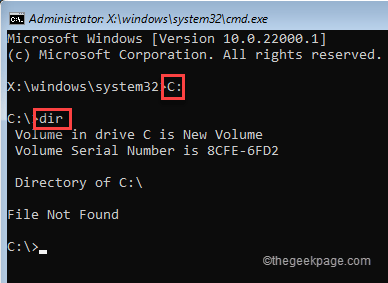
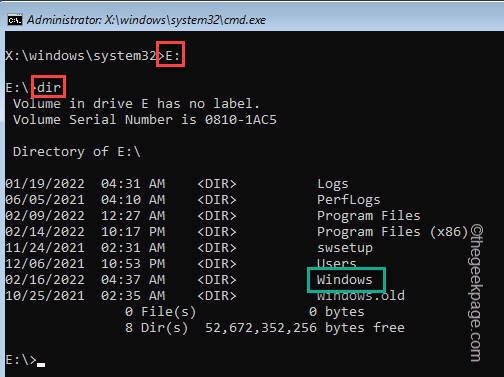
7. You need to locate which drive actually has the Windows folder. So once the CMD pops up, writes this command and press Get into.
C:
dir
Now, you need to check if you can find the “Windows” file. If you can’t find it, you need to look in another drive.
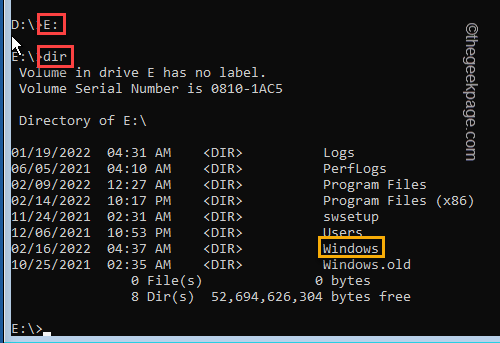
8. Now, you need to go to another drive and find the Windows folder.
E:
dir
Here, you can see the “Windows” file. So, in all the next commands, we will use the “me” drive.
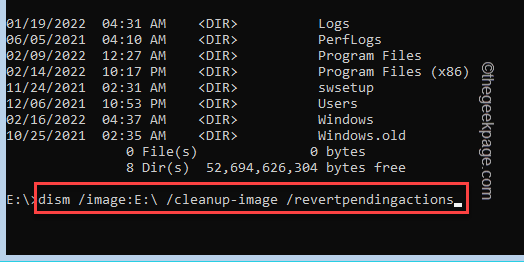
9. So now carefully catch-modify this command and press Get into to start the DISM scan.
dism /image:driveletter /cleanup-image /revertpendingactions
[
NOTE – Replace the “driveletter” with the drive letter where you have noticed the Windows folder.
In our case, it is the “E:” drive. So, the command, in our system, will be –
dism /image:E: /cleanup-image /revertpendingactions
]
[
OPTIONAL STEPS-After running the DISM command, there are two additional commands that you can run and check.
After opening the Command Prompt opens up, copy-paste these commands and hit Enter.
cd C:WindowsWinSxS
move pending.xml pending.old
]
After this, close the command prompt with your mouse.
10. Now tap “Continue”To boot into Windows.

Check if this solution works for you or not.
Solution 2 – Disable Driver Signature Enforcement
Disabling driver signing enforcement has worked for many users.
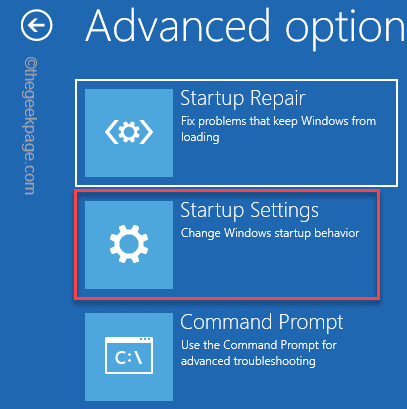
1. When the Automatic Repair screen starts, tap «Advanced Options“.
2. Next, touch the button “Solve problems” to continue.
3. In the next step, tap «Advanced Options“.
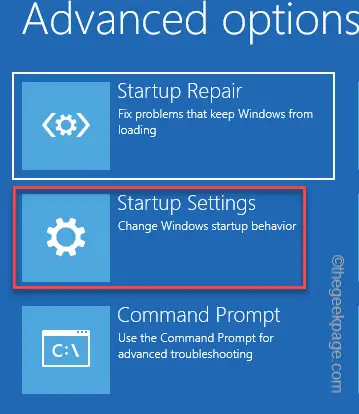
4. Here, just click “Start Settings” to start the system in special modes.
8. In the next step, tap «Restart” restart.
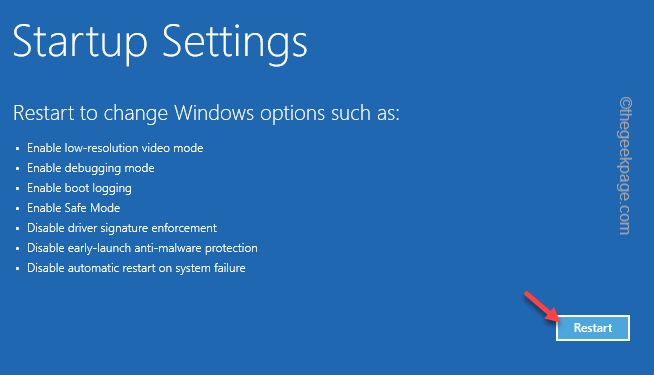
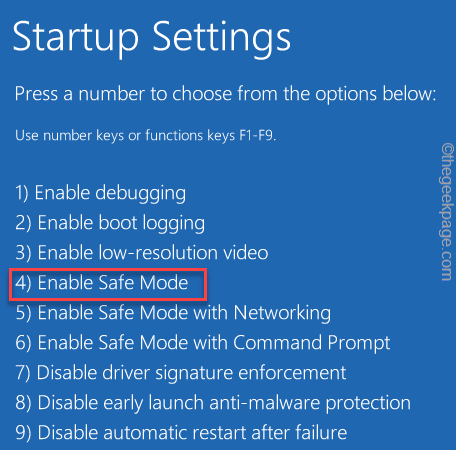
9. In the Startup Settings window, you will find 9 options.
10. Then press the F7 from your keyboard to select the “Disable driver signature enforcement“.
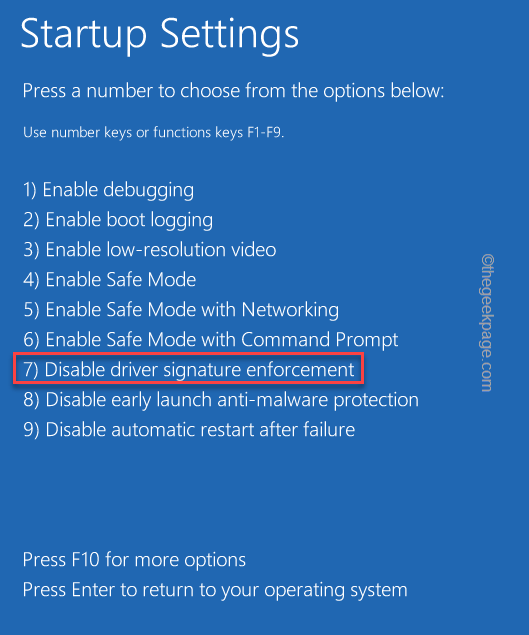
This will reboot the system and disable driver signature enforcement.
Please wait while your system boots. Login to the system and check if this works.
Solution 3 – Run CHKDSK and SFC tool
You need to run check disk operation and SFC tool.
1. When your system boots to the Automatic Repair window, tap on the «advanced options».
2. Then go this way:
Troubleshoot > Advanced options > Command Prompt
In the following steps, choose your administrative account and enter the password for the account to log in.
3. Now, you need to find which drive contains the Windows folder.
To do that, you need to go to the individual drive and do a directory search.
C:
dir
Here, check the “Windows” file. If you can’t find it, you need to look for it on another drive.
8. So again go to another drive and list all the folders using these commands.
E:
dir
Here, you can see the “Windows” file. So, in all the next commands, we will use the “me” drive.
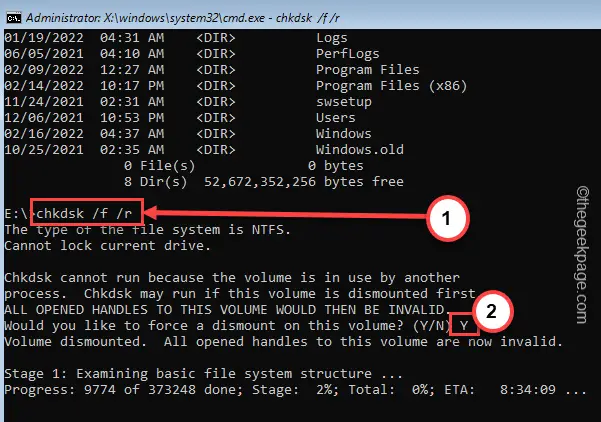
4. Once you are in the Windows drive, run this code to run a check disk operation.
chkdsk /f /r
When you see the “Would you like to force a dismount on this volume? (Y/N)“A question has appeared in the CMD terminal, please type”AND” and press Enter to start the process.
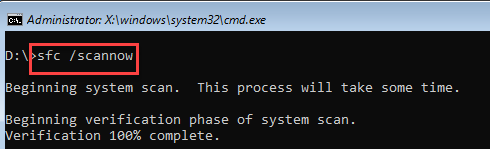
5. Once done, run this SFC scan command.
sfc /scannow
6. After running the SFC tool, finally, copy and paste this command to the terminal and press the Enter key on your keyboard to run the DISM command.
DISM /Online /Cleanup-Image /RestoreHealth
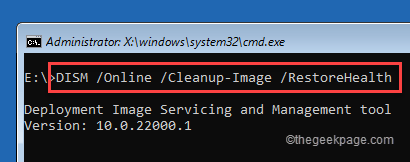
After finishing the DISM command, close the command prompt. Close the command prompt.
7. Going back to the first page, touch «Continue” to start Windows normally.
This should have solved the problem you are facing.
Solution 4 – Uninstall any new apps
If you are facing this problem right after installing a new app on your system, then you should uninstall it in Safe Mode.
Steps to boot into safe mode
1. Tap on “Advanced Options” to go to the next step.
2. Then click the button “Solve problems” to solve this problem.
3. After that, tap on the “Advanced Options” to go to the next setup page.
4. In the Advanced Options window, click the “Start Settings“.
5. Now touch “Restart” to reboot the system.
This will reboot your system.
6. Then just press the button F4 from your keyboard to choose the “enable safe mode» option.
You will see your system reboot automatically. In 2-3 minutes, it will boot into your system. You will notice that the desktop background appears completely black, which is completely normal in Safe Mode.
Step 2: Uninstall the app
Now, once you have booted into the system, you can easily uninstall the new faulty application from your computer.
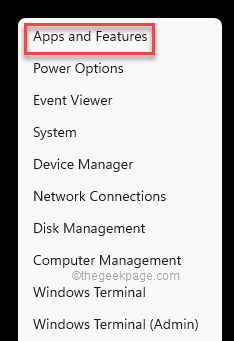
1. Simply right-click on the windows icon and tap on “Applications and features“.
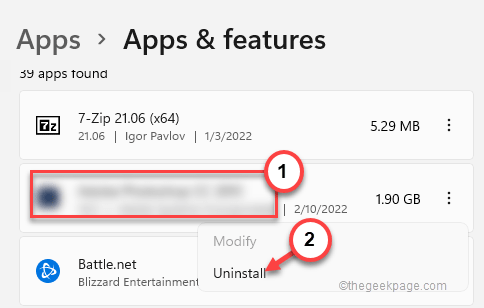
2. When Settings appears, scroll down the right panel to identify the app.
3. Once you’ve found it, tap the three-dot menu next to it and tap “uninstall” to uninstall the app.
Now just complete the uninstall process.
Once you’ve done that, close Settings.
Finally, reboot the system.
Related posts:
 How to access Steam games without an internet connection
  How to view FPS with Xbox Game Bar in Windows 10: Steps Made Easy
  Hacked account? How to check and remedy
  How to make video calls from WhatsApp Web
  How to increase the RAM memory of a desktop or laptop + Tips and Tricks
  How to organize your YouTube subscriptions into categories
+ Tips and Tricks
How to organize your YouTube subscriptions into categories
+ Tips and Tricks


