


How to fix Outlook not deployed error
Some of the Outlook users reported seeing the Not Implemented error. This error usually appears when:
- Users click on the Send / Receive button.
- Users click on the Reply / Reply to all The Ahead button.
The full error is as shown below:
Has not been implemented
Users will not be able to update their mailbox with the new emails after seeing this error.
If you see this error, don’t panic. This article lists possible solutions to the Outlook not implemented error.
Solution 1: Repair MS Office
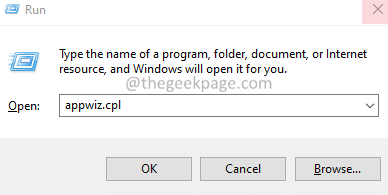
1. Hold down the keys Windows + r together to open the To run Dialogue.
2. In the Run window, type appwiz.cpl, and hit the Get into wrench.
3. In the Program and Features window that opens, look for Microsoft Office suite The Microsoft 365. Right click and select Change option.
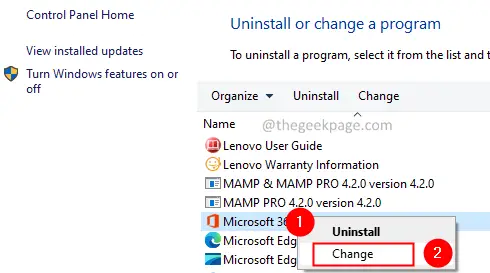
4. If the UAC appears, click And.
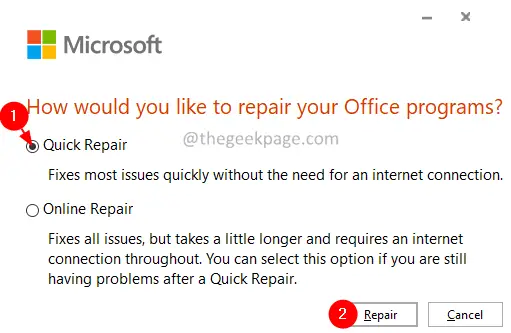
5. In the window that appears, click Quick repair As shown below.
6. Then click the Repair button.
7. Follow the instructions and repair the Office programs.
8. If the problem is caused by a corrupted Outlook application, this solution will resolve the problem.
9. Restart the application.
10. If the error persists, try choosing Online repair option and click Repair.
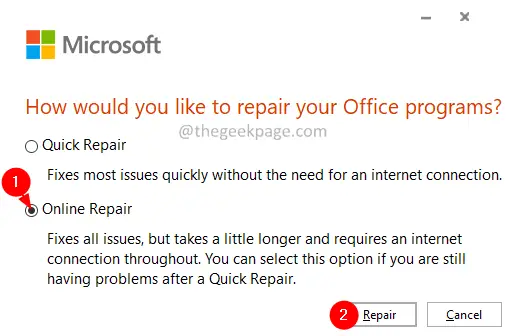
11. In the Ready to start an online repair Dialog, click Repair.
12. Restart the application and verify.
Solution 2: repair corrupted PST file
Step 1: Find out the location of the .pst file. To do it
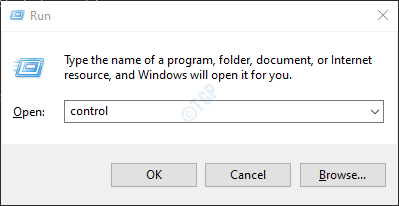
1. Open the Run dialog box by holding down the keys Windows + r simultaneously on your system.
2. Type control and hit Enter.
3. Writes Mail in the search bar located in the upper right corner of the window. Click the Mail option that appears.
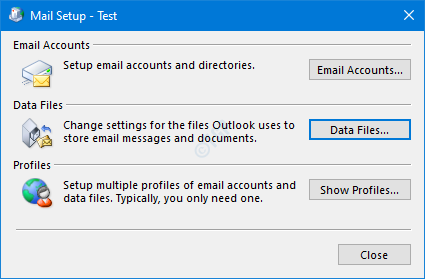
4. In the Mail Settings window, click data files button as shown below.
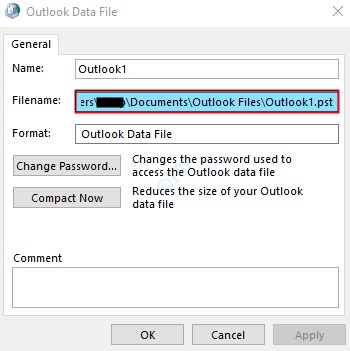
5. The Account Settings window opens. Double-click the .pst file you want to repair.
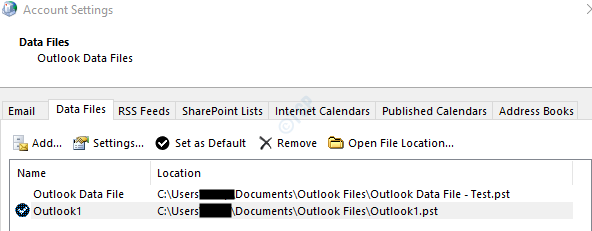
6. In the Outlook Data File window, check the file location beside file name.
Paso 2: Run the SCANPST application.
Below is the location of the different versions of Outlook.
Outlook 365
C: Archivos de programa Microsoft Office root Office16
Outlook 2016/2019
Windows de 32 bits> C: Archivos de programa Microsoft Office Office16
Windows de 64 bits> C: Archivos de programa (x86) Microsoft Office Office16
Outlook de 64 bits> C: Archivos de programa Microsoft Office Office16
Click and run> C: Program files Microsoft Office root Office16
Outlook 2013
Windows de 32 bits> C: Archivos de programa Microsoft Office Office15
Windows de 64 bits> C: Archivos de programa (x86) Microsoft Office Office15
Outlook de 64 bits> C: Archivos de programa Microsoft Office Office15
Click and run> C: Program files Microsoft Office root Office15
Outlook 2010
Windows de 32 bits> C: Archivos de programa Microsoft Office Office14
Windows de 64 bits> C: Archivos de programa (x86) Microsoft Office Office14
Outlook de 64 bits> C: Archivos de programa Microsoft Office Office14
Outlook 2007
Windows de 32 bits> C: Archivos de programa Microsoft Office Office12
Windows de 64 bits> C: Archivos de programa (x86) Microsoft Office Office12
Outlook 2003
32-bit Windows> C: Program Files Common Files MSMAPI System
64-bit Windows> C: Program Files (x86) Common Files MSMAPI System
Outlook 2002 / XP
C: Program Files Common Files MAPI System
Outlook 2000
C: Program Files Common Files MAPI System
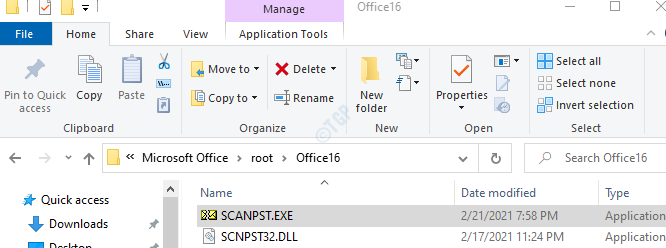
Depending on the version of Outlook on your system, navigate to the appropriate location and double click on SCANPST.EXE
Step 3: Now open the Outlook Data File window (the window was opened in Step 1, point 6). Copy the file name (Click anywhere within the Text area, hold down Ctrl + A followed by Ctrl + C).
Step 4: When the SCANNPST application opens,
- Paste the file name in the Enter the name of the file you want to scan Text’s box.
- Click on the Start button.
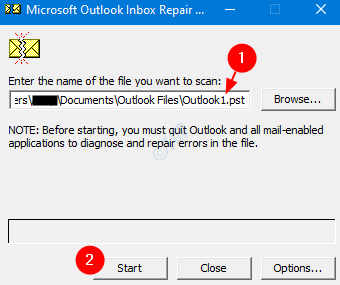
Once the scan is complete, reboot your system. Try to open the Outlook application. Check if this helped.
Solution 3: create a new profile
1. Open the Run dialog box by holding down the keys Windows + r simultaneously.
2. Type control and press Enter.
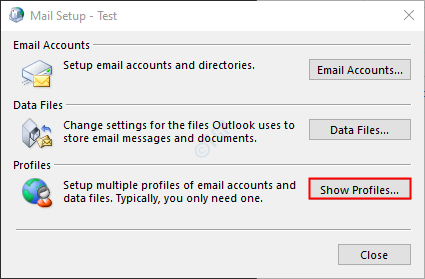
3. Writes Mail in the search bar located in the upper right corner of the Control Panel window. Click Mail (Microsoft Outlook) as shown below.

4. In the Mail Settings window that opens, click on the Show Profiles button as shown below.
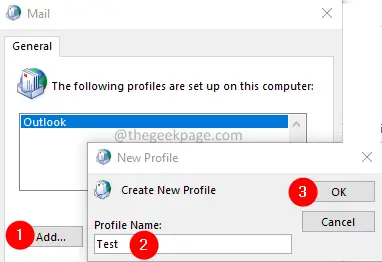
5. Click the Add button.
NOTE: NO double The Remove the existing profile until the new profile is created and up and running.
6. In the new profile window that appears, enter a Nameand press Get into.
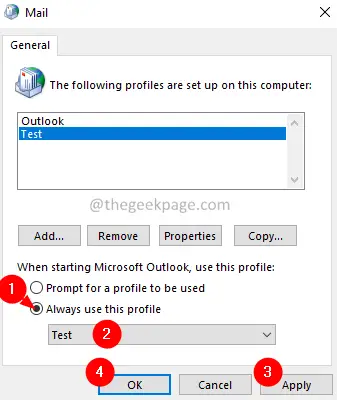
7. Click about Always use this profile.
8. From the drop-down menu, choose the profile you just created. For example, Test.
9. Click Request and then in the it’s fine.
10. In the opening window, enter your email credentials and click Next.
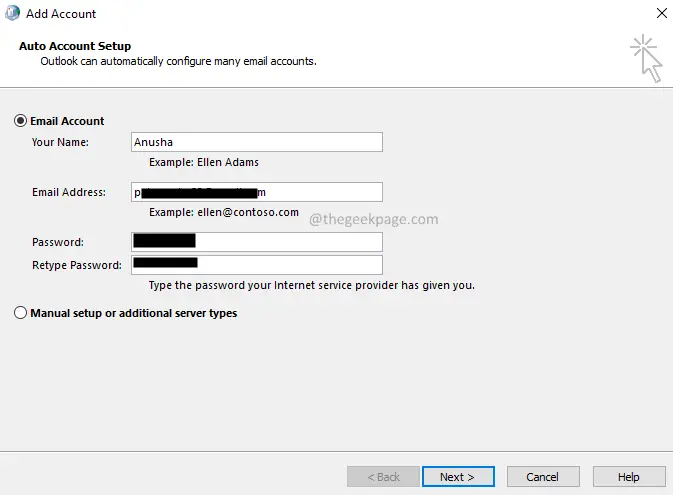
11. Follow the instructions on the screen and complete the process.
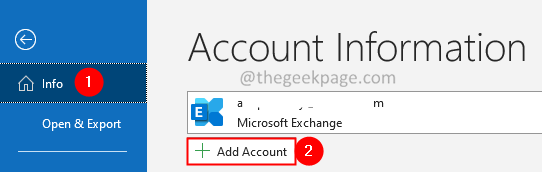
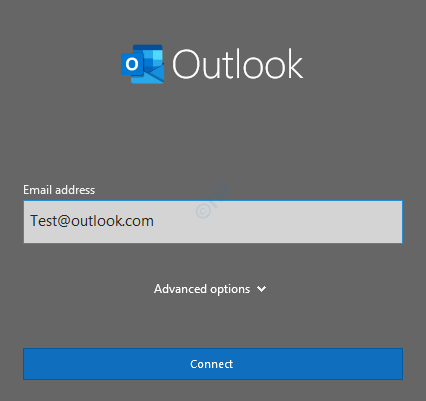
12. Open the MS Outlook application and click Archive Menu option.
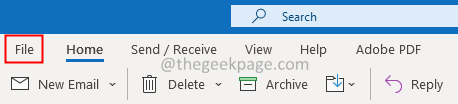
13. In the Information tab, click Add Account button.
14. Enter your email address and press Connect. Follow the instructions displayed to re-add the account.
This will take time to complete the configuration settings.
15. Click End up.
Check if the problem is resolved. If not, try the next solution.
Solution 4: disable add-ons causing problems
Sometimes third-party plugins cause this problem. To fix that problem, run Outlook without add-ins.
1. Open the To run Dialogue holding Windows + r.
2. Type outlook.exe/secureand hit Get into.
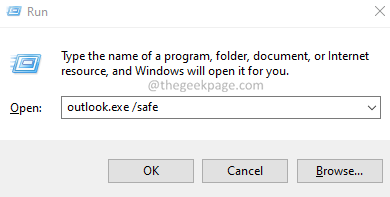
3. Outlook opens in safe mode where all add-ins have been disabled.
4. If you don’t see the error, it means that the error is caused by some plug-in. Disable the plugins one after the other and check which plugin caused the problem.
5. Open MS Outlook on your system.
6. Click the Archive option menu.
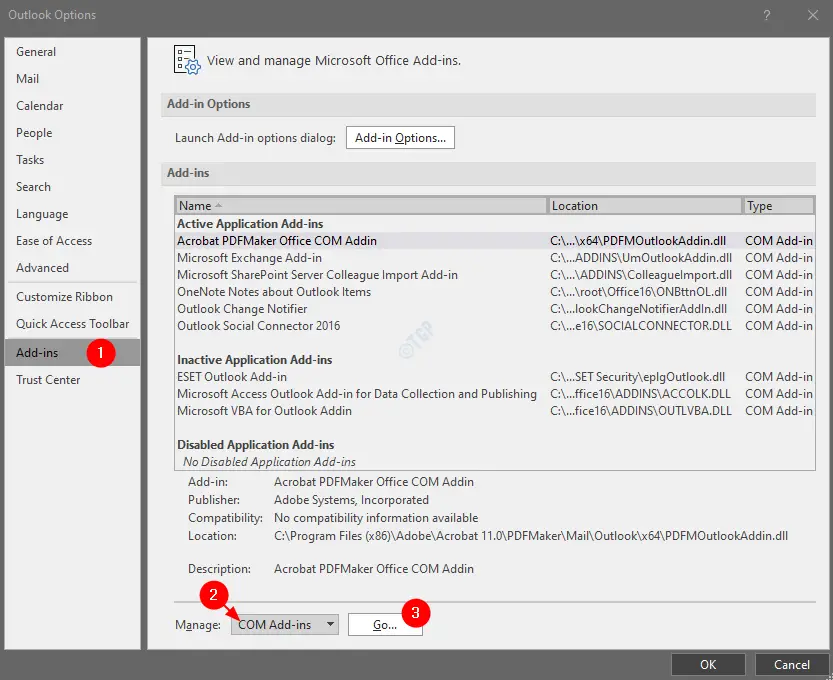
7. In the window that appears, in the lower left corner, select Options As shown below.

8. In the Outlook Options window, select Accessories in the menu on the left side.
9. All plugins will be displayed. Choose COM add-ons from the drop-down menu at the bottom of the window and click the Let’s go Button See the image below for details.
10. Mark off all the add-ons in the list and click the OK button.
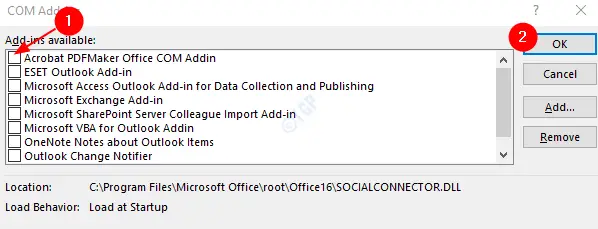
11. Enable one plug-in at a time and verify which plug-in caused the problem.
12. Once the problematic add-on has been identified, take the necessary action.
That’s it.
We hope this article has been informative. Thank you for reading.
Please comment and let us know the solution that helped you fix the problem.
Related posts:
 How to access Steam games without an internet connection
  How to view FPS with Xbox Game Bar in Windows 10: Steps Made Easy
  Hacked account? How to check and remedy
  How to make video calls from WhatsApp Web
  How to increase the RAM memory of a desktop or laptop + Tips and Tricks
  How to organize your YouTube subscriptions into categories
+ Tips and Tricks
How to organize your YouTube subscriptions into categories
+ Tips and Tricks


