


How to Flash a ROM on an Android Mobile without PC with Flashify – step by step
–
Do you know how to flash a ROM with Flashify on Android? If you do not know, we will give you an even more interesting information, with this App you do without a PC to do it.
Surely, if you have ever rooted your mobile, it is likely that you have read about flashing a ROM. This means that you can load your mobile with an .img or .zip file or in any other formatThis is known as Flash, thus allowing multiple files to be loaded onto the mobile, such as the personalized Recovery.
This time, we will teach you how to flash ROM with Flashify, a very powerful tool that little by little has become very popular.
If you have previously flashed your Android phone then you should be familiar with the ADB drivers and you will have used some custom Recovery, as well as Fastboot.
All these methods are well known and allow you to customize these mobiles. Another very common method is to flash any Rom. but with the use of the PC. However, here we will show you a much simpler alternative.
What is special about Flashify compared to the other tools?
Obviously, we can find a large number of applications that allow Android flashing, but Flashify is the best among all these since It allows install custom Recoverys, ROMs, Mods, Kernels, archivos .zip y .img.
In addition to all this, the application has a very simple and friendly interface, thus having everything necessary to grant root access to the user. In addition to flashing boot.img and recovery.img files, Flashify allows make backup copies and restore them too.
Another great feature of Flashify is that allows you to completely erase the Caché and Dalvik Caché memory, as well as performing a factory reset, flashing multiple files at the same time, creating a queue to keep track of flashed files, starting the phone in Recovery Mode, and more.
In short, this tool allows you to perform many operations with your mobile in a fast and secure way. The important thing is that you have the suitable application such as SuperOneClick to grant the permissions required by the mobile for the process.
Flashify features
1.- It allows flashing .zip files, cleaning cache, Dalvik cache and data using Recovery Philz or TWRP.
2.- It allows flashing the mobile startup and .img files without accessing the Recovery mode of your mobile.
3.- Use Loki Patch automatically if necessary.
4.- You can download and flash Philz, CWM, TWRP, Franco Kernel, gaps, Nexus Recovery and Nexus Kernel.
5.- It is capable of making backup copies and restoring them through an SD card.
6.- It is automatically synchronized with the Cloud and makes backup copies between computers and mobile devices.
7.- It allows you to flash several files at the same time and create a file queue to flash.
How to flash a ROM with Flashify on Android?
This tool becomes very useful especially for users looking for an alternative to Recoverys that are personalized or do not have Root permissions on your mobile. There are several tools that allow you to root your mobile with a single click quickly, but in this case Flashify will be our option. To flash ROM with Flashify you just have to follow the following steps:
1.- Your mobile must have been rooted, if you don’t know how to do it, here is a guide to flash it quickly.
2.- Now you must download the Flashify app to start the procedure.
3.- When you have installed it, you must run the application.
4.- Now you must give Root permissions to the application and go to the main Flashify screen.
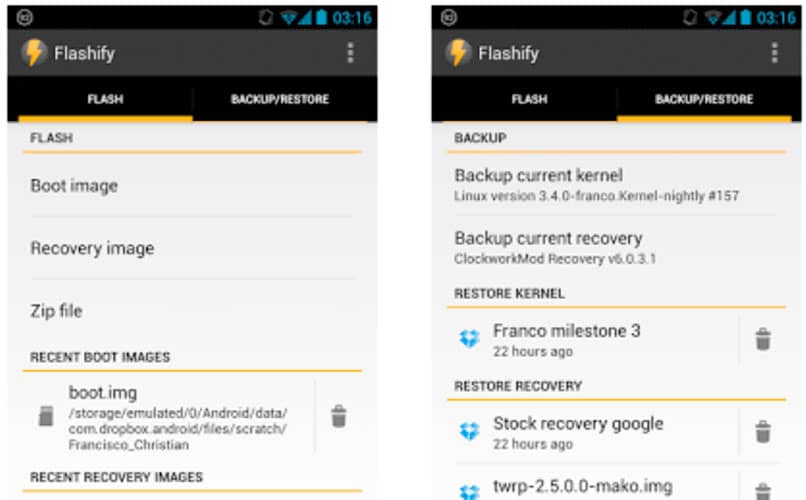
5.- The buttons will be unlocked, so you can find the .img or .zip file you want to flash.
6.- The backup menu allows you to access Backup Nandroid and all the available options. In the upper right corner you can see a button that allows you to start the mobile in the way you want or simply access the settings.
7.- By pressing the + button at the top of the screen you will be able to create a cola to flash multiple files .zip o .img.
8.- Everything else is easy to do, you just have to follow the application tutorial.
Related posts:
 How to access Steam games without an internet connection
  How to view FPS with Xbox Game Bar in Windows 10: Steps Made Easy
  Hacked account? How to check and remedy
  How to make video calls from WhatsApp Web
  How to increase the RAM memory of a desktop or laptop + Tips and Tricks
  How to organize your YouTube subscriptions into categories
+ Tips and Tricks
How to organize your YouTube subscriptions into categories
+ Tips and Tricks


