


How to install Pop_OS on Raspberry Pi 4
Pop! _OS is now available on Raspberry Pi 4! This guide will explain how you can configure the operating system on your Raspberry Pi 4. To get started, make sure you have a fast MicroSD card.
Download Pop_OS for Raspberry Pi 4
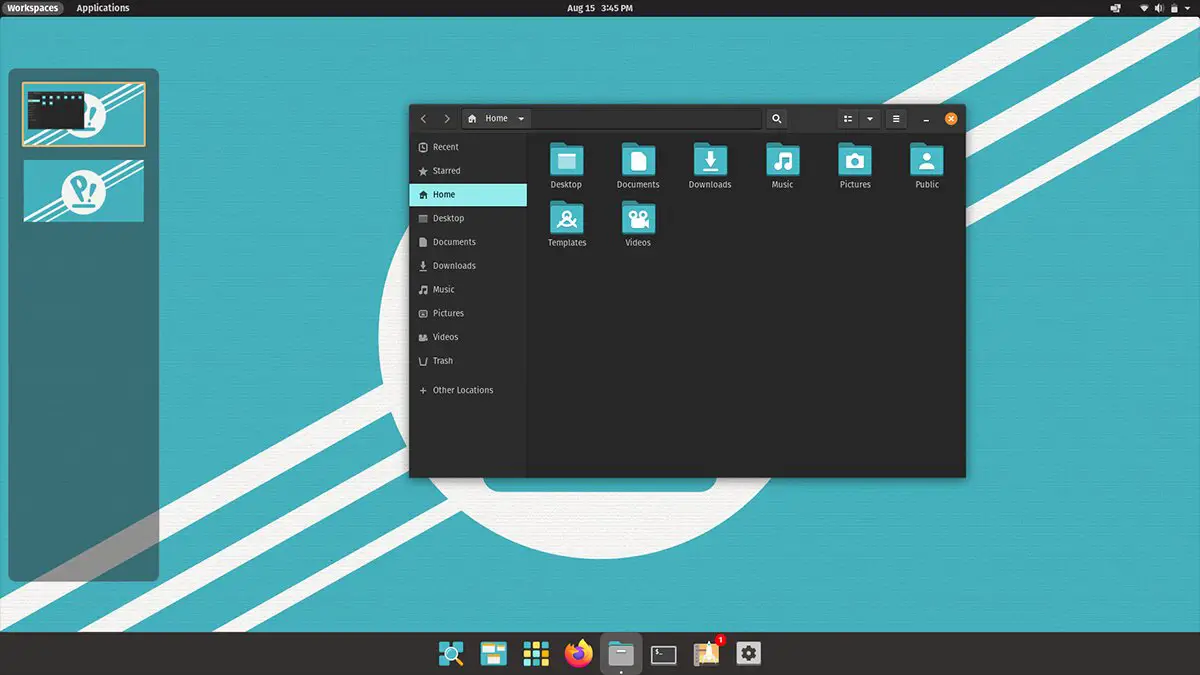
Head over to the Pop_OS official website and click the download button. Once the download button is selected, a pop-up window will appear. Find “Download 21.10 (Ras Pi 4)” and click it with your mouse to download the operating system.
Instalar Raspberry Pi Imager
The Raspberry Pi imaging tool is the best way to create a Pop_OS installation for Raspberry Pi 4. Open a terminal window on the Linux desktop to get your hands on the Raspberry Pi image printer.
Not sure how to open a terminal window? printing Ctrl + Alt + T on the keyboard. Alternatively, you can search for “Terminal” in the application menu and open it that way.
Once the terminal window is open and ready to use, you can begin the installation. Follow the instructions below to configure the Raspberry Pi Imaging Tool.
Note: If you are using Mac OS or Windows, you will need to obtain the imaging tool from the official website.
Snap package
The Snap version of the Raspberry Pi Imager is easy to get up and running on any Linux OS that supports Snaps. You will need to enable the Snap runtime on your computer to get started.
Enabling the Snap runtime is easy. To do so, follow our guide on the subject. Once the runtime is configured on your computer, use the instant installation command to configure the Raspberry Pi Imager tool.
sudo snap install rpi-imager
Flatpak
If Snaps isn’t for you, another way to get the Raspberry Pi imaging tool is with Flatpak. Install the latest version of the Flatpak runtime on your computer to get started.
Setting up the Flatpak runtime on Linux is pretty simple. To do so, head over to our guide on how to set up Flatpak. Once configured, use the remote flatpak-add command to configure the Flathub app store on your system.
flatpak remote-add --if-not-exists flathub https://flathub.org/repo/flathub.flatpakrepo
After adding the Flathub repository to your computer, you will be able to install the Raspberry Pi imaging tool. Then using the flatpak installation , set up the Raspberry Pi imaging application on your computer.
flatpak install flathub org.raspberrypi.rpi-imager
Arch Linux
The Chaotic AUR software repository has a pre-built Raspberry Pi imager package available for users to install. If you want to install this package on your computer, start by using the wget download command to download the package to your computer.
wget https://builds.garudalinux.org/repos/chaotic-aur/x86_64/rpi-imager-1.6.2-2-x86_64.pkg.tar.zst
Installation can begin after downloading the Raspberry Pi Imager package to your computer. Using the pacman -U , install the latest version of Raspberry Pi Imaging Tool on your Arch Linux computer.
sudo pacman -U rpi-imager-1.6.2-2-x86_64.pkg.tar.zst
Pop_OS configuration on Raspberry Pi 4
Launch the Raspberry Pi Imaging Tool to configure Pop_OS on Raspberry Pi 4. Once it is open, follow the step-by-step instructions below.
Paso 1: Inside the Raspberry Pi Imaging Tool, find the “Choose Operating System” button and click on it with your mouse. When this button is selected, a pop-up menu will appear. Within this pop-up menu, there are many different options. Find the “Use Custom” button and click on it.
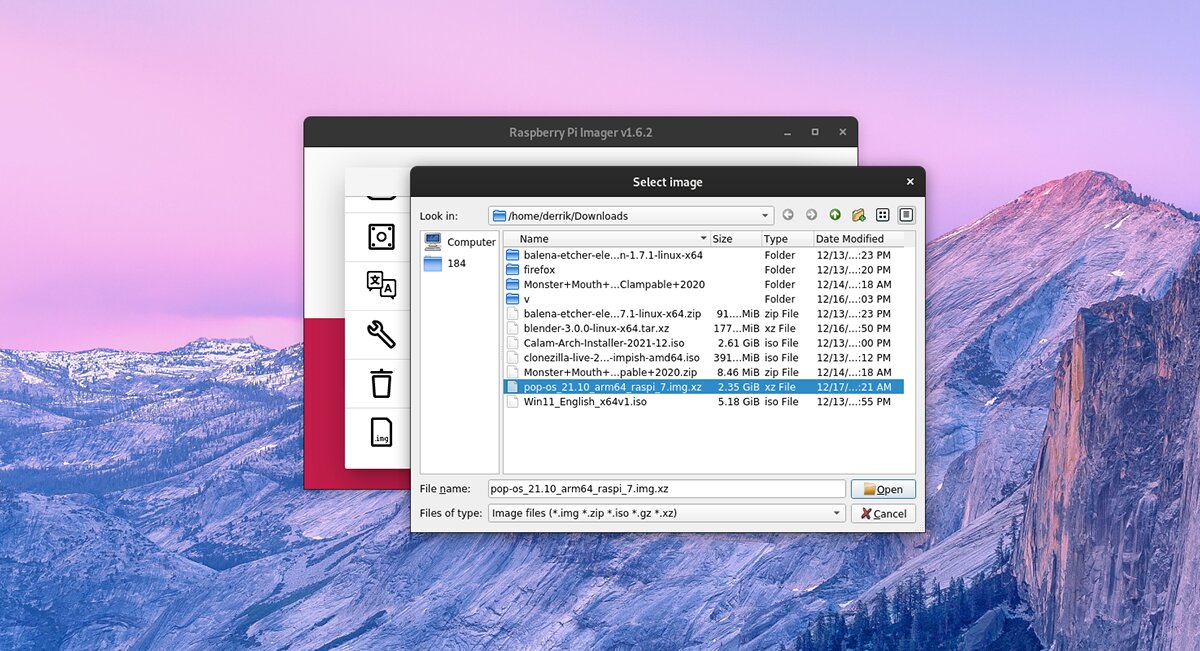
Paso 2: After selecting the “Choose Operating System” button, locate the image “pop-os_21.10_arm64_raspi_7.img.xz” downloaded earlier in this post and select it to add Pop_OS to the Raspberry Pi imaging tool.
Paso 3: Look for the “Choose Storage” button on the Raspberry Pi Imager. Once you have selected the “Choose Storage” button, insert your SD card into your computer’s SD card reader.
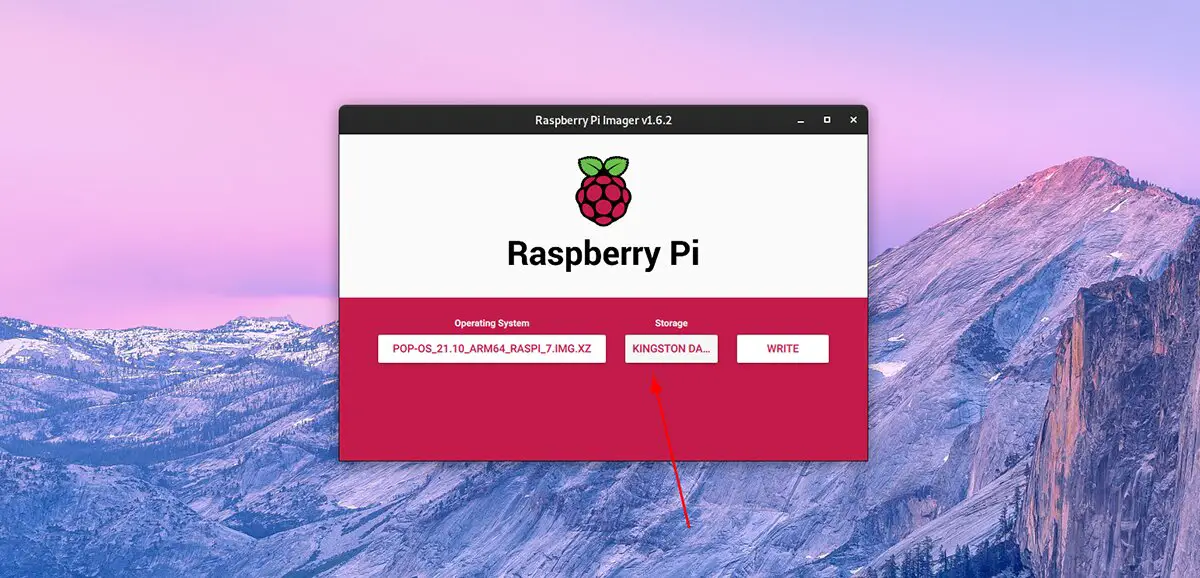
Stage 4: Look for the “Write” button to start the writing process. Please note that the writing process will take a little time to complete. After the writing process is finished, disconnect the SD card from the reader.
Paso 5: Connect the SD card to the Raspberry Pi 4 device. Once the card is connected, connect a keyboard, mouse, display, and speakers (if you need sound).
Paso 6: After connecting the keyboard, mouse, screen, and speakers, connect the power cord to your Raspberry Pi 4. The Raspberry Pi 4 will turn on when the power cord is connected.
Once the Raspberry Pi 4 is powered up, it should boot directly into the Pop_OS Cosmic desktop environment. From here you will be able to use Pop_OS, all the applications and everything that is out of the box.
If you want to customize the operating system (user account, network, etc.), open the settings and change it. However, you do not need to change these settings.
Related posts:
 How to access Steam games without an internet connection
  How to view FPS with Xbox Game Bar in Windows 10: Steps Made Easy
  Hacked account? How to check and remedy
  How to make video calls from WhatsApp Web
  How to increase the RAM memory of a desktop or laptop + Tips and Tricks
  How to organize your YouTube subscriptions into categories
+ Tips and Tricks
How to organize your YouTube subscriptions into categories
+ Tips and Tricks


