


How to lock your Windows PC 11: 4 methods
Many users complain that some data / information is stolen from their system often, but they forget that it could be because they leave their system unlocked while away. This can be avoided if users practice the standard of locking their computer before leaving and there are many ways you can lock your system very quickly and easily. Also, locking your computer does not mean that you will close your applications or any unsaved work of your project and after unlocking it, you can continue your work as before. In this article, we will show you how you can lock down your Windows 11 system by many methods.
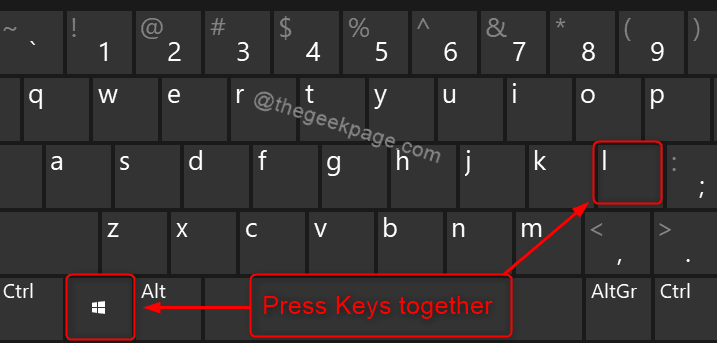
Method 1: using the keyboard shortcut
Paso 1: Press Win + L keys together on your keyboard to lock your PC very quickly.
This will instantly lock up your system as soon as you press those keys at the same time.
Method 2: using the CTRL + ALT + DEL option
Paso 1: Press CTRL + ALT + SUPR keys together on your keyboard.
Paso 2: Click on Close with key on the screen menu as shown in the following screenshot.
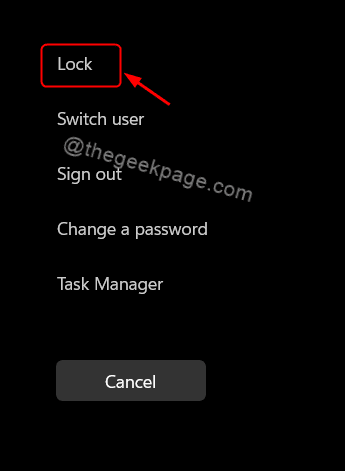
This will crash your Windows 11 computer easily.
Paso 1: Press Windows logo key on your keyboard.
Paso 2: Click the user account name icon at the bottom left of the start menu.
Paso 3: Then click Close with key from the list as shown below.
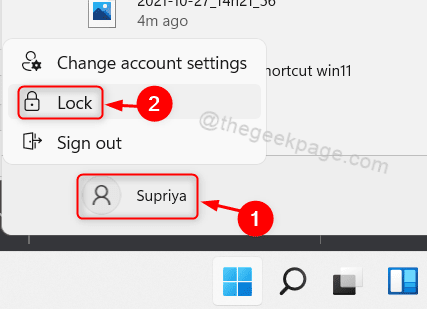
This locks your computer as soon as you click the lock button from the list without delay.
Method 4: lock your PC automatically with the screen saver
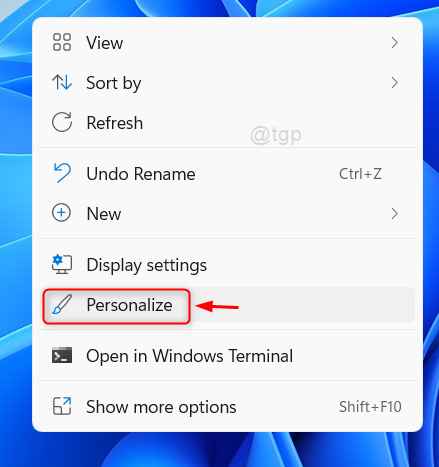
Paso 1: Press Win + D keys together on your keyboard to go to the desktop.
Paso 2: Right-click somewhere on the desktop.
Paso 3: Click on Personalize in the context menu as shown below.
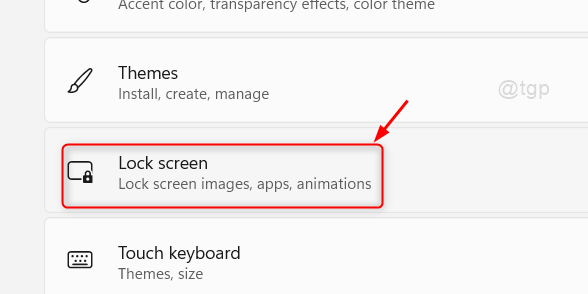
Paso 4: Click on Lock screen option on the Personalization page.
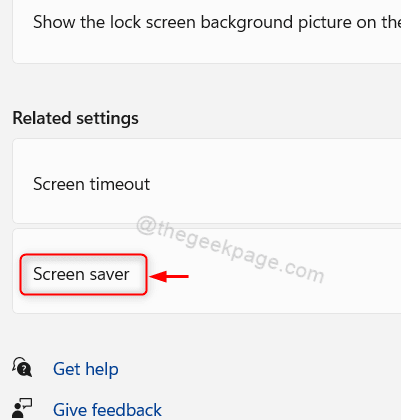
Paso 5: Scroll down the page and select Screen saver option in Related Settings.
Paso 6: Select any screensaver from the list in the screensaver settings window (ex: blank screensaver)
Paso 7: Enter the time in the Expect text box in minutes.
Paso 8: Then select the check box When resuming, display the login screen in the Screensaver section as below screenshot shown.
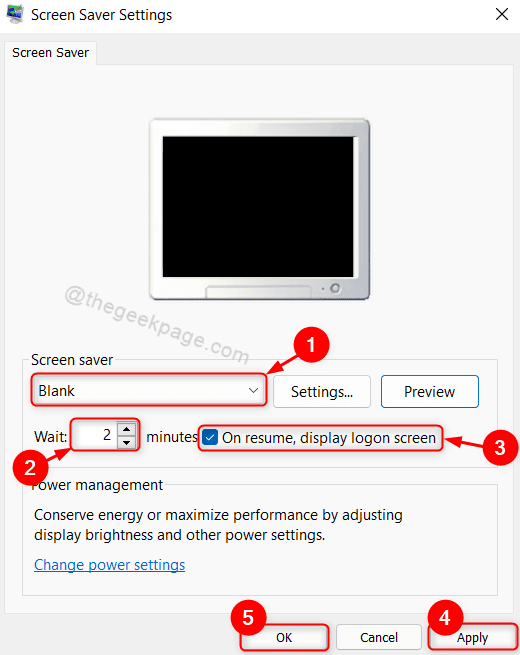
Paso 9: Finally, click Request and OK to make changes.
This will eventually lock up your computer when there is no activity for a certain amount of minutes mentioned in the screen saver and shows the screen saver and on resuming it shows the login screen.
That’s it guys!
I hope this article has been informative and helpful.
Thank you for reading!
Related posts:
 How to access Steam games without an internet connection
  How to view FPS with Xbox Game Bar in Windows 10: Steps Made Easy
  Hacked account? How to check and remedy
  How to make video calls from WhatsApp Web
  How to increase the RAM memory of a desktop or laptop + Tips and Tricks
  How to organize your YouTube subscriptions into categories
+ Tips and Tricks
How to organize your YouTube subscriptions into categories
+ Tips and Tricks


