


How to move Android apps to SD card

Here’s how to move Android apps to an SD card and free up storage space on your phone! Is there anything worse than when you try to install a new app on your Android device and the low space warning pops up? It means that all those 4K games, photos and videos that you have saved on your phone, have filled all the memory.
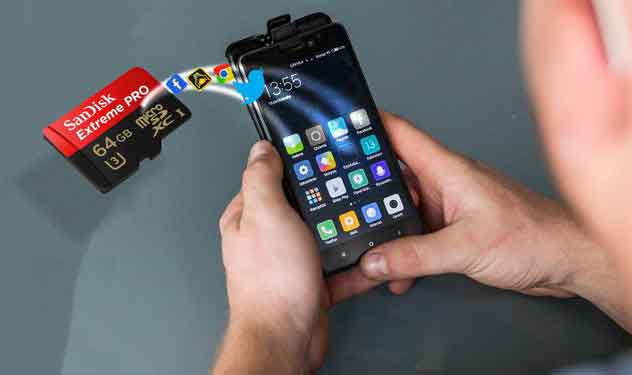
If your phone has a memory card slot, the solution is simple. A microSD card is an inexpensive way to expand your phone’s storage. You can move apps to an SD card to free up space, instead of removing or not installing more apps on your Android device.
How you do this depends on the version of Android you are using. In this article we will talk about all the ways to move Android apps to an SD card.
Before moving Android apps to SD card
Before you begin, consider a few things. Memory cards are slower than internal memory, so you may notice some, albeit little, slowness for resource-intensive apps. When choosing an SD card, choose the fastest and largest one your phone can support, check your phone’s specifications to see which SD card it is compatible with.
It is not possible to move pre-installed apps without root your phone, and some third-party apps may not move as well. Also, in older versions of Android, you may not be able to use the widgets associated with the apps you moved to the memory card. That said, let’s see how to move apps to an SD card.
Use an SD card as internal storage
Android Marshmallow introduced changes to the way Android phones can handle memory cards, and these changes have continued in later versions of Android.
You can now configure microSD cards to function as internal storage. Instead of having the existing internal and external memory as separate spaces, Android sees the card as an extension of your internal memory.
Data and apps can write to both as needed and everything runs smoothly. As a result, you don’t have to worry about where your apps are stored.
You need to configure the feature first. Your SD card will be wiped during the process, so make sure you’ve backed up all the data you need:
- Insert the SD card into your phone. When the notification is displayed New SD card, touch Configure.
- Next, you need to choose how your phone should use the card. Select Phone memory your Android 9 or Use as internal storage in previous versions. Alternatively, go on Settings> Memory, select the card, tap the menu button and select Storage settings. Touch Format as internal.
- On the next screen, tap Format SD card The Erase and format. This will cancel your card.
- On Android 9 and later, you are offered the option to move your content, including apps, to the card. It also shows you how much space you will save. Awards Move content to complete.
This function is called Adoptable Storage and requires you to keep the SD card in your phone permanently. The card is also encrypted, so you can’t insert it into another device to copy the data.
The big drawback of Adoptable Storage is that all Android phones are different, so some manufacturers choose not to offer it on their devices. If you don’t have it, you will need to manually move your apps to the SD card.
How to move apps to an SD card on Android 9 Pie and later
If your phone doesn’t support Adoptable Storage, you can still manually transfer apps to an SD card on Android 9 and later. Just remember that you don’t move all apps to an SD card on Android, and you can’t move pre-installed apps either:
- Go up Settings> Apps and notifications> App info.
- Find the app you want to move in the list and tap it.
- Select Memory. If the app supports switching to a tab, you will see a button labeled here Change. Tap this.
- Select the SD card in the dialog box Change memory. This brings up a confirmation screen. Touch Move to start.
To return the app to internal storage, repeat the previous steps but select Internal shared memory in the final step. You should always do this when you want to change or remove your memory card.
How to move apps to an SD card on Android 8 Oreo
The process for moving an app to the SD card on Android 8 Oreo is basically the same as on Android 9 Pie:
- Go up Settings> Apps and notifications> App info.
- Scroll down to find the app you want to move to the card and tap on it.
- Select Memory. If the app supports moving to a tab, you’ll see a section named Memory used. Press the marked button Change.
- Select the card you want to move the app to, followed by Move.
How to move apps to an SD card on Android 7 Nougat
You can move apps to a memory card on Android 7 Nougat via Settings. However, you can’t move all apps. If not supported, you won’t see the button Edit in step 3:
- Go up Settings> Apps.
- Find the app you want to move to the microSD card and tap it.
- Go up Storage> Edit and choose your card from the request window that opens.
- Touch Move to complete the process.
Depending on the size of the app, it may take a few moments to complete (especially for large games), so don’t touch your phone until it’s done. To return the app to its previous location, repeat the steps and choose Internal shared memory in step 3.
How to move apps to an SD card on Android 6 Marshmallow
Moving apps to a microSD card is the same on Marshmallow as on Nougat:
- Go up Settings> Apps, then tap your chosen app.
- Touch Memory> Edit, then choose the card when prompted.
- Awards Move to complete the process.
How to move apps to an SD card on Android 5 Lollipop
Lollipop comes with little support for memory cards compared to later versions of Android, but you can still move apps via Settings.
You’re limited with the apps you can move to external storage; depends on the developer if it supports the option. Also, it is not possible to move the whole app to the SD card, only a part of it.
You can see which apps you have on your card by swiping to the right tab on the screen App, labeled on SD Card. This makes it easy to identify which ones you may want to go back in the future.
To move apps:
- Go up Settings> Apps and tap the app you want to move to the SD card.
- So, in the section Archiving, touch Move to SD card. The button will be grayed out as the app moves, so don’t interfere until it’s done.
- If the option is not present Move to SD card, the app cannot be moved.
When finished, the section Archiving will update to show how much of the app is now stored on the card (and how much is still in internal memory). The button Move will now read Move to phone The Move to device memory.
By tapping this you can remove the app from the card.
How to move apps to an SD card on Android 4.x and earlier
Support for microSD cards was extremely limited in all versions of Android 4.x (including KitKat, Jelly Bean, and Ice Cream Sandwich). Android at the time of this version’s release did not support the ability to move apps to an external card at all, as Google wanted to get rid of tabs entirely.
However, some manufacturers have decided to include the feature in their own versions of the operating system. If your old device supports it, the process is simple:
- Go up Settings> Apps.
- Then, find and tap the app you want to move to the card.
- Select Move to SD card. If this button isn’t available, you can’t move the app (or your phone doesn’t support this).
In the unlikely event that you are still using an Android 2.x device, the steps are more or less the same. Home screen widgets aren’t supported in these older versions – you’ll need to keep the app in internal storage if you want to use a widget.
If you don’t have the option on your phone, you will need to try using a third party app to move apps to an SD card.
How to move apps to an SD card using Link2SD
If your phone doesn’t support moving apps to the SD card, or if you want to move an app that “can’t be moved”, there are some third-party apps that can help you. Apps2SD is the most used option, as is FolderMount. Both require a rooted Android phone.
We will look at another app, Link2SD, which is usable with both root and non-root. You can use it to move apps in bulk to your SD card, to “forcibly move” apps that don’t normally allow it, and to download data folders for larger apps and games to external storage.
First, launch the app and grant root permissions if your phone is rooted. Then tap the app you want to move and select an option:
- Connection to SD card: requires root and moves the entire app and its data to the card.
- Move to SD card: does not require root and only works if your phone supports moving apps to external storage. If you have root, you can also force-move apps that don’t otherwise support it.
- Connection to SD card (data and cache): moves data files and requires root.
To move more than one app at a time, tap the del button menu in the upper right corner and choose Selection multiple. Now tap on all the apps you want to move, hit the button again menu and choose Connect to SD card The Move to SD card. These are the same options as described above.
Link2SD is free, with a paid upgrade. It works on Android 2.3 and above.
Download: Link2SD (gratuita) | Link2SD Plus (€ 1.99)
The best way to move apps to an SD card on Android
The best way to install apps on the SD card depends on the version of Android you are using, whether your phone manufacturer has implemented all the features, and which app you want to move.
In summary:
- On phones that support adoptable storage, this is the best choice. Eliminate any need to manually manage your card.
- For phones that only support manually moving apps to the card, this method is the best and the cleanest.
- If your phone doesn’t support any of this, or if you have specific requirements, consider rooting and using Link2SD.
- Don’t overlook the occasional drawbacks of using an SD card on Android.
If your apps take up too much space, another good solution is to use the Android Go range of apps instead. Not only are they smaller and take up less space, but they also run faster on older or less powerful phones.
Related posts:
 How to access Steam games without an internet connection
  How to view FPS with Xbox Game Bar in Windows 10: Steps Made Easy
  Hacked account? How to check and remedy
  How to make video calls from WhatsApp Web
  How to increase the RAM memory of a desktop or laptop + Tips and Tricks
  How to organize your YouTube subscriptions into categories
+ Tips and Tricks
How to organize your YouTube subscriptions into categories
+ Tips and Tricks


