


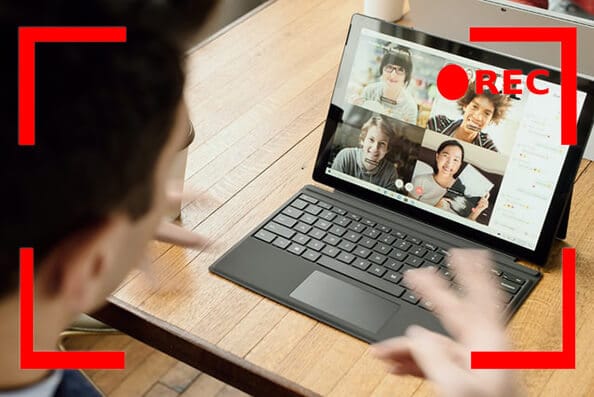
How to Record a Video Conference | Tips and Tricks
– Learn these tips and tricks on how to use your devices in a much easier way as well as solved some of your common problems that are difficult.
We’ve already talked about the best programs for recording video lectures, streaming video conferences, and even group calls.
In this article we will go into detail instead, seeing all the steps necessary to record a videoconference or video lesson complete with audio and video.
Among all the programs that we have recommended, to start a videoconference recording we decided to deepen the use of OBS (Open Broadcaster Software) because it is free software (free and open source), very comfortable and well functioning and multiplatform (available for Windows, Mac and Linux).
Next, we will see in detail the methods by which it is possible to record a video conference already integrated into the video conferencing services (Meet, Teams and Zoom).
Record a video conference with OBS on Windows, Mac and Linux
L’installation of OBS for Windows and Mac is very similar, after going to the OBS website, you can download the executable suitable for the operating system in use by clicking on the corresponding logo and then on “Download Installer“.
Once you have downloaded the suitable executable just click on it to start the installation procedure.
For theinstallation on Linux, the procedure differs for each distribution, fortunately there is a dedicated page with installation instructions with the commands to be executed to install the program on the main Linux distributions.
Once the installation is complete, the program interface is the same on the three platforms.
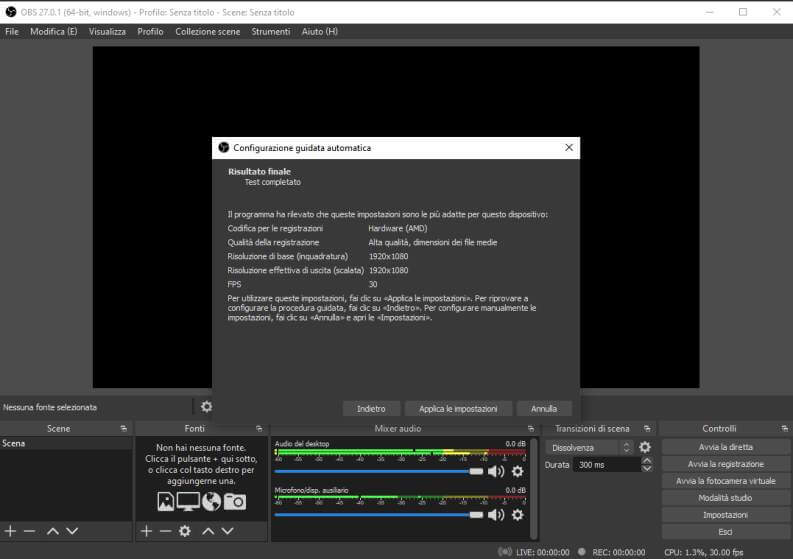
Just launch the program by clicking on its icon and the first configuration procedure will start.
When requested, you must indicate what you intend to use the program for, in our case you must select “Optimize for recordings only, I don’t do direct“.
In the next screen leave the basic resolution unchanged and select “30“. Recording a lesson at 60 FPS would just be an unnecessary waste of space.
Finally, select the “Apply settings“.
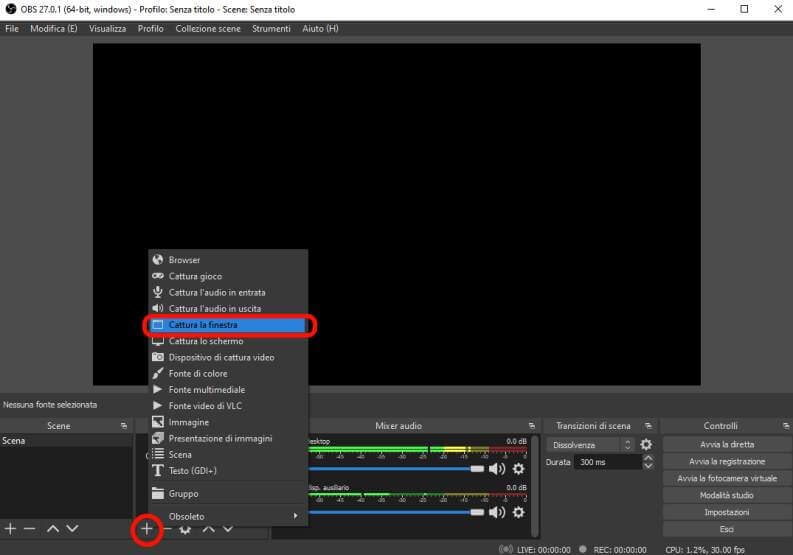
So you have to enter the sources to be captured, doing it is simple, to record videolessons or conferences on the net you can click on the “+“In the section”Sources“And in the menu it is necessary to choose the item”Capture the window“.
At this point a dialog box will open, which will allow you to choose the name to give to the source, in our case you could opt for “videoconference“.
Then in the appropriate drop-down menu make sure you have selected the window in which you are watching the video lesson, or that of the program you use for the video lesson (for example that of Skype, Zoom, or Teams).
If you have problems with capturing a single window, you can alternatively opt for the “Screen capture“, With which you can record the whole screen and not a single area.
At this point, if you also want to record the audio of the video lesson, you have to go to “Sources“And click on the”+“. Here then you can click on “Capture the audio output”.
A dialog box will open, so you have to enter an explanatory source name eg. “Audio videolesson” and press on “OK“.
At this point OBS is configured and we can record audio and video of lectures and video conferences.
Per start recording just click on the button “Start recording“, per stop recording just click on the same button that has become “Finish the registration“.
Next to this key there is also the one for pause the recording, which will be enough to press again for continue recording.
After finishing the recording of the video lesson, the resulting video file, if you are on Windows, will automatically be saved in the “Video”Of the user.
Per change the folder where to save the video lesson recordings, in the OBS program window, just click on “File“, Then on”Settings“And then go to the”Exit“.
In this section, in the “Registration path“, You can set the folder in which to save the recordings.
Record videoconferencing with the most used platforms
After this solution to record videolessons, valid for every service and every platform for videolessons, video calls and videoconferences, let’s see how to record videolessons with the various platforms that are used to make video lessons: Google Meet, Microsoft Teams e Zoom Meeting.
Record video conferences and video lessons on Google Meet
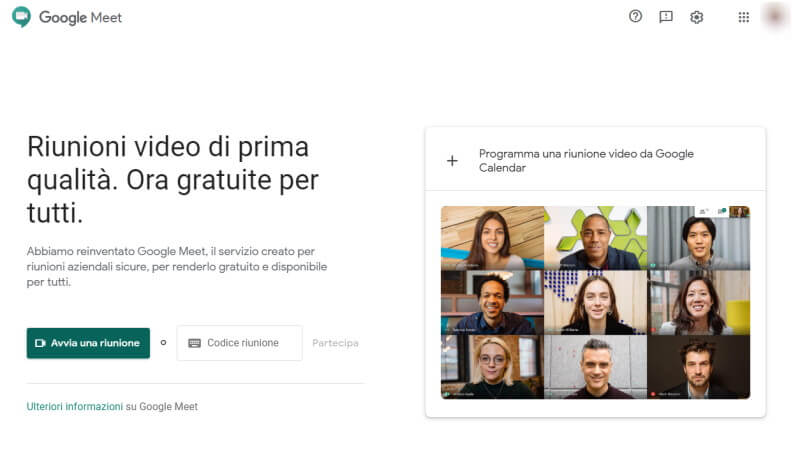
We have already talked about Google Meet, it has been the platform chosen by many schools, universities and courses to offer remote lessons.
Among the available functions there is also the one that allows you to record the videoconference in progress. To enable the function you must be a G Suite administrator, or get enabled by an administrator.
At that point, the recording function will be conveniently available by clicking on the icon with the three vertical dots and then on “Register“.
The option, if enabled, is present only in the Desktop version of Google Meet.
The option is rarely enabled, therefore, it is better to proceed using OBS as we have illustrated in the previous paragraph.
Record a video conference on Microsoft Teams
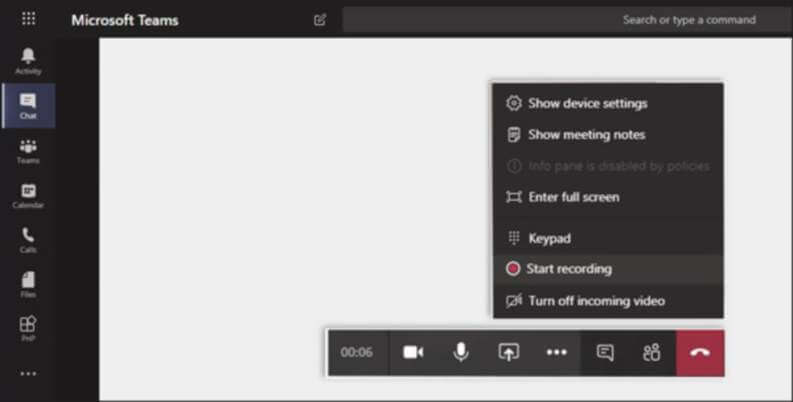
This solution is also widely used for lectures, video conferences and courses. Registering on Teams is really easy, as long as you’re not a guest user and have a valid license for the program.
If you are enabled to register, to start recording the videoconference just click on the “Other Options“And then on the item”Record meeting“.
When you start recording all participants are notified with a notification, the captured video is stored directly on Microsoft Streams and you will receive a link on your account that can be used to access the recorded video.
Obviously also in this case, it is recommended to use OBS, especially if you are not enabled to register, or if you want to avoid disturbing other participants with the notification during registration.
Record video conferences on Zoom Meeting

We have already talked about Zoom, a solution widely used for videoconferencing and therefore also for videolessons.
Recording a video conference on Zoom Meeting is very simple, just click on the “Record“, Present in plain sight in the interface.
The recording will be saved locally and will always be accessible.

Related posts:
 How to access Steam games without an internet connection
  How to view FPS with Xbox Game Bar in Windows 10: Steps Made Easy
  Hacked account? How to check and remedy
  How to make video calls from WhatsApp Web
  How to increase the RAM memory of a desktop or laptop + Tips and Tricks
  How to organize your YouTube subscriptions into categories
+ Tips and Tricks
How to organize your YouTube subscriptions into categories
+ Tips and Tricks


