


How to record your iPhone screen (with sound)
Being able to record your iPhone screen is useful for a number of reasons. You can record your screen to show a friend or family member how to do something on an iPhone. Maybe you have a blog where you post short video tutorials for iOS. Or maybe you want to create your own YouTube channel full of instructional videos on iPhone.
Either way, it’s now easier than ever to create a screen recording on iOS. We will show you how to filter the recording on your iPhone with a built-in tool as well as some iPhone screen recording apps.
Record the screen on your iPhone or iPad
IPhones with iOS 11 and later can use Screen Recording Tool. This utility is built into iOS, it doesn’t cost a penny, and is one of the most useful iPhone widgets.
Step 1. Activate the screen recording tool
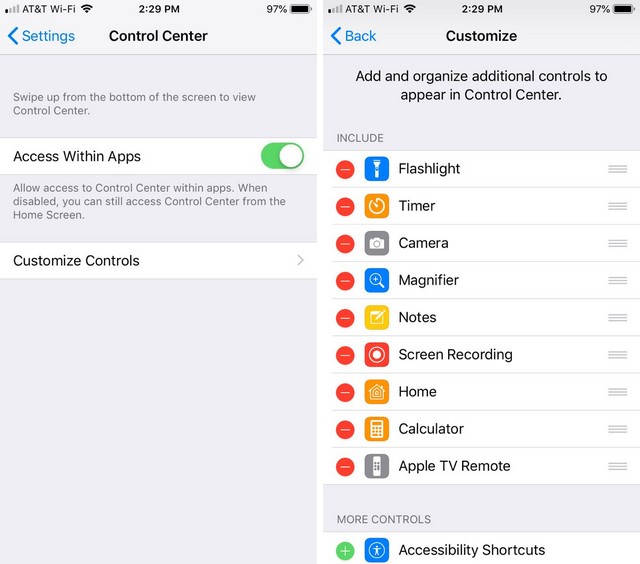
To use the screen recording tool on iOS, you must first activate it in Control Center. To do this:
- Opened ParametersAnd select Control center.
- Scroll to More ordersAnd you should see Screen recording.
- Touch the icon Plus and drag it up under the header Controls included.
Step 2. Start recording your screen
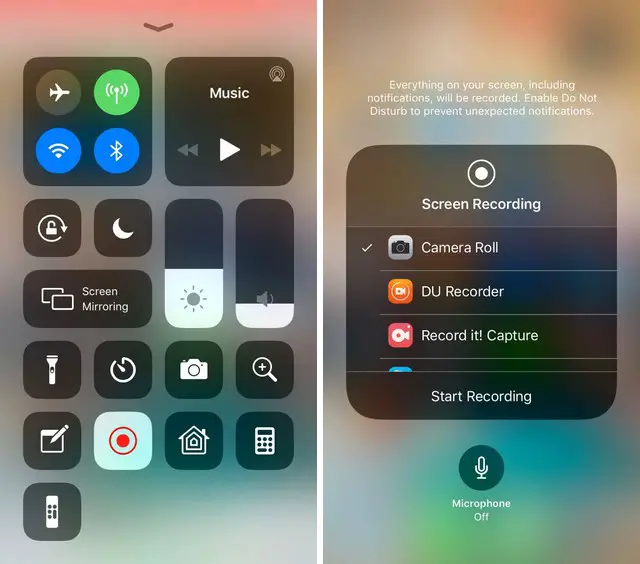
- Opened the control centerOn an iPhone X or later, swipe down from the upper right corner of the screen to do this. On older models, swipe up from the bottom of the screen.
- Press the button Screen recording and you will see a three second countdown before your phone starts recording. This gives you time to prepare your screen. You can turn on Do Not Disturb to prevent pop-up notifications from interfering with screen recording.
- If you want to capture audio while recording your screen, press and hold the button and then tap the icon Microphone offTo turn it on. Once you turn on the mic, it will capture audio the next time you record your screen, unless you go back and listen to it.
- While recording, the bar or clock at the top of your screen Red.
Step 3. Stop recording your screen
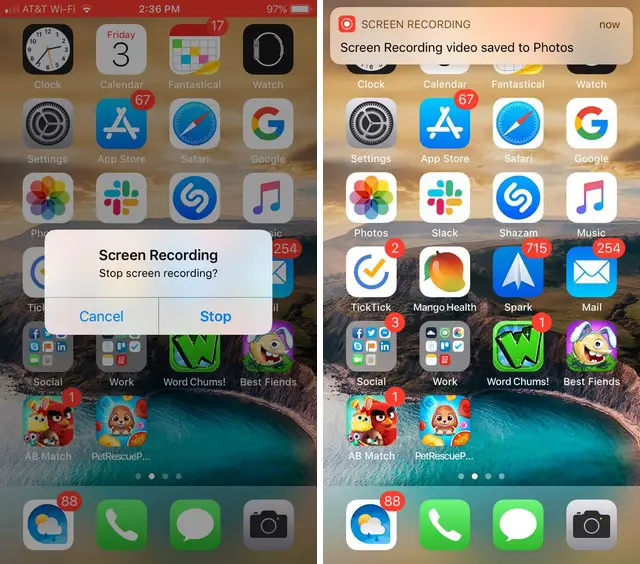
- To stop recording, you can touch the red clock or the red bar at the top and confirm that you want to end the recording by pressing StopYou can also press the button again. Screen recording in the Control Center.
- When you stop recording, you will see a notification that the screen recording has been saved in your Photos app. And ready! This is how to record your screen.
How to use iPhone screen recording apps
While the screen recording tool that comes with iOS works quite well, you can try a third-party app that offers additional functionality. There are many applications to choose from, but these three applications are free to download and easy to use.
1. TechSmith screenshot

If you are a fan of Snagit for computer screenshots, then you will like TechSmith Capture for iPhone and iPad.
press the Red buttonAt the top of the app to start recording, then select Start streamingOn the next screen. If you want, you can also turn on the microphone to record audio.
Like the native iOS tool, the clock or bar at the top of the screen will be shown in red during recording. To stop recording, press that red bar and select StopYou will see a notification that your screen recording has been saved.
Open the app and you will see the recording, which you can share if you want. Select an option from Camtasia, Snagit, TechSmith Relay, or one of the sharing options on your device. Sharing on Snagit is ideal if Snagit is installed on your PC.
2. Grabe!
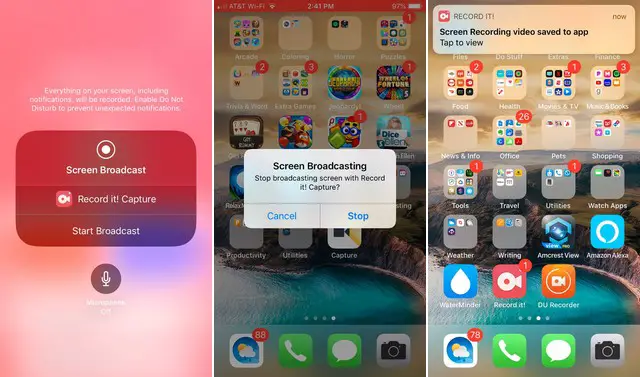
Record! is another good option from the App Store. This application works almost the same as TechSmith Capture.
To start a recording, press the Red button, then select Start streamingOn the next screen. Again, you can turn on the microphone if you want to record audio with your display as well.
The clock or bar at the top of the screen will be red during recording. To end the recording, press the clock or the red bar and select Stop. You will see an alert that your screen recording has been saved.
Open the app to view your recording. From there, you can share it to your Camera Roll, YouTube, or any of the other apps on your device. Cut your recording, resize the canvas, add a background color, etc.
3. DU recorder
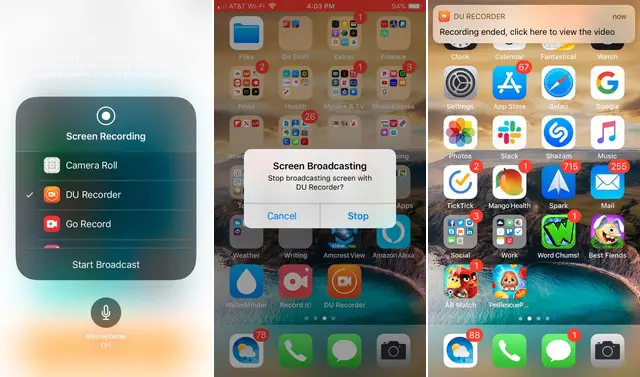
Another iPhone screen recording app that you should check out is DU Recorder. This app works the same way for screen recordings as the previous two. However, with DU Recorder, start by pressing Save to a local deviceIf you want to save the recording to your photos, press Start recording, Select DU RecorderAnd choose Start streaming.
You will be greeted with the clock or the red bar at the top of your screen, like the others.clock or red bar to stop recording, then press StopTo confirm. You will see a notification that your recording has been saved to your photos.
DU Recorder also offers additional features including live streaming to YouTube, Facebook, and Twitch. You can also edit videos from the app to cut, add text or music, and trim your recording.
conclusion
In this guide, you have learned how to record your iPhone screen. If you have any questions or suggestions, let us know in the comments. Also refer to this guide if you want to learn how to take a screenshot on iPhone 13.
Related posts:
 How to access Steam games without an internet connection
  How to view FPS with Xbox Game Bar in Windows 10: Steps Made Easy
  Hacked account? How to check and remedy
  How to make video calls from WhatsApp Web
  How to increase the RAM memory of a desktop or laptop + Tips and Tricks
  How to organize your YouTube subscriptions into categories
+ Tips and Tricks
How to organize your YouTube subscriptions into categories
+ Tips and Tricks


