


How to Root or Root a Nokia 3, 5 and 6 Mobile without PC, with TWRP Recovery
–
Do you have a Nokia 6? You have to know then that you will be in the presence of a device that fulfills perfectly on a day-to-day basis, and that is also one of the most recent that we have seen appear on the market. Anyway, we think that the most daring users will want to know what the procedure is like, in details, in order to be able to root a Nokia 6 and make the most of it.
That is precisely why, in this article, we want to teach you how to root a Nokia 6 without PC in just 5 minutes, taking into account that many owners of this device ask us about it. The truth is that we are completely sure that by following the step by step that we are going to teach you, you will get an integral use of the options of this team.
In particular, we recommend root Nokia 6 to the most expert users, taking into account that in this particular device, as it has been released rather recently, that will mean that we will lose the warranty of the terminal. Considering this initial aspect, we have to add to that that it is a process with certain elements of care that we are going to analyze.
Root a Nokia 6 step by step
Of course, before starting with the step by step, we have to say that many users are probably wondering what are the main reasons for carrying out this tutorial. Well, when we root a Nokia 6, we have the possibility to use different ROMs custom, install special applications, or enhance any other feature of your mobile.
Requirements to root the Nokia 6
Before performing this procedure for the rooteo del Nokia 6The first thing you have to analyze is that it will be necessary to have at least 80% of the phone’s battery available, to prevent it from turning off during the process. In addition to that, we always recommend making a backup, since although there are usually no problems, eventually we will not lose content.
Another not minor detail is that, as we are going to work with applications that are external to the device, we have to take the trouble to modify some of its basic settings in order to run them smoothly. Indeed, you have to go to Settings, Security, and enable Unknown sources or Unknown sources, and then you will be in a position to move on.
Tutorial to root Nokia 6
The first thing you have to do then is download the Kingo Root application, something you can do without problems from this link. Then, using a file explorer, you have to specifically search for it and run it, pressing on its icon. You will then see that you can open the application from the apps directory. Make sure you are connected to a network of WiFi o 4G LTE.
Once the Kingo Root app, just download Kingo Root PC Windows – Learn how to root your Android step by step, it will tell you if the smartphone has already been rooted or if that has not happened in the past. Then you have to press the main button to start the procedure, and in just a couple of minutes, you will be able to restart the computer. When it starts up again, then you will have your Nokia 6 rooted without any further difficulties.
Check everything with Root Checker
From this link you can download Root Checker, and it is an essential application for when we finish with this type of procedure. The best thing about Root Checker is that in just one second it will tell you if the rooting process that we have just shown you has completed exactly the way it should.
When you open the app, it will immediately tell you if yourmartphone has been rooted correctly or not. Also using this application you can know if your Android mobile is rooted with Root Checker
Nokia 6 Features
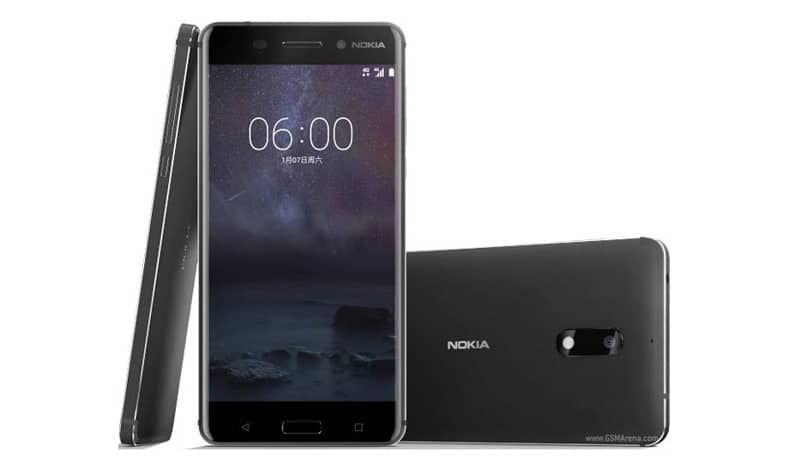
If you want to know more details about the Nokia 6, the first thing you have to keep in mind is that we are in the presence of a terminal that we could qualify as belonging to the medium / high range. The Nokia 6 has a 5.5-inch screen with a Full HD resolution, in addition to a 3,000 mAh battery, and it runs the Android 7.1.1 Nougat operating system.
Beyond that, we cannot stop emphasizing other details of the Nokia 6, such as that it has a processor Snapdragon 430 with 3GB of RAM and 32GB internal storage. To that we have to add later that it has a 16 megapixel main camera, an 8 megapixel secondary camera, and several other elements that make it an attractive option in this range.
Other very common questions and queries that users have not stopped asking in different forums and social media About these topics, they have to do with the following: nokia 6 root, download iroot apk, vroot, apk to root, framaroot apk, download towelroot, iroot pc or towelroot apk. Any other questions you have within this segment, you just have to ask us so that we can give you a hand, through the comments of the different articles, of course.
Do you want to know how to root Nokia 3 with TWRP Recovery quickly? You have to know then that we are going to teach you the step by step that you have to follow in such particular situations, situations in which we want to make better use of our smartphone. The truth is that when we do this step by step, we have the possibility of accessing a huge number of options and functions that would otherwise be completely inaccessible with smartphones.
Well, we are going to show you then how to root Nokia 3 with TWRP Recovery quickly, taking into account that we are talking about a step by step of those that are among the best that we must take into consideration in this type of very particular situations. The interesting thing about the case is that by doing so, we will be able to work with Custom ROMs, among other issues. Without a doubt, it is one of those tutorials that we should carry out with any terminal.
Tutorial to root Nokia 3 with TWRP Recovery
Requirements to root Nokia 3 with TWRP Recovery
Of course, as always you will find that there are some requirements that we must take into account in this type of situation, in order to be completely sure that we will have absolutely no problems in this regard. First of all, you have to perform a charge of device battery, since it is the only way in which you will be able to have enough battery to finish the step by step. It is not too complicated to do that, of course.
In the second instance, you have to know in this regard that it is also convenient that you make a backup copy of absolutely all the content that you think you should protect. In this way, you can be completely sure that you will not lose any of that relevant content. The truth is that you will then have the possibility of finding a backup that will leave you completely calm while you carry out this Step by Step so transcendent.
Root Nokia 3 with TWRP Recovery step by step
- Download and install Minimal ADB and Fastboot on mobile
- Download and install Nokia 3 Drivers
- Enable USB Debugging and OEM Unlock on the device. If they are not active, you have to go to Settings, Developer options. If you do not find this option there, you must go to Settings, Security, and press several consecutive times on Compilation number until that option appears
- Later, you have to make a full backup on your device if you have not done it before
- Charge the battery of the terminal, also if you have not done it before
- Download SuperSU for Nokia 3
- Descarga TWRP Recovery
- Connect Nokia 3 to PC using USB cable
- Copy the TWRP file to the ADB and Fastboot folder and rename it Recovery.img
- Go to the ADB and Fastboot folder and press Shift + right mouse button on a blank space, choosing the option Open command window here
- The command bar or CMB will then open, where you must write Fastboot devices, where you will see if the device has been taken or not by the computer
- Then add the adb reboot bootloader command that will allow you to reboot the device in Bootloader Mode
- Go to Nokia’s official site and download the Bootloader unlock code
- Then enter the code obtained with the fastboot oem unlock command
- Finished all the previous steps, enter the Fastboot Reboot command to restart the terminal
Check everything with Root Checker
Once you have finished with all the previous steps that we have just taught you, you have to know that there is an application that has been specially developed to check if you have really carried out this step by step in the conditions in which you should have done it. Indeed, you have to consider in this regard once you have downloaded the application from its link, you will only have to run the application, and then you will be in a position to know if you have rooted your mobile as you wanted.
Nokia 3 Features
Of course, we will not stop analyzing the characteristics of this device, as we always do when rooting procedures. The first thing you should know is that the Nokia 3 has a repertoire of rather simple features, but also enough for day to day. The Nokia 3 is the Android smartphone Nokia’s cheapest of the last ones that have hit the market, and for that reason, below we are going to show you all the details you have to know about this device and its features.
The Nokia 3 stands out in the first instance for having a 5-inch HD screen, accompanied in turn by a processor MediaTek quad-core with a clock frequency of 1.3 GHz, plus 2 GB of RAM, 16 GB of expandable internal storage capacity. To that, two 8-megapixel cameras will have to be added later, considering at the same time a 2,630 mAh battery, and the Android 7.0 Nougat operating system that should be updated shortly to Android Oreo.
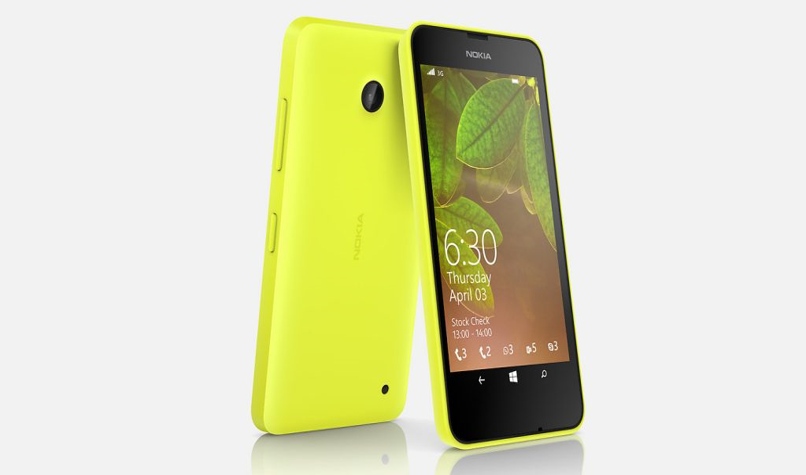
Some of the following have to do directly with the ones that we are going to mention below: root lumia 640, how to root windows phone 10, how to root a lumia 520, jailbreak windows phone 8.1 lumia 520, how to root a nokia, how to root microsoft cell phone, how to root a lumia 640 xl or windows phone internals.
Have you been able to root Nokia 3 with TWRP Recovery quickly with this step by step?
Related posts:
 How to access Steam games without an internet connection
  How to view FPS with Xbox Game Bar in Windows 10: Steps Made Easy
  Hacked account? How to check and remedy
  How to make video calls from WhatsApp Web
  How to increase the RAM memory of a desktop or laptop + Tips and Tricks
  How to organize your YouTube subscriptions into categories
+ Tips and Tricks
How to organize your YouTube subscriptions into categories
+ Tips and Tricks


