


How to save photos in JPG format on iPhone
In this guide, we will tell you how to save photos in JPG format on iPhone. In iOS 11, Apple changed its default camera formats for photos and videos from JPG to HEIC. Apple has made these changes to save space on your iPhone. Compared to JPG format, HEIC format takes up less space.
So whenever you capture a photo with your iPhone, it is automatically saved in .HEIC format. Although HEIC is a very efficient file format, it still has some drawbacks.
Once you share your iPhone photos and videos on your Windows PC, you will find that you cannot open the files due to the HEIC format. By default, the Windows operating system does not support the HEIC format, but you can use a third-party photo viewer to view these files.
Also, you can rely on image converters to convert your HEIC images to JPG or any other supported format. Unfortunately, all of these things can be time consuming. So to reduce these annoyances, iPhone now allows you to change formats.
Steps to Capture / Save JPG Photos on iPhone
So if you want to save photos in JPG format on iPhone, you are reading the correct guide. Below, we share some easy steps to change the image file format on iPhone. Let’s check.
1. First, open the application. configurations on your iPhone.
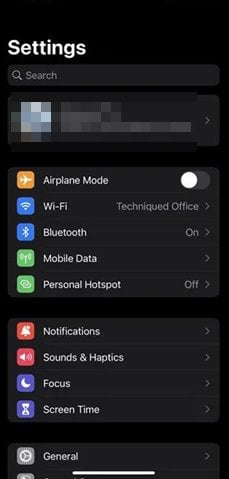
2. In the Settings app, scroll down and tap the app. Camera.
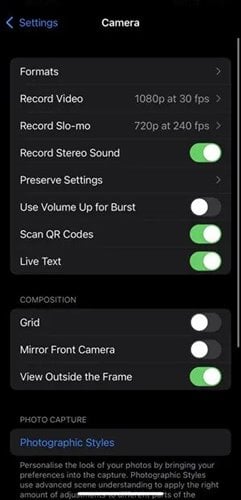
3. Now, in the Camera app, find the option Formats. Then press the right arrow button behind the formats.
4. Under the formats, you must select the option more compatible.
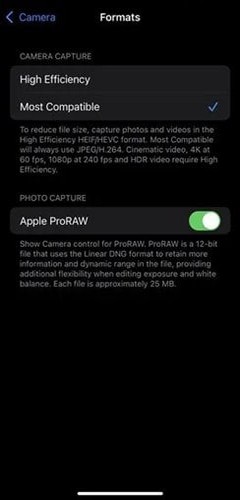
That’s it! Is over. Now all the iPhone images will be captured as JPEG files and stored in the same format.
conclusion
In this guide, you have learned how to save photos in JPG format on iPhone. If you have any questions or suggestions, let us know in the comments. Also, check out this guide too if you want to learn how to enable automatic updates on iPhone.
Related posts:
 How to access Steam games without an internet connection
  How to view FPS with Xbox Game Bar in Windows 10: Steps Made Easy
  Hacked account? How to check and remedy
  How to make video calls from WhatsApp Web
  How to increase the RAM memory of a desktop or laptop + Tips and Tricks
  How to organize your YouTube subscriptions into categories
+ Tips and Tricks
How to organize your YouTube subscriptions into categories
+ Tips and Tricks


