


How to set up and use the Windows 10 Quick Support Tool
Remote assistance is a common way to troubleshoot your computer when on-site help is not available, or if you don’t have someone available to fix any problems you are having. Unfortunately, remote assistance is not easy to set up. There are many tools for remote assistance, but setting them up is not so easy for everyone.
Windows 10 quick support
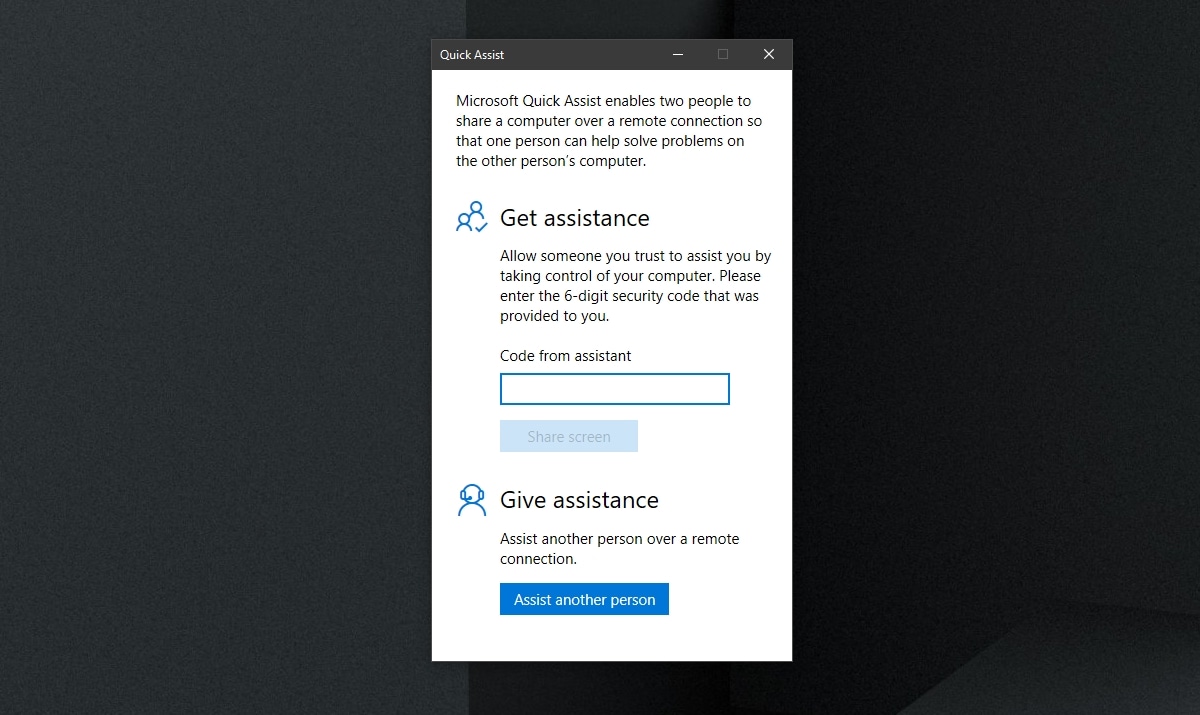
Windows 10 comes with two remote access tools; Remote desktop and quick assistance. Remote Desktop is only present in Windows 10 Pro versions, but Quick Assist is available in all versions of Windows 10, including the Home version used by most homeowners.
The Quick Assist application in Windows 10 is;
- A standard application on Windows 10 and installed out of the box.
- Allows a Windows 10 user to remotely connect to another Windows 10 system.
- Provides authentication codes so that unauthorized users cannot access a system.
- The application can be used to obtain and provide assistance remotely, that is, one application does both.
- It gives the person remotely accessing a system full access to it.
Set up the Windows 10 Quick Assistant
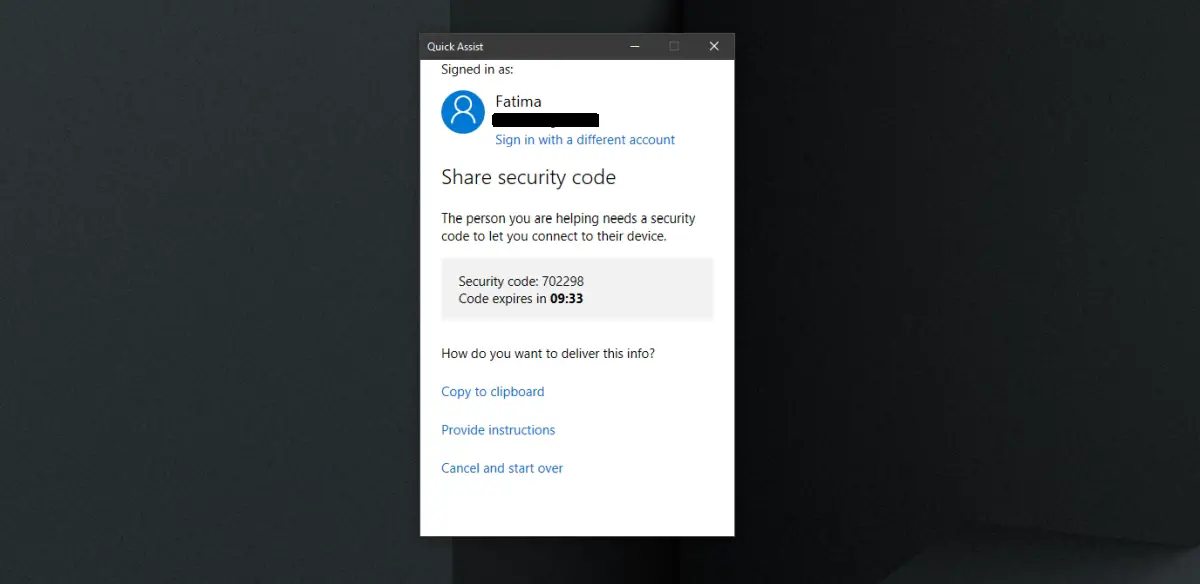
If you want to provide remote assistance to a Windows 10 user through Quick Assistance, you will need to generate a code for the session. This code requires several steps to generate and you will need to contact the owner of the other system during the process.
- Open the Start Menu.
- Go to the List of applications.
- to expand Windows accessories.
- Please select Quick assistance.
- Click Help someone else.
- Sign in with your Microsoft account that you plan to use to provide assistance.
- Copy the code and send it the person you plan to help.
Note: the code expires after ten minutes. You must share it and it must be used within that time frame.
Connect to Windows 10 Quick Support
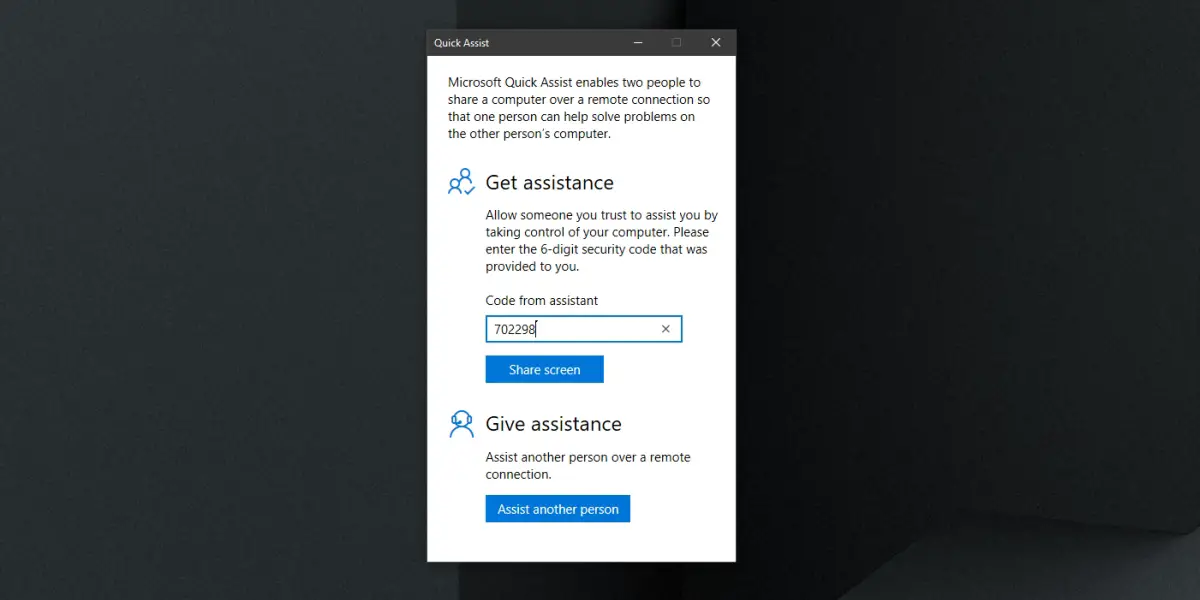
You will receive a code from the person providing you remote assistance. Make sure the code was generated new, that is, it should not be hours or days old. A code cannot be recycled and is only valid for one session.
- Open the Start Menu.
- Go to the List of applications.
- Go to Windows Accessories> Quick Support.
- Enter the code provided to you.
- Click Screen Share to start the session.
Start Quick Support Session
To start a Quick Support session, follow these steps. You and the person you are helping should work together to start the session.
- Open Quick Assistance on your system.
- Provide the code to the other user.
- Make the other user Enter the code.
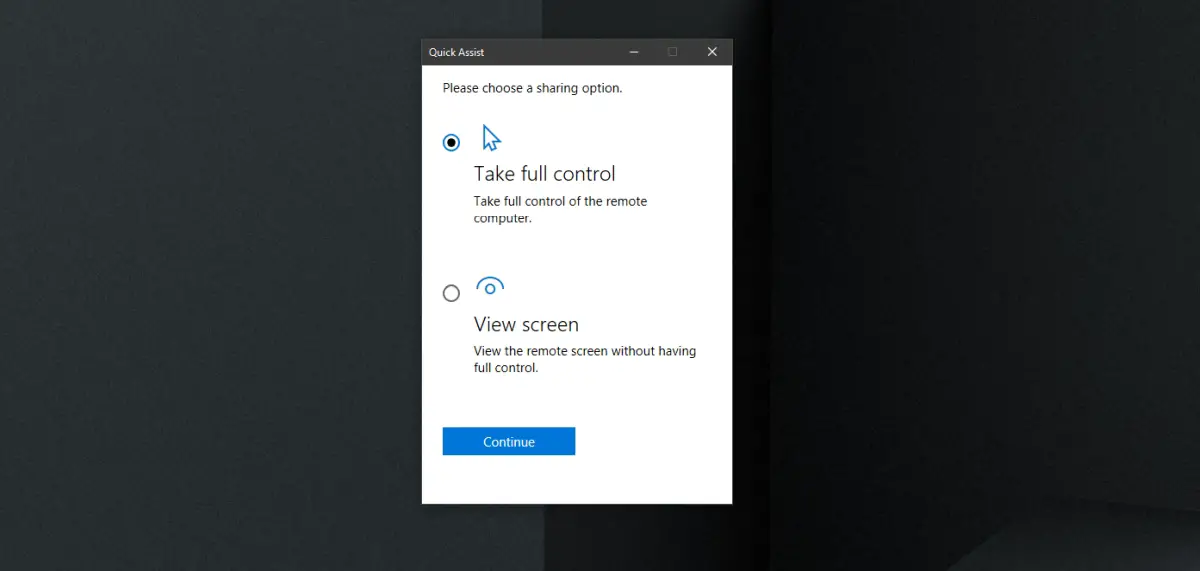
- On your screen select how you want to help – watch or take full control.
- Once you choose a method, the other user must allow the session to be established.
- You will see a new window on the screen that will reflect the other system.
- You can now control it.
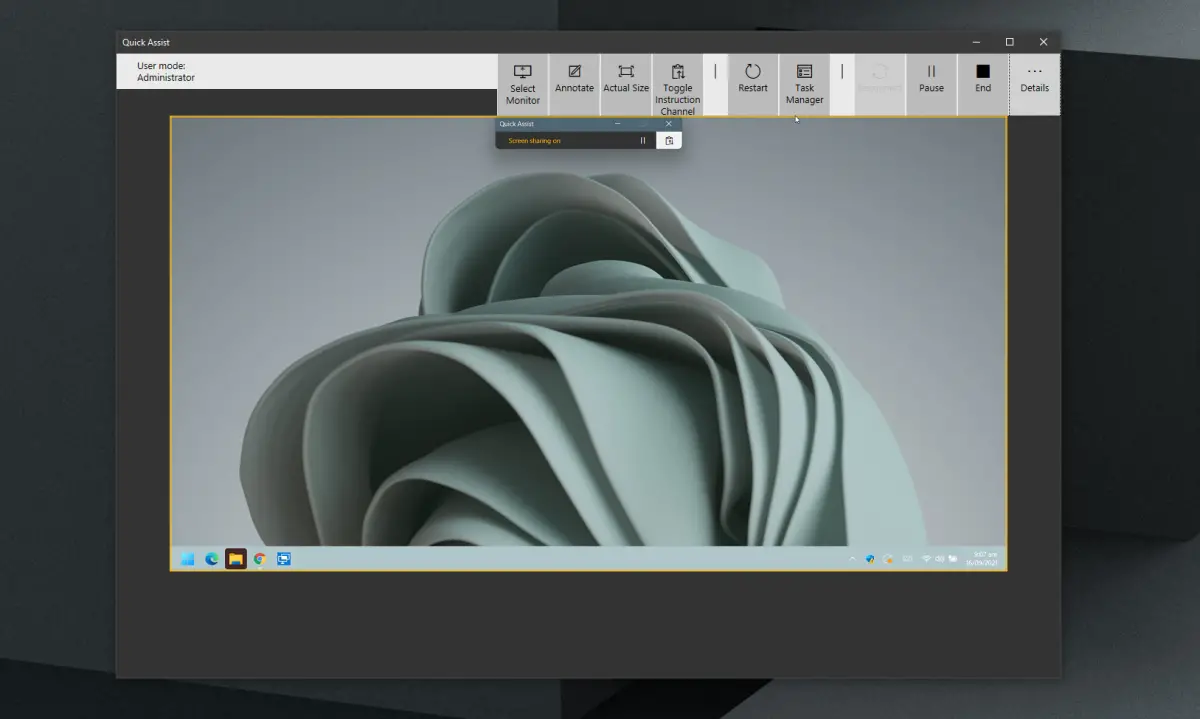
Quick attendance controls
The window allows you to control the other system with a mouse and keyboard, but it has dedicated controls at the top. The controls allow you to;
- Select a different monitor if the system has multiple monitors configured.
- Annotate the screen that is, draw over it to highlight something on the screen.
- View the window in ‘actual size’ that is, to reflect the actual size of the remote system.
- Toggle instruction channel that is, move to a text-based communication method.
- Restart the remote system.
- Access the task manager on the other system.
- Pause the session.
- Stop the session.
conclusion
Quick Assist provides a network connection to a system. It’s easy to set up and you should always be careful who you set one up with. Your computer can be remotely controlled in such a session, and if you’ve given control to someone you don’t trust, you may lose sensitive files and / or data. Quick Assist is available in Windows 10 and Windows 11. It is not available in Windows 8 / 8.1 or earlier versions.
Related posts:
 How to access Steam games without an internet connection
  How to view FPS with Xbox Game Bar in Windows 10: Steps Made Easy
  Hacked account? How to check and remedy
  How to make video calls from WhatsApp Web
  How to increase the RAM memory of a desktop or laptop + Tips and Tricks
  How to organize your YouTube subscriptions into categories
+ Tips and Tricks
How to organize your YouTube subscriptions into categories
+ Tips and Tricks


