


How to share your screen on Classroom
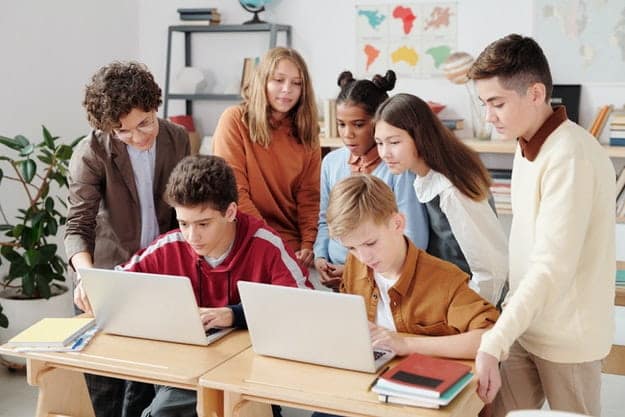
You have finally developed the next lesson to present to your pupils and, in this regard, it would be very convenient for you to show practical examples in real time: the best way to do this would be to share your screen on Classroom during class, but you’ve never done anything like this before and as a result, you just don’t know how to proceed.
If this is your need, know that you are in the right place, at the right time: in the course of this guide, in fact, I will explain how to share a photo or video of your display on the Classroom Stream, or how to broadcast the contents in real time using the Presentation mode of Google Meet. Please note, before continuing, that in the latter case it is essential to have a teacher-type Google Workspace (formerly G Suite) for Education account, otherwise the “direct” interaction between Classroom and Meet will not work.
Having made this necessary clarification, you just have to take a few minutes of time and carefully read everything I have to explain to you on the subject: I am sure that, at the end of reading this guide, you will be perfectly able to complete the task. that you set out for. Having said that, there is nothing left for me to do but wish you good reading and … good lesson!
Index
Per share your screen on Classroom from a PC, you can follow at least two different ways: take a photo or video of the screen and upload the file to the stream, or proceed with the presentation via videoconference using Google Meet.
In the first case, after having created the content to share (if you don’t know how to do it, follow the instructions I gave you in the tutorials linked above), connect to the Classroom site, log in with your Google account (if necessary), and click on the first course name and then on the text box post an ad for your course.
Once this is done, click on the button add, select the content you had previously created and, if you wish, type a caption or description for it; once the upload is complete, choose whether to share the item with all the students or only with some of them, using the appropriate drop-down menu, and finally press the button Publish.
If, on the other hand, you want to share your screen via video conference, you must first activate Google Meet for the course (feature available only for teachers enabled Google Workspace (ex. G Suite) for Education): after reaching the course page, click on the symbol ofgear located at the top, locate the button Generate Meet Links (located below the box General) and wait for the link for the videoconference to be created.
Now, make sure the toggle Visible to students is set to ON (otherwise the link will not be visible) and click on the button Save, located at the top, to publish the video conference address on both Stream of the course that under its description.
Now, go back to your course, click on the Meet link just created, wait for the video conference to start and press the button Get involved, to enter the room; if necessary, allow use of camera and microphone, responding affirmatively to notifications generated by the browser.
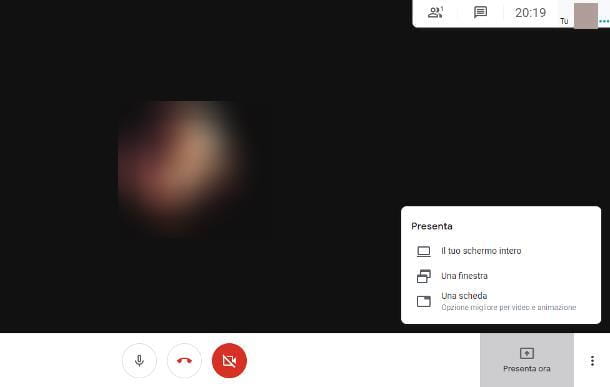
Once this is done, close the content sharing panel (if necessary), wait for the students to take part in the conference and, when you are ready, click on the item Submit now located at the bottom, to activate screen sharing: therefore choose whether to share only a Chrome tab, whether to share the full screen or a window active; indicates whether or not to share theaudio by clicking on the appropriate box and, when you are ready, click on the button Share to start the transmission.
You can stop the presentation at any time by clicking on the button Stop Presentation placed at the bottom. It was easy, wasn’t it?
The steps for share your screen on Classroom gives smartphone e tablet are quite similar to those already seen for computers: if you intend to share an existing screenshot or screen recording, open the Classroom app, tap the Name of the course you are interested in and then on the text box Post an ad for your course.
Now, tap the button Add attachment and attach the photo or video of the screen of your interest, selecting through the appropriate panel; if you wish, tap on the text box Share with the course to type an additional caption and press the button Publish, to conclude.
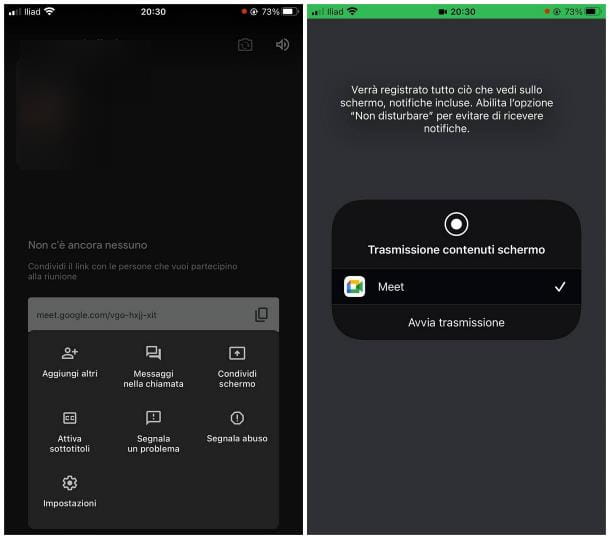
If you want to share what happens on the device screen instead, you will need to download the Google Meet app (available for Android, iPhone e iPad) and then enable videoconferencing for the course from Classroom.
So, after downloading, installing and configuring Google Meet with your teacher-enabled G Suite for Education account (I’ve explained how to do this here), go back to Classroom, tap the Name of the course and then on the symbol ofgear, which appears at the top.
Now, locate the entry Link to video meeting located in the box General, tap the button (⋮) corresponding to it and touches the item Generate meeting link, to create a videoconference associated with the course; when you’re done, tap the button Save and make sure that the lever next to the item Visible to students is set to ON, otherwise you do it.
If everything went well, the Meet link should appear in the Stream of the course and immediately below its description: to access the videoconference, go back to the course, tap on the link just created and wait for Google Meet to open.
When this happens, if necessary, authorizes using the microphone and camera, by pressing the appropriate button, and wait for the videoconference to start. As students join the course, tap the i button three dots, tap on the item Show screen attached to the panel that opens and taps the button Keep it going.
Finally, tap the button Start now / Start transmission, in order to start sharing your screen. When you’re done, tap the button End presentation, to stop sharing your screen and return to the video conference.
You have enabled screen sharing on Google Meet and, now, you are no longer able to see your pupils? In this case, if you’re using a computer, you have at least a couple of options to consider. For example, if you have chosen to show only part of the screen, like the window of another program, you can place the latter next to the browser hosting the videoconference, in such a way that you always have an eye on your students.
If your screen is particularly small, or if the previous option is not applicable to you, you can evaluate the use of a double monitor: by connecting an external screen to the computer, in fact, you can present the contents visible on it, always keeping open the Meet screen dedicated to videoconferencing on the main monitor (or vice versa).
If you do not have a secondary screen, you can take a look at my guide dedicated to these devices, to choose the one that best suits your needs; if, on the other hand, you have a second monitor and you do not know how to connect it to the computer, I refer you to reading my guide on how to connect two monitors to the PC, in which I have explained everything to you in great detail.
Related posts:
 How to access Steam games without an internet connection
  How to view FPS with Xbox Game Bar in Windows 10: Steps Made Easy
  Hacked account? How to check and remedy
  How to make video calls from WhatsApp Web
  How to increase the RAM memory of a desktop or laptop + Tips and Tricks
  How to organize your YouTube subscriptions into categories
+ Tips and Tricks
How to organize your YouTube subscriptions into categories
+ Tips and Tricks


