


How to take screenshots on Windows 10 PCs
– Learn these tips and tricks on how to use your devices in a much easier way as well as solved some of your common problems that are difficult.
Windows 10 offers its users several tools to capture the computer screen or a portion of it. And if that’s not enough, other third-party programs do this very well.
Below we show you all the ways to take a screenshot on PC with the operating system on board Windows 10.
How to take a screenshot of the entire screen with the Print key
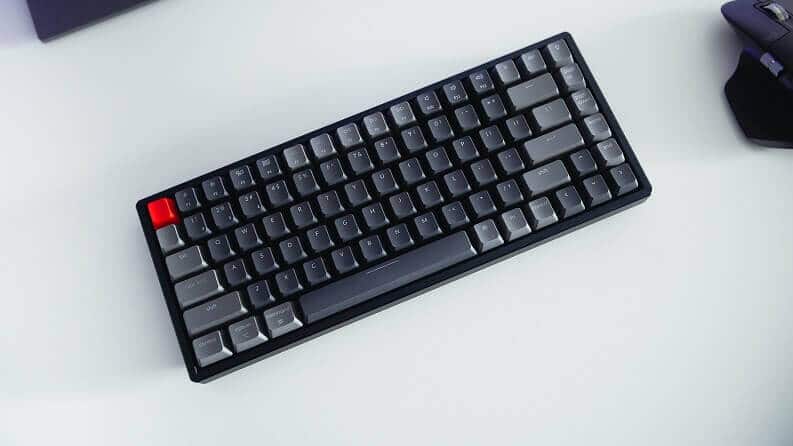
The easiest way to take a screenshot on a Windows 10 PC is with the pressing the Stamp – R Sist, through which the entire computer screen is captured and automatically saved to the computer. Usually the Stamp – R Sist key is located at the top right of the keyboard, just after the F12 button.
However, not all computers work the same way, so sometimes pressing just the Stamp – R Sist key is not enough to capture the screenshot. Here’s what the alternative combinations:
- FN + Stamp – R Sist
- Windows + Stamp – R Sist
Pressing the Windows and Print keys simultaneously saves the PC screen in “Screenshots”, a sub-folder of the “Images” folder. Conversely, the Print – R System key alone copies the screen to the Windows 10 clipboard, an area where the copy and paste data is saved.
To be able to save the screenshot in “Pictures” or in another folder of your choice, simply:
- Open the Paint program.
- Press the CTRL + V key combination to paste the screenshot.
- Click on the “File” menu and select the “Save as” item.
The screenshot is automatically saved with the default extension .png.
Important: If you have a keyboard with a foreign layout, the Stamp – R Sist key corresponds to Print Screen, PrtScn, PrntScrn or Print Scr.
Note: instead of Paint you can use any other photo editor, such as IrfanView, but also Word or Excel itself. In this regard, we invite you to read our guide on the best photo editing programs.
How to take a screenshot of a single window with the Stamp key
Capturing the entire computer screen is not always what you really want, as you often need to take a single portion of the screen. A little ‘out of laziness, a little’ for lack of knowledge, you almost always use only the Stamp – R Sist button, and then cut out the section of your interest using the photo editor.
In fact, it is much more intuitive and faster to take a screenshot of a single window using the key combination Alt + Stamp, or use Shift + Windows + S to select the area you want.
This method is more:
- Intuitive: because it allows you to perform the operation you have in mind from the beginning.
- Rapid: because it avoids having to waste time cropping the screenshot of the entire screen.
Also in this case the screenshot is automatically copied to the Windows 10 clipboard, and not saved in “Pictures” or in another folder. Therefore, the same speech made in the previous chapter applies: to save the image in the internal memory of the computer you can use Paint or another program to edit the photos.
Note: the Alt key is located at the bottom left of the keyboard, shown with an up arrow icon. To be clear, it is the same key you use to transform a letter from lowercase to uppercase, or to type a symbol other than the main one (for example Alt + 5 returns the percentage symbol% and not the number five).
Read also: How to save screenshots of an entire web page
How to take a screenshot with the Snip & Sketch tool
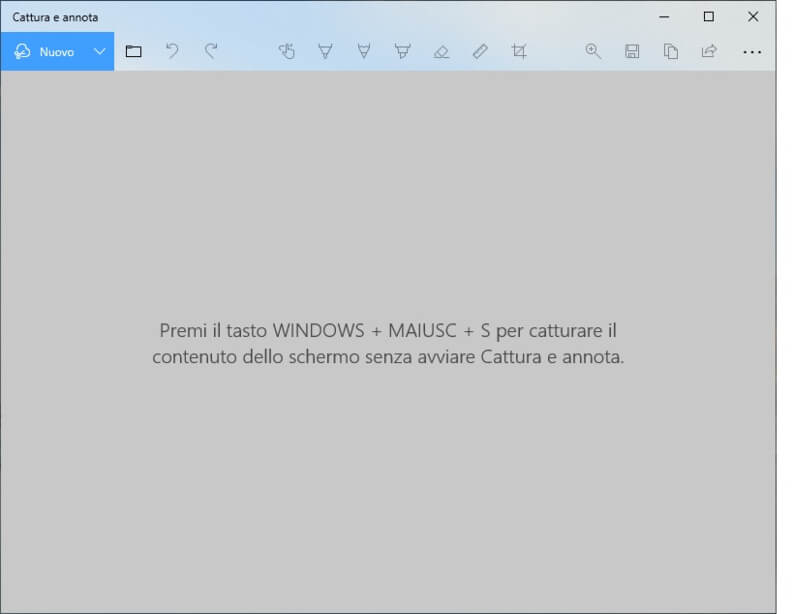
Snip & Sketch (in Italian Capture and annotate) is the integrated tool of Windows 10 for capture and annotate screenshots, which replaces the previous Snipping Tool found on PCs starting with Windows 7.
Here are what the steps are for fare uno screenshot con Snip & Sketch:
- Type the key combination Windows + Alt + S.
- Select one of the following functions from the pop-up bar at the top: rectangle-shaped cropping (first button from left), freehand cropping (second button from left), single window cropping (middle button), full-screen cropping ( fourth button from the left), close the Snip & Sketch bar (the X icon).
Note: Snip & Sketch will remember your choice if you use the Windows + Alt + S keyboard shortcut to open the app a second time.
The screenshot comes automatically copied to the Windows clipboard, as a notification that appears automatically in the corner of the screen suggests. At this point you can decide whether to paste it into an image editor or edit it directly with the Snip & Sketch tool.
If you opt for the second solution, click on the notification that the system automatically sends to open the Snip & Sketch window and choose how to change the previously captured screen to your liking.
These are the available options:
- Enter new text.
- Highlight parts of the image.
- Delete items.
- Cut out areas of the screenshot.
The Snip & Sketch application also allows you to take a delayed screenshot, by setting a timer of 3 or 10 seconds. Here is the step by step procedure:
- Click on the “Start” menu.
- Type Snip & Sketch in the search bar at the bottom and start the app shortcut that automatically appears above.
- Locate the “New” button in the Snip & Sketch window, then click on the “down arrow” and choose the “Snip in 3 seconds” or “Snip in 10 seconds” option.
How to take a screenshot with the Xbox Game Bar
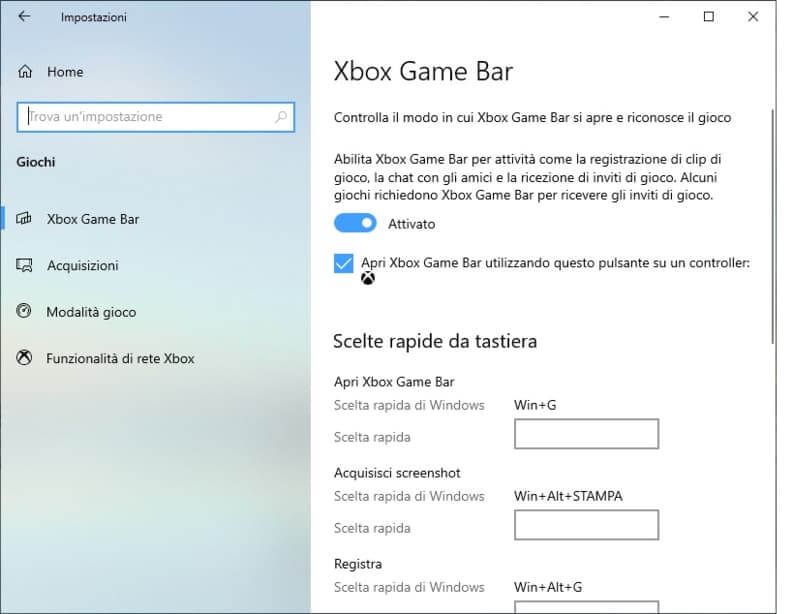
The Xbox Game Bar is another tool built into Windows 10 that allows you to take a screenshot in an easy way. It is a particularly useful tool for video game enthusiasts, as it allows them to take screenshots and record game sessions.
To start using the Xbox Game Bar, first make sure it is active:
- Go to “Settings”, select “Games”, then “Xbox Game Bar”
- Move the switch at the top right to “On”.
Then use the shortcut to open the Xbox Game Bar Win + G, and to take a screenshot, press the key combination Win + Alt + Stamp: Screenshots are automatically stored in C: Users YourName Video Screenshots.
Third-party programs for taking screenshots on Windows 10 PCs
the alternative however, there is no shortage of tools integrated into Windows 10 to capture a screenshot, both free and paid. Below is a brief description of the three most accredited apps to date to complete Microsoft’s basic proposal:
- Greenshot: a free and open source software, with an advanced integrated editor and easy to use even for those who are not very familiar with technology. One of its most special features is the ability to take a screenshot of a drop-down menu window.
- ShareX: another 100% free and open source program. Like many other similar tools, it allows you to customize the ways to capture a snapshot of the screen and their saving.
- SnagIT: a powerful tool designed by Techsmith, a leading US company in the creation of screenshot and video editing software. Among other things, SnagIT is able to both extract the text present in the screenshots and replace it.
Conclusions
Our guide on how to take a screenshot on windows 10 ends here. And how do you usually take the snapshot of the computer screen? Did you know the key combinations and tools described? Let us know what you think by leaving a comment below the article.
On the same topic: How to Record Screen on Android Phone

Related posts:
 How to access Steam games without an internet connection
  How to view FPS with Xbox Game Bar in Windows 10: Steps Made Easy
  Hacked account? How to check and remedy
  How to make video calls from WhatsApp Web
  How to increase the RAM memory of a desktop or laptop + Tips and Tricks
  How to organize your YouTube subscriptions into categories
+ Tips and Tricks
How to organize your YouTube subscriptions into categories
+ Tips and Tricks


