


I can’t access Western Digital My cloud on Windows 11 or 10
Western Digital My Cloud provides an in-house solution for all your media needs. No need to turn on your laptop or PC, these cloud storage devices are a good replacement for media server. But what if you can’t access your Western Digital My Cloud from your Windows PC or laptop? Do not worry. Misconfigured credentials or a missing registry value may be the primary reason for your WD My Cloud access to be interrupted.
alternative solutions –
COMMERCIAL
1. Reboot the Western Digital My Cloud device. Just turn it off, wait a few seconds, and then turn it on. Then try to connect again.
2. Try to access WD My Cloud from your smartphone. Check whether you can access it or not.
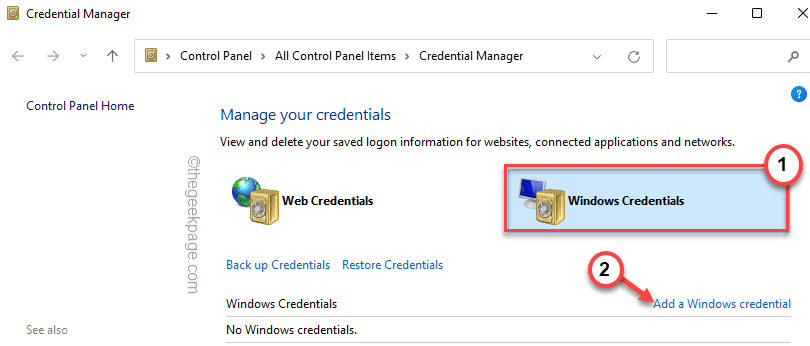
Solution 1 – Add a new credential
Missing credentials can cause this connection interruption to your Western Digital My Cloud.
1. Type “Credential” in the search box.
2. Then touch “Credentials Manager” to access the Credential Manager.
3. Later, tap on “windows credentials” to select it.
4. After that, click «Add a Windows credential” to add a new credential to your system.
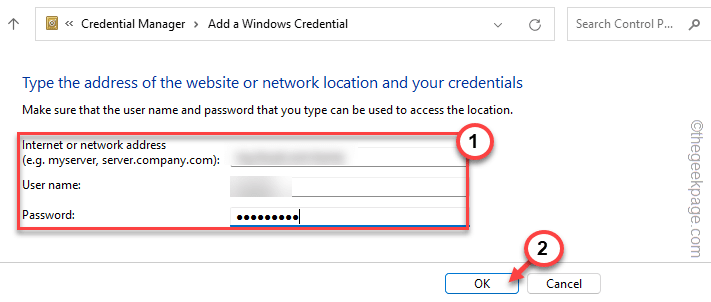
4. Here, you will notice three specific boxes:
Internet or network address – Enter your WD My Cloud device.
Username – Enter the username of the WD My Cloud account
Key – Type the WD My Cloud password in the box.
5. Finally, tap on “OK” to save these changes.
After doing this, close the Control Panel screen. Then, restart the computer once. After your device restarts, test whether you can connect to WD My Cloud or not.
If this doesn’t work, go to the next solution.
Solution 2 – Add a missing value in Registry Editor
NOTE – We are going to make a registry tweak to allow guest authentication, which is not a secure method. We recommend that you do this if and only if you are doing it on a private (home or known) network system.
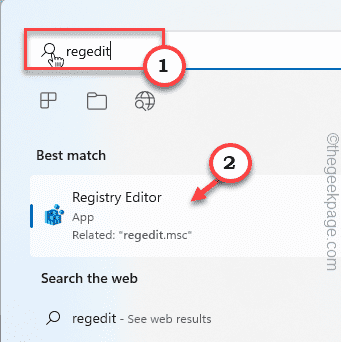
1. After pressing the Windows key, type «regeditar” in the search box.
2. Later, click the button “registry editor” to open Registry Editor.
NOTE –
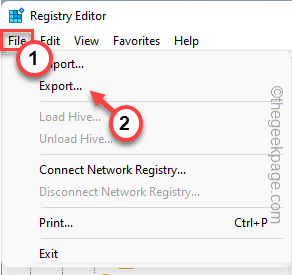
We are going to add a new value to the system to allow guest authentication. Now, before making any changes to the system registry, we suggest that you take a backup of the registry.
a. In the Registry Editor menu bar, tap «Proceedings” and touch “To export…”
Then give this backup a name and store it in a safe place.
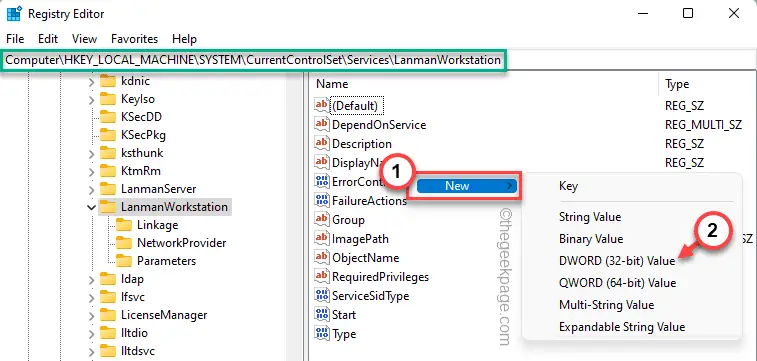
3. Afterward, go this way –
HKEY_LOCAL_MACHINESYSTEMCurrentControlSetServicesLanmanWorkstation
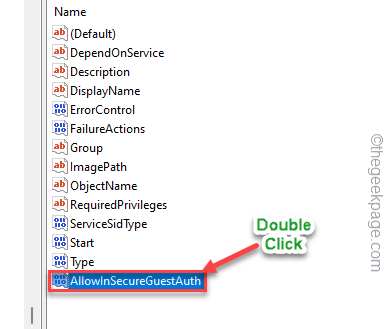
4. Once you’ve reached it, check if you can find a value called “AllowInSecureGuestAuth” in the right panel.
5. If you can’t find that value, you need to create a new one.
a. Go to the right side, right click on the space and tap «New>” and touch “Valor DWORD (32 bits)“.
B. Set the value name as “AllowInSecureGuestAuth“.
6. After creating the value, double click to modify it further.
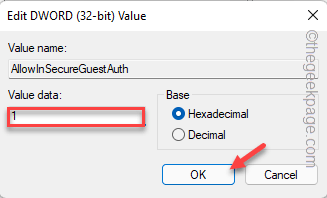
7. Simply set the value to “1“.
8. Finally, tap on “OK” to save this modification.
Then close Registry Editor and restart your system.
Once the system reboots, try to access WD My Cloud again from your computer or laptop.
Solution 3 – Enable SMB 1.0/CIFS file sharing protocol
The SMB 1.0 file sharing protocol, although it is an older file transfer system, can solve this problem if it is enabled.
1. Firstly, press Tecla de Windows+R to access the Run terminal.
2. Simply type this code in the Run terminal and press Get into key to access Windows features.
optionalfeatures
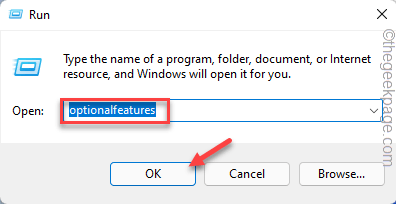
This will open Windows features.
3. Now scroll down through the list of optional features and tick mark the “SMB 1.0/CIFS file sharing support“.
4. Then tap on “OK” to continue.
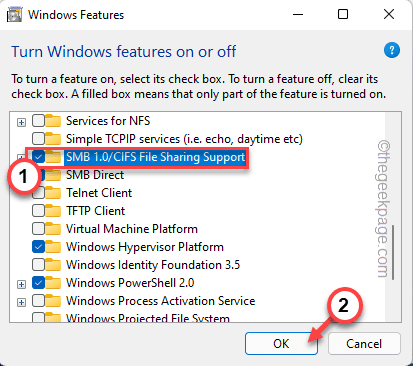
This will enable SMB 1.0/CIFS file sharing support.
Wait until Windows enables this feature on your system.
5. Finally, tap on “Restart now…” to reboot your system.
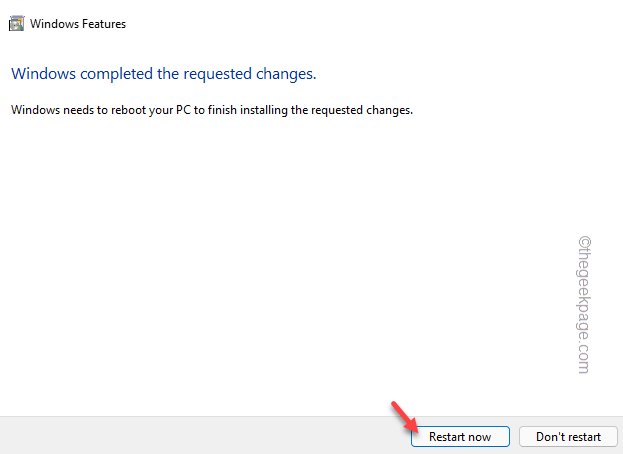
This will reboot your machine.
Solution 4: Enable NETBIOS over TCP / IP
If WD My Cloud uses a static IP address, enabling NETBIOS over TCP/IP should resolve the issue.
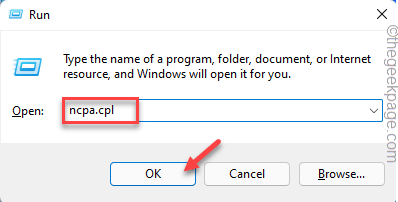
1. Press the button Windows wrench With R wrench.
2. Then just type “ncpa.cpl” in the terminal and press Get into.
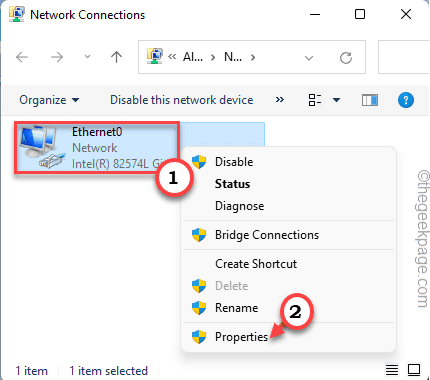
3. When it appears on the Network Connections page, there will be multiple network adapters.
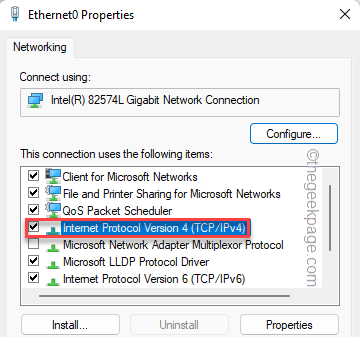
4. Find the one that is currently connected. So, right click on the network adapter and tap «Properties“.
5. Then just double click about him “Internet Protocol version 4 (TCP/IPv4)” to access it.
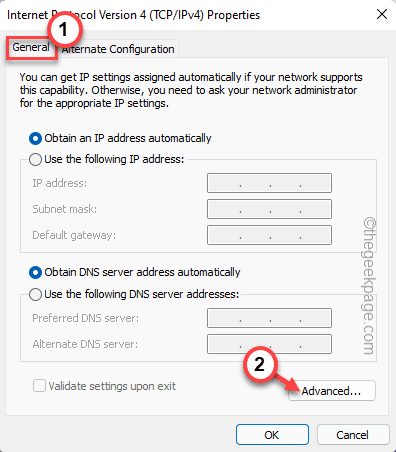
6. Then go to “General” area.
7. Here, tap on the “Advanced” section.
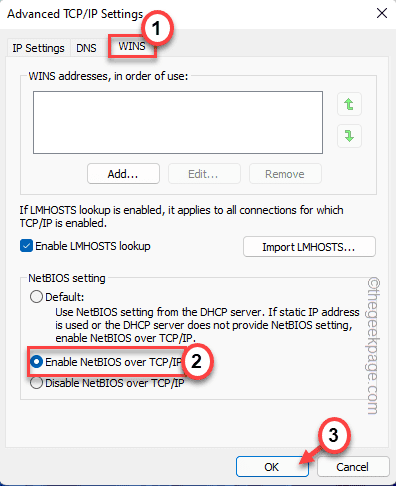
6. Now, go to “WIN” tab.
7. Here you will find the ‘NetBIOS Settings’. Just check the “Enable NetBIOS over TCP/IP» option.
8. Finally, click on “OK” to save the settings.
Close the Network Connections window.
Then try reconnecting to WD My Cloud Home again. This time you will not have problems again.
Related posts:
 How to access Steam games without an internet connection
  How to view FPS with Xbox Game Bar in Windows 10: Steps Made Easy
  Hacked account? How to check and remedy
  How to make video calls from WhatsApp Web
  How to increase the RAM memory of a desktop or laptop + Tips and Tricks
  How to organize your YouTube subscriptions into categories
+ Tips and Tricks
How to organize your YouTube subscriptions into categories
+ Tips and Tricks


