


internal error code 2502 and 2503 cannot install or uninstall software
In Windows we can easily install the programs we want by running the installer. In the same way, we can also uninstall the programs. However, many users reported seeing an error while installing and uninstalling system software. The full error message says the following:
The installer has encountered an unexpected error installing this package. This may indicate a problem with the package. The error code is 2503
O
The installer has encountered an unexpected error installing this package. This may indicate a problem with the package. The error code is 2502
This problem is seen in all versions of Windows and is not specific to a particular version of Windows.
If you are seeing this error on your system, this could be due to the following reasons:
- An unexpected error in the installation program.
- Insufficient permissions.
- malware in the system
- Corrupted files on the system.
In today’s article, let’s see different ways to overcome this error in Windows 11.
Note: You must have administrator rights to perform the fixes listed below.
Solution 1: Take ownership of the installer and temporary folder.
Note: You must have administrator rights to perform this fix.
1. Open the Run dialog box with the keys Windows + R
2. In the Run window, enter the following command and press Get into.
c:WindowsInstaller
3. In the windows that appear, click three dots on the top menu as shown in the following screenshot.
4. Click Properties.

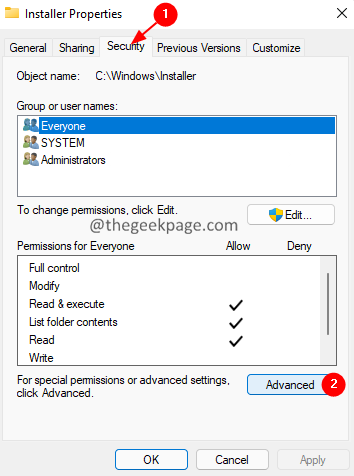
5. The Installer Properties window opens.
6. Click on the Security tab.
7. Click on the Advanced tab. Enter the administrator password, if prompted to do so.
8. Click on the Change option.

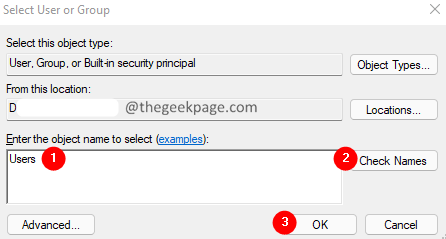
9. The Select User or Group window that appears.
10. Under the object name to select option, Type Everyone.
11. Click on the check names button.
12. Click on the OK button.
13. Now click on the Add button as shown below.

14. In the window that opens. Click on Select a director.

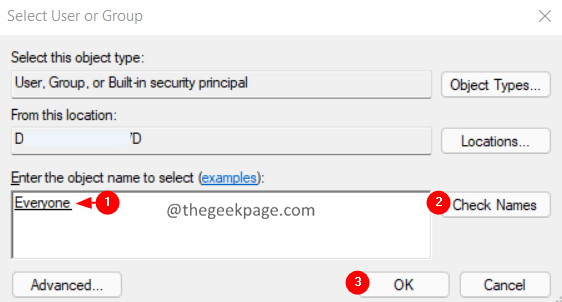
15. The Select User or Group the window opens.
16. Type Everyone and then click the check names button.
17. Click OK.

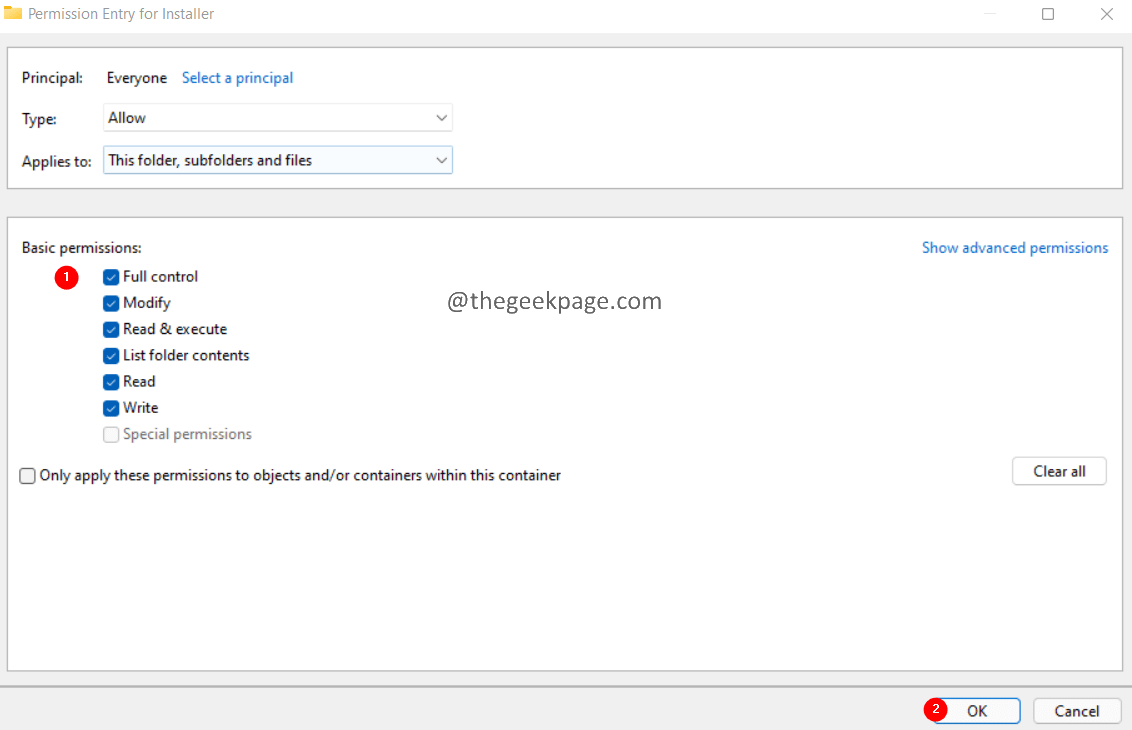
18. In the Installer Permission Entry window, tick the Total control option and click OK.
19. In the Advanced Security Settings for Installer window, click Apply and then click it’s fine.
Solution 2 – Provide the necessary permissions on the temporary folder.
1. Open the Explorer window using Windows + E.
2. In the search bar located at the top, enter the following command.
C:Windows
3. In the window that opens, scroll down and locate the folder called Temperature.
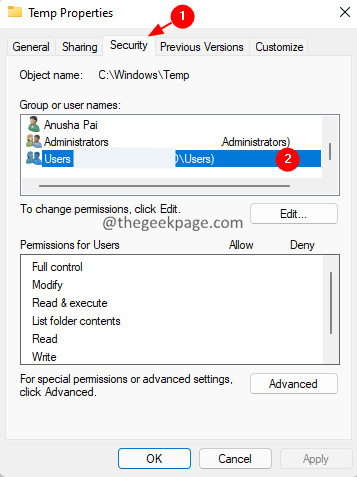
4. Right click on the Temperature folder and choose Properties.

5. Go to Security tab.
6. In the Group or Username section, click administrators.
7. Under the Permissions for
8. Similarly, check if Full Control is enabled for the Users.
9. If not, then we need to enable Full Control for the administrators and Users using the steps below.
10. Click Change.
11. The Select User or Group window that appears.
12. Under the object name to select option, Type Users or you administrators
13. Click on the check names button.
14. Click on the OK button.
Note: After clicking Check Names, you should be able to see an underline as shown below.

15. In the advanced security settings for the temporary window, double-click the Users(the Administrators).
16. In the window that appears, tick on Total control and click It’s fine.
17. Click again Apply and then click OK at Advanced security settings window.
18. In the properties window, check if the Total control is enabled.
19. If enabled, click Apply and then click OK.
Solution 3: Run Explorer with administrator privileges
1. Hold the Ctrl+Mayús+Esc keys at the same time to open the Task Manager window.
2. In the Task Manager window that appears, find the Windows Explorer icon.
3. The right button of the mouse on Windows Explorer and choose Final task.

4. This may take some time. Please wait patiently until it is complete.
5. Open the Task Manager window again.
6. Click on the Proceedings menu option
7. Choose run new task.

8. In the Create new task window, enter explorer.
9. Tick the option Create this task with administrative privileges.

10. Now try to install or uninstall the software again.
Check if this helps. If not, try the next solution listed below.
Solution 4: Re-register the Windows Installer program
1. Open the Run dialog box with the keys Windows + R.
2. Type the following command and press Get into.
msiexec /unreg
3. Now, register the installer using the following command:
msiexec /regserver

4. This will re-register the Windows installer.
5. Reboot the system.
Solution 5 – Run the installer from the command prompt
1. Open the Run dialog box with the keys Windows + R.
2. Type the following command and hold down the keys Ctrl+Mayús+Intro to open the command prompt with administrator rights.
cmd

3. If you see any UAC opening asking for permissions, click And.
4. You will see the command prompt open. Enter the following command at the command prompt and press Enter.
cd c:WindowsInstaller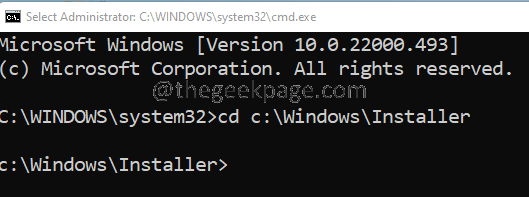
5. Now, minimize the command prompt window.
6. Hold the keys Window+R to open the Run dialog box.
7. In the Run window, enter the following command and press Get into.
c:WindowsInstaller

8. Now, right click on the tab menu (The menu that has Name, Date Modified, etc.)
9. Choose Plus from the context menu.

10. The Choose Details the window opens.
11. In the details section, scroll down and locate Theme.
12 Tick about him Theme and click it’s fine.

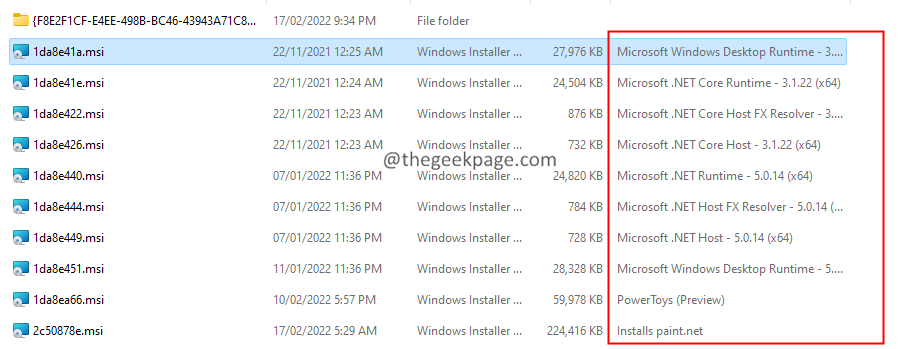
13. Now, you will be able to see the names of the applications corresponding to a particular .msi file, as shown below.
14. Now, if you want to uninstall the Power Toys app, copy the name of the MSI file corresponding to the Power Toys.
15. Paste it into the command prompt window as shown below and press Get into.

16. The installer runs to finish the task.
That’s it.
We hope this article has been informative. Please kindly comment and let us know the solution that helped you solve the problem. Also, comment and let us know if you have any problems, we will be happy to help you.
Thank you for reading.
Related posts:
 How to access Steam games without an internet connection
  How to view FPS with Xbox Game Bar in Windows 10: Steps Made Easy
  Hacked account? How to check and remedy
  How to make video calls from WhatsApp Web
  How to increase the RAM memory of a desktop or laptop + Tips and Tricks
  How to organize your YouTube subscriptions into categories
+ Tips and Tricks
How to organize your YouTube subscriptions into categories
+ Tips and Tricks


