


In this guide, we will see how to modify the host file, a procedure that allows, for example, to block navigation on one or more sites, change their IP address or redirect (always and only locally).
The host file is a text file present on Windows, Mac and Linux PCs that associates the domain names of hosts with their respective IP addresses on the operating system, without the help of DNS servers.
Con server DNS we mean a series of computers distributed around the world that allow users to open a website by typing only the domain name and not the IP address. The DNS is therefore to be considered as the central addressing system: if desired, however, it can be bypassed locally via the hosts file, which takes precedence over the DNS.
Specifically, the ability to edit the hosts file is very useful when you are making a change to a site: in this way, online users will continue to view the website in its official capacity, while the webmaster will be able to operate on a server. test for as long as necessary.
We will explain to you how to edit hosts file on windows, mac and linux, with a procedure within everyone’s reach, to be followed step by step.
How to edit host files on Windows
To edit the hosts file on Windows, first of all you need to open an editor with administrator permissions (otherwise you will not be able to save the changes to the hosts file).
To open Notepad as an administrator:
- Click on the magnifying glass and type “block notes”.
- At the app “Block notes” in the search results click the right mouse button or select the item “Run as administrator”.
- Click on the button “Yup” to allow the app to make the change you just made.
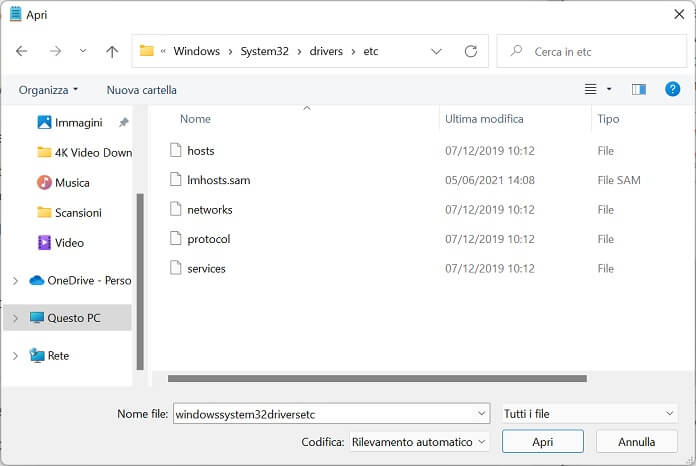
At this point you need to select the file to open and edit.
The full path to the hosts file on Windows 11 (and earlier) is this:
C:WindowsSystem32driversetchosts
Here are the steps to follow to edit the hosts file:
- Open Notepad (it should already be open after the end of the previous step).
- Click on the menu “File” and select “You open”.
- Above the button “You open” click the drop-down menu and select “All files”.
- Follow the path “C:” > “Windows” > “System32” > “drivers” > “etc”.
- Select the file “hosts” and click the button “You open”.
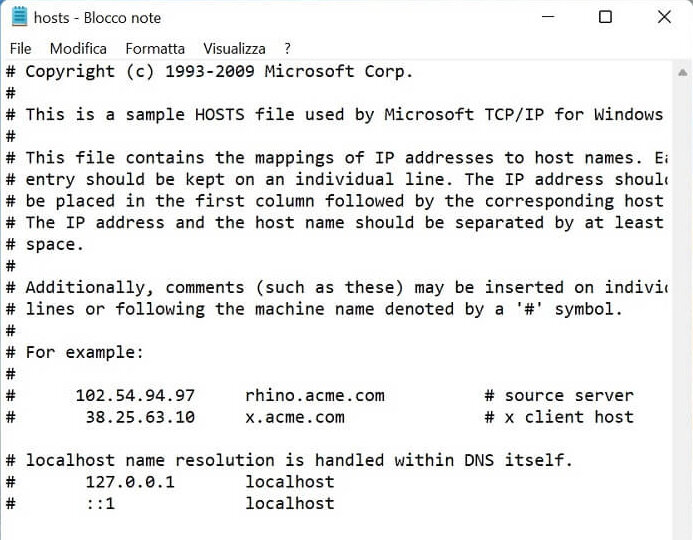
The Lock app will now automatically host the Windows hosts file, including a simple explanation on how to make any changes.
Changes to the file must follow the wording below:
127.0.0.1 server.domain.com
The first 4 numbers separated by a dot indicate the chosen IP address, while instead of server.domain.com, the domain name you want to connect to with respect to the specified IP.
When finished, click on the menu “File“ and then on “Save“ to store changes made to the hosts file. If saving the file does not work, remember to start the text editor (in this case the Windows Notepad) with administrator permissions.
How to edit host files on Mac
Contrary to what one might believe at the beginning, the Host file is not only the prerogative of PCs with Windows on board but is also present in portable and fixed devices that are mounted as a macOS operating system. Below we show you how to edit the hosts file on a Mac computer.
The full path to the host file on macOS is:
/etc/hosts
Note: / private / etc / hosts and / etc / hosts are the same file.
To edit the hosts file on Mac:
- Open the “Finder“.
- From the side menu select “Applications“.
- Scroll down and double-click “Utility“.
- In the new screen choose the app “Terminal“.
- Using the terminal app type the following command: “sudo nano /private/etc/hosts“ (without quotes) and presses the key “Enter“ keyboard.
sudo nano /private/etc/hosts
At this point the system will ask you to type the password with which you log in to the Mac, after which you will have free access to the Mac host file. The content of the file is very similar to that already seen on Windows, except for the text editor interface.
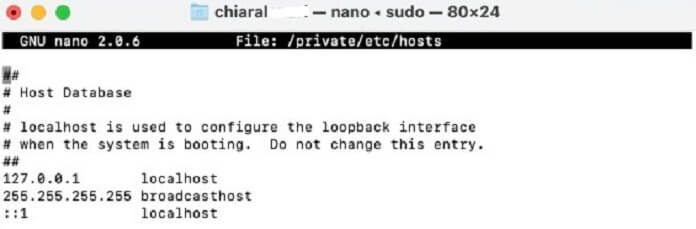
Also in this case, to edit the host file on Mac it is sufficient to type the IP address followed by the server name, as in the following example:
127.0.0.1 server.domain.com
Finally, to save the changes make press the keys “Command” + “O”, to quit the key combination to be typed is “Command” + “X”. All available combinations are shown at the bottom of the file.
Note: use the hash sign (#) to tell the computer that what you are typing is a simple comment and that line of the file will be ignored completely.
To report the changes immediately, it is also useful to issue the command:
dscacheutil -flushcache
with which it resets (flush) the DNS cache on Mac.
How to edit Host files on Linux
We still have to see how to perform a Host file modification in a Linux environment. As you may have already understood, the same changes made on Windows and Mac can also be made on Linux. To bring the changes back to the Host file using Linux, you first need to open the terminal window.
Numerous Linux distributions allow you to call the terminal through the path “Applications”, “Utilities”, “Terminal” (on the false line of Macs). Other distributions still allow you to open the terminal window with a simple right click of the mouse on the desktop screen, and the selection of the “Open Terminal” item.
The full path to the host file on Linux is:
/etc/hosts
Now edit the hosts file on Linux via a simple terminal command:
sudo vim /etc/hosts
Note: instead of Vim you can also choose to start another text editor for terminals, such as Nano by typing “nano” instead of “vim”.
At this point, the system should ask you to re-type the password you use to log into your computer or to install new programs. So write the password and immediately press the “Enter” key on the keyboard to open the hosts file.
The formatting of the Linux hosts file is identical to that already seen in Macs in the previous chapter: the first part is the IP address, the second part is the domain to which you want to associate the IP address just entered. We remind you that each addition must be inserted at the end of the file and not at the beginning.
When you are done, save the changes you made to the hosts file and then exit.
Instead, to make the system ignore one or more lines shown in the terminal window, all you have to do is add the hash sign (#) at the beginning of the line.
Do you have a Chromebook?
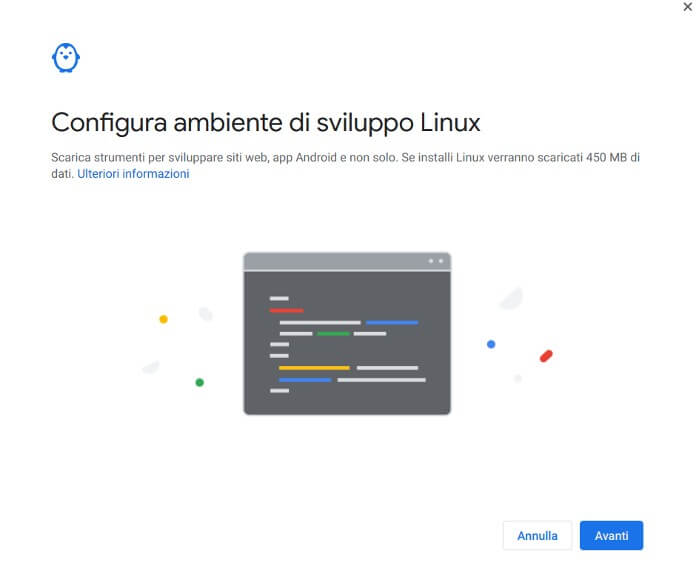
If you have a Chromebook, you have the option to edit the hosts file by following the procedure just described above. Chrome OS, the operating system of Chromebooks, allows you to activate a Linux environment in a few simple steps, so you can install Linux apps, code editors and much more:
- Open settings.
- From the left side menu select “Advanced“ and then click on the entry “Developers“.
- In the card “Linux development environment“ click on the button button “Activate“ and wait for the end of the activation process.
- Using the Chrome OS app search menu, type the word “terminal“ and select the app “Terminal“.
- Invoke the hosts file by typing the command line “sudo vim /etc/hosts” (without the quotes).
You might also be interested in: DDNS, what it is and how it works

Related posts:
 How to access Steam games without an internet connection
  How to view FPS with Xbox Game Bar in Windows 10: Steps Made Easy
  Hacked account? How to check and remedy
  How to make video calls from WhatsApp Web
  How to increase the RAM memory of a desktop or laptop + Tips and Tricks
  How to organize your YouTube subscriptions into categories
+ Tips and Tricks
How to organize your YouTube subscriptions into categories
+ Tips and Tricks


