


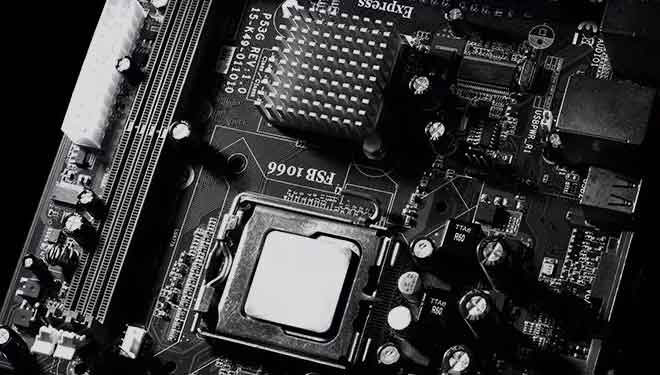
Motherboard burned out, symptoms and causes
When you have a burned-out motherboard, depending on the severity, the attached parts such as RGB fans and CPU fans may start. Even if it happens very often that the computer does not show signs of life. Users need to do a careful review before concluding that the motherboard is broken. So, we have published this article to help you know for sure if your device motherboard is broken or not.
Read also: The best video cards
Motherboard burned out, the causes
When the motherboard is about to break it starts showing some signs. The components connected to it will start not working as before. So, let’s start seeing what are the first symptoms of a motherboard about to fail. If your PC is suffering from any of the problems mentioned below, there is a high probability that the motherboard is on the verge of dying.
- Very thick BSOD (Blue Screen of Death)
- The operating system restarts by itself.
- The speaker constantly emits an error code
- The overall decrease in the performance of your computer
- The system overheats even when it is idle
- The motherboard is having trouble detecting its internal components (CPU, RAM, HHD or SSD, etc.)
These are all possible signs of an “almost” dead motherboard. However, this may not always mean that your motherboard is dying. Sometimes, even simple bugs can cause these problems. But, if your computer starts exhibiting this behavior, it’s usually best to fix these problems before they cause irreparable damage.
How to test a motherboard?
Follow the steps in the order they are listed. However, keep in mind that with every step you take, the likelihood that your motherboard is broken increases.
1. Disconnect everything
Some internal components, but especially external ones, may prevent the motherboard from starting, and from turning on the computer. Unplug the mouse, USB stick, external SSD and so on and turn on the computer. If it still does not start, remove the internal components such as the hard drive, burner etc. if possible. If the motherboard boots up without problems, one of these devices is broken.
2. Swap components
Another thing we can do to determine if a motherboard is broken is swapping the hardware components. In some cases, when we have a faulty part, such as RAM and CPU, the motherboard may stop working. Then, we can try to swap these components one at a time to determine who is causing problems.
3. Check for hardware damage
The first thing we can do to know if a motherboard is burned out is check for physical damage. Physical damage to the motherboard includes DIMM slots or CPU sockets. Check if these slots and pins are loose or bent. Depending on the severity of the damage, we can try to have it repaired by a trusted technician. However, if there are visible cracks on the motherboard, there is no way to fix, your motherboard will be inoperable. Some other physical damage on the motherboard that we can check for are explained below.
Swollen capacitors
Capacitors are protruding cylindrical parts on motherboards that handle electrical surges, when there is a voltage spike, capacitors absorb it and protect the motherboard from damage. A swollen capacitor indicates that it is no longer functional. As a result, your components will be vulnerable to voltage spikes.
Burnt point on the motherboard
Another sign of visual damage on the motherboard is a burn spot. If there are burns on the motherboard, it most likely means that there was a short circuit when turning on the computer. When any electrical system is short-circuited, it immediately stops working. This also applies to the motherboard. If there are any burnt spots on the motherboard, it is most likely burned out.
Read also: The PC turns on but does not show, how to fix
4. Check the error indication
If we can’t find any physical damage on the motherboard, check if the motherboard shows an error message. Usually, when the PC does not turn on, an LED light will turn on or beep codes to indicate that something is wrong. These LED lights that turn on mean there is a problem with the video card, CPU, power supply, or physical memory. Likewise, if a speaker is plugged into the motherboard’s front panel connectors, it will beep with the detected error code.
So, if your motherboard is unresponsive or does not turn on LED lights or emits error beep codes, there is a high probability that your motherboard is broken. If your motherboard warns you with an error code or LED light, it means that it is still working, but it is signaling that something is wrong.
5. Examine the power supply
Another reason a motherboard can appear broken is because of insufficient power. All components connected to the motherboard require a certain amount of power. If the power supply fails to supply enough power to the motherboard, it will stop working. Therefore, make sure that the power supply is adequate for all system components. Newegg e Coolermaster they have a great section on their websites to help you figure out if the amplifier is still working fine or in need of replacement.
Read also: What to do if the PC does not go to sleep
How to diagnose a motherboard?
Check for any LED lights on the motherboard. These LED lights, when turned on, usually indicate that there are some problems with detecting components on the motherboard. Another way to diagnose a motherboard is through beep codes. Here is the list of all beep codes with their meaning.
- Single beep: BIOS waiting for keyboard input
- Double beep: GPU error
- 3 beeps: memory problem
- 4 beeps: timer failure
- 5 beeps: problem with the processor
- 6 beeps: keyboard controller error
- 7 beeps: exception of virtual mode
- 8 beeps: displays the memory error
- 9 beeps: ROM error
- 10 beeps: cache error
- 11 beeps: memory or video error
Apart from this we can also use a POST (Power On Self Test) card or PC analyzer to diagnose a PC. These cards are inserted into PCIe slots to display BIOS POST codes. Using these codes, you can identify the problem with the motherboard.
Related posts:
 How to access Steam games without an internet connection
  How to view FPS with Xbox Game Bar in Windows 10: Steps Made Easy
  Hacked account? How to check and remedy
  How to make video calls from WhatsApp Web
  How to increase the RAM memory of a desktop or laptop + Tips and Tricks
  How to organize your YouTube subscriptions into categories
+ Tips and Tricks
How to organize your YouTube subscriptions into categories
+ Tips and Tricks


