


Root Android Phones in 2 Minutes Using Universal Android Root
Let’s face it. One of the first things many Android users do as soon as they get their Android devices is to look for root guides. Root has many advantages, but it also has problems. The process is not easy for some phones, and new Android users sometimes get scared by all the complications and warning signs.
I remember rooting my first Android phone and it took me days to decide if root was the right thing to do due to all the complicated steps. Read: Android Root in 2020: Is It Worth It?
I have great news for you! A fantastic is available universal method for rooting Android devices. And it’s extremely easy to use!
Read:
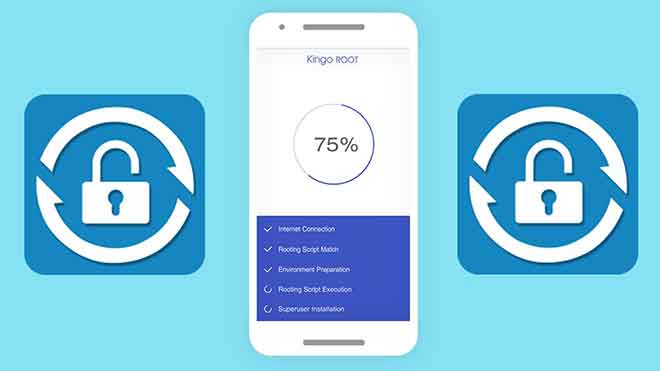
The software Kingo Android Root has become very popular and allows you to root your Android device in just a couple of minutes. Great, right ?! After downloading and installing the software, you will be able to root your phone in just 2-5 minutes. As easy as drinking a glass of water!
Note: the time will depend on your PC and the phone you are using.
Let’s take a look at how to root Android phones in 2 minutes using Universal Android Root.
Why Root Your Android Device?
While this post aims to use an extremely simple method to root, you may still wonder if root is worth it. Here are the reasons why rooting is great for your Android phone.
Devices supported by Kingo Android Root
One of the best things about this particular software is that it can root many Android devices!
Currently, Kingo Android Root supports devices from manufacturers including Samsung, LG, Lenovo, Acer, Motorola, Huawei, Alcatel and Micromax.
But. Although Sony and HTC devices are also supported, you will need to unlock your phone’s bootloader before rooting using Kingo Android Root software. For a complete list of supported devices, you can visit the official device page .
Tips Before Rooting Your Android Device
Rooting is a complicated process and I highly recommend running it at your own risk. You will also void the manufacturer’s warranty.
That said, Kingo Android Root claims to have successfully rooted millions of Android devices without breaking or blocking any type of device.
To root your phone, you will need a Windows PC, internet connection and a micro USB cable. Make sure you follow these tips before proceeding with the rooting process.
- Charge your phone at least 50%
- Create a full backup of your Android device, in case something goes wrong. Feel free to read our post on top ten backup apps for Android.
- Make sure your phone is synced with your Google account, in case you lose some data from your phone.
How to use Kingo Android Root
Follow the below given steps carefully to successfully root your phone in a couple of minutes.
Step 1: Download and install Kingo Android Root
Download the Kingo Android Root installer on your PC. You can download it from official site by Kingo. Once downloaded, run the installer and install Kingo Android Root on your PC.
Step 2: Launch Kingo Android Root
Open Kingo Android Root software on your PC. You will see a Not connected message. Don’t connect your Android device to PC yet.
Step 3: Enable USB Debugging on the Android device
Open the Settings app on your Android device, go to Developer Options and enable the USB Debugging option. If you can’t find the developer options, go to About phone in Settings and keep tapping the build number until you see a pop-up message You are now a developer. You will now see the Developer Options menu in Settings.
Step 4: Connect your Android device
Connect your Android device to PC using a micro USB cable.
Step 5: Allow USB Debugging
If you get a message Allow USB debugging on your Android device, tap OK and click OK in the Kingo Android Root app to connect your device successfully. If the software starts installing the drivers, wait for it to complete the installation.
Step 6: Read root notifications
You will now see your device name and root status. Make sure you read root notifications.
Step 7: one-click root
When ready, click the ROOT button to start the rooting process. Wait for the rooting process to complete.
Step 8: Restart your Android phone
If the rooting is successful, you will see the message Root Succeeded !. Click the Finish button. Your phone will now restart. That’s all! You have successfully rooted your Android device and now you can make the most of it.
Remove root access (optional)
Kingo Android Root also offers an option to remove root access and you can easily remove the root from your phone to get back to where you were before you root your device.
Step 1: Plug in your phone
Connect your Android phone to PC using a micro USB cable.
Step 2: Grant superuser access
Tap Grant if a Superuser prompt pop-up appears on your phone and click the OK button in the Kingo Android Root software.
Step 3: Remove Root
Click the Remove Root button.
Step 4: Reboot your phone
Wait for the process to complete. Once the root has been removed, you will see the Remove ROOT successful! Message. Click the Finish button to restart the phone.
People also ask
Will rooting my Android phone void the warranty?
Unfortunately the answer is yes. Since rooting your phone is a complicated process, there is a risk that you can end up messing up or damaging your phone’s software. Some phone errors or problems may be covered by the warranty, but there is a high probability that such problems occurred because you rooted the phone. These cases are the main reasons why root voids the phone’s warranty.
Conclusion
Although rooting Android smartphones and tablets has become quite popular in recent years, new Android users may find it difficult to root their devices, especially due to the complicated rooting methods available. Using the steps mentioned above, you can easily root your device without any complications.
Kingo Android Root does not support all Android smartphones, so be sure to read your device’s support list before proceeding with the rooting process. Also, even if your phone is supported, you may not be able to root if you have updated to the latest Android version which is not supported by Kingo Android Root.
Make sure you follow all the instructions correctly and let us know if you have any questions about how to root Android phones in 2 minutes using Universal Android Root in the comment area below. To learn more about root, check out our guide on the root of Android devices.
Related posts:
 How to access Steam games without an internet connection
  How to view FPS with Xbox Game Bar in Windows 10: Steps Made Easy
  Hacked account? How to check and remedy
  How to make video calls from WhatsApp Web
  How to increase the RAM memory of a desktop or laptop + Tips and Tricks
  How to organize your YouTube subscriptions into categories
+ Tips and Tricks
How to organize your YouTube subscriptions into categories
+ Tips and Tricks


