


The last device you connected to this computer did not work properly and is not recognized by Windows
The ‘Eject’ option is provided to users to safely eject their USB devices. This protects users from forcibly ejecting the USB which can corrupt the data on the USB. But sometimes if you have to force / manually eject the USB from your system, this message may appear on your screen after – «The last USB device you connected to this computer did not work properly and is not recognized by Windows“. If you are facing this problem, you can solve it with some quick fixes.
Solution 1: change the USB port / USB cable
If you are experiencing this problem over and over again, you can try this simpler solution.
1. Use a different port on your computer. Connect the USB device to one of the rear ports of your system.
2. If you are trying to connect a device with a USB cable, try using a different USB cable.
Dive into the top solutions if this quick fix doesn’t work.
Solution 2: change the USB indicator setting
If you are annoyed with this same repetitive message, you can choose not to receive any messages if there is something wrong with the USB connection.
1. At first, click on the Windows key and type «USB settings”In the search box.
2. Then tap on the «USB settings“.
3. When the USB Configuration opens, on the right side, move the button «Connection notifications“Option a”Off“.

Close the Settings window.
After that, you will not get any kind of error message related to connecting the USB device.
Solution 3: update the generic USB hub
You can upgrade all generic USB hubs on your computer.
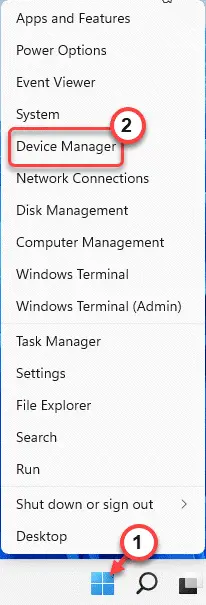
1. At first, press the Window key + X keys together.
2. Then click on «Device administrator”To open Device Manager.
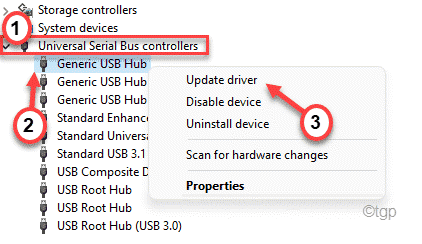
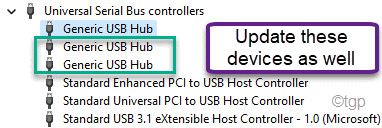
3. Now scroll down and expand the «Universal serial bus drivers“.
4. Here, you can find various USB Hub devices.
5. Then, right-click on the first «Generic UBS Hub«And it touches»Update driver“.
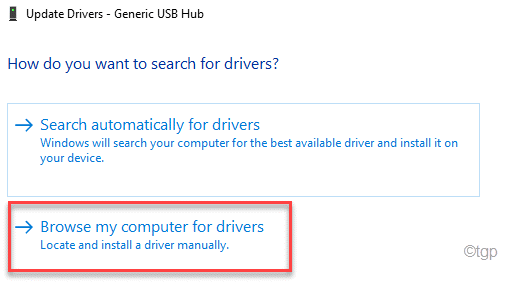
6. Now click on «Find drivers on my computer“.
7. Then click on «Let me choose from a list of drivers available on my computer“.
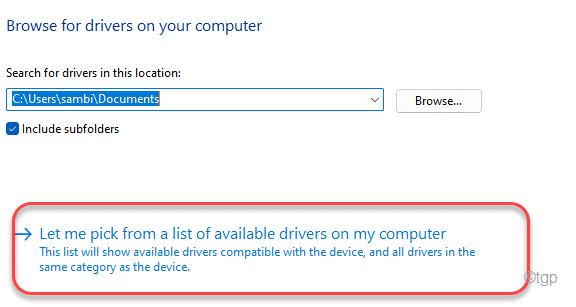
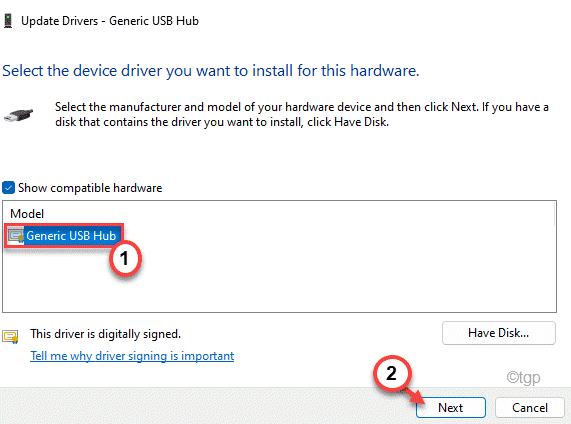
8. This will open the list of existing drivers on your screen.
9. Select the «Generic USB hub“.
10. Finally, tap «next“.
Now, Windows will install the driver on your computer.
11. Then update the other generic USB hub devices in the same way.
Finally when I’m done restart your computer. After restarting, check the status of the problem.
Solution 4: modify USB selective suspend settings
You can disable the USB Selective Suspend feature to prevent this error message from appearing.
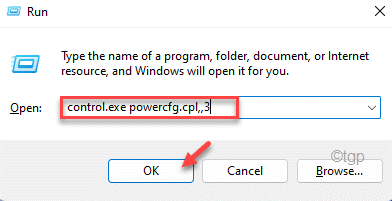
1. At first, press the Tecla de Windows + R keys together.
2. Then, catch this UTR command and paste Pay in.
control.exe powercfg.cpl,,3
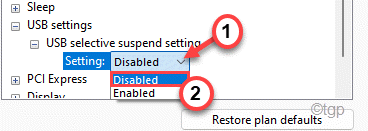
3. Now, expand the «USB settings:“.
4. Then select the «USB selective suspend settings“.
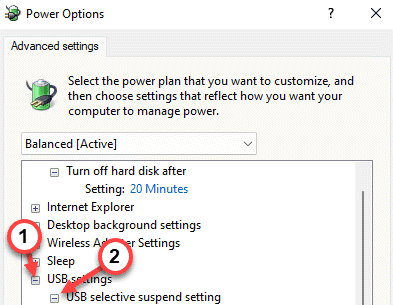
5. Next, click on the “Settings:” drop-down icon.
6. Finally, choose «Disabled”From the drop-down option.
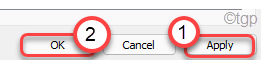
7. Finally, click on «Request” and “OK”To save the changes.
Finally, restart your computer.
Solution 5: perform a power drain
Power Drain is a process with which you can clean the residual electrons from your computer.
1. At first, completely turn off your computer.
2. Next, remove the power supply plug from your system (if you are using a laptop, remove the battery).
3. Next, try turning on the computer with the power button. This will drain the residual electrons from the entire system (if it’s a laptop, drain the battery first, then try turning on the power button).
4. Now, connect the USB device to your system.
5. Once the USB device is connected to your system, connect the power supply to your computer.
6. Then start your device.
Now, check if you keep seeing the error message after ejecting the device or not.
Solution 6: uninstall and reinstall the drivers
Uninstalling the corrupted drivers can help you solve the problem.
1. At first, press the Tecla de Windows + R keys together.
2. Then write «devmgmt.msc«And hit Pay in.

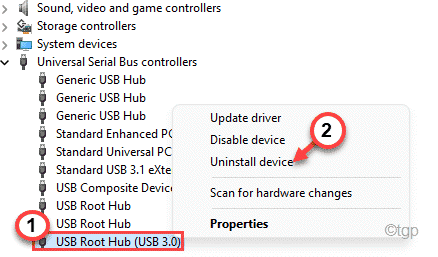
3. Now, expand the «Universal serial bus controller“.
4. When you expand it, you will see a conductor carrying a yellow triangle ⚠ symbol.
(As you can see from our system, it is «USB 3.0 root hub“That bears that mark)
5. Then right click on the device and then click “Uninstall device“.
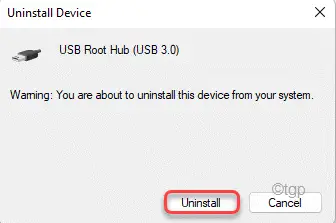
6. Finally, click on «Uninstall”To uninstall it from your computer.
After that, close the Device Manager window. Later, restart your computer.
During the restart, Windows should install the default driver instead of the uninstalled one.
If this does not install the driver, you must install it manually. Follow these steps –
1. Open the Device administrator.
2. Then tap «Action«In the menu bar and then click»Check for hardware changes“.

This will scan and install the missing driver.
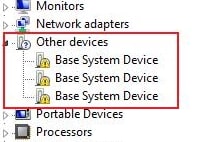
3. In this way, try to locate any other unknown device in the other devices section.
If you can find any device with a yellow triangle ⚠ symbol, reinstall it following the same way we have commented.
After doing all of this, you will not see the error message again.
Solution 7: run the hardware device troubleshooter
If nothing works for you, you can try running the Hardware Device Troubleshooter to find and fix the problem.
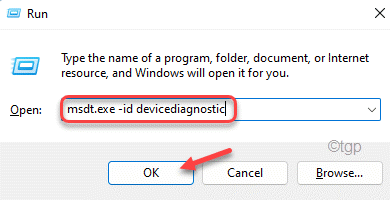
1. At first, press the Tecla de Windows + R keys together.
2. Then, copy get command and hit Pay in.
msdt.exe -id devicediagnostic
3. Now, tap «next”To allow Windows to identify and fix the hardware problem on your computer.
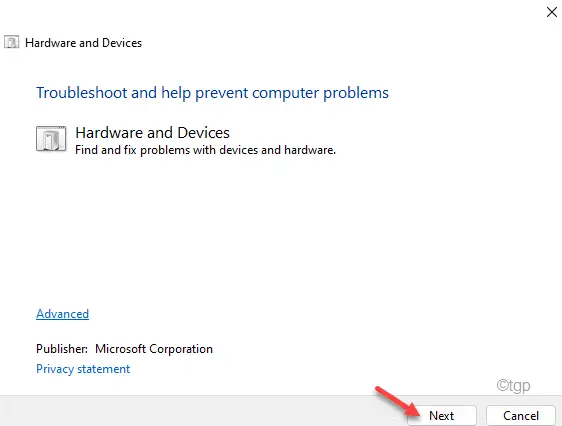
Now, just wait for Windows to solve the problem for you. This should have solved the problem with your system.
Related posts:
 How to access Steam games without an internet connection
  How to view FPS with Xbox Game Bar in Windows 10: Steps Made Easy
  Hacked account? How to check and remedy
  How to make video calls from WhatsApp Web
  How to increase the RAM memory of a desktop or laptop + Tips and Tricks
  How to organize your YouTube subscriptions into categories
+ Tips and Tricks
How to organize your YouTube subscriptions into categories
+ Tips and Tricks


