


This app can’t open error when opening Snipping Tool
Every time a new app update arrives, bugs are likely to follow. When Windows replaced your classic Crop tool with the new cut out and draw tool, the case was no different. now we have a Crop tool that makes us all a little frustrated with their mistakes. On a different note, this is an excellent update on the classic. Crop tool application and correcting small errors is worth every effort you put into it.
In this article, we focus on one main snipping tool error message, This app cannot be openedthat users get when they try to click on the New crop tool button. Although this may put you off a bit, you might be surprised to learn that this problem can be fixed quite easily.
In this article, we explain all the possible solutions that you can try to fix this problem. Try them one by one, we’re sure you won’t walk away with a sad face.
Solution 1 – Temporarily disable automatic time and then set it manually
Paso 1: Press the WIN + ME keys together to launch the Settings window.
At left window panel, click the time and language tile. At right window panel, click the Date and Time tile.
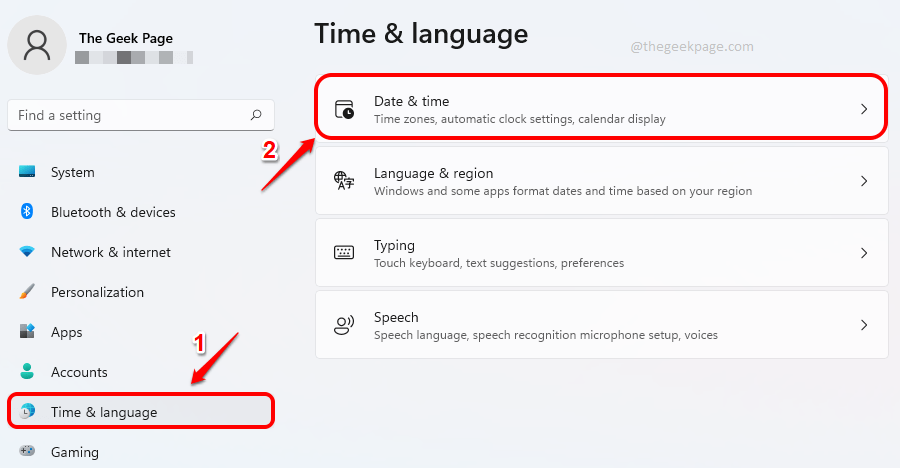
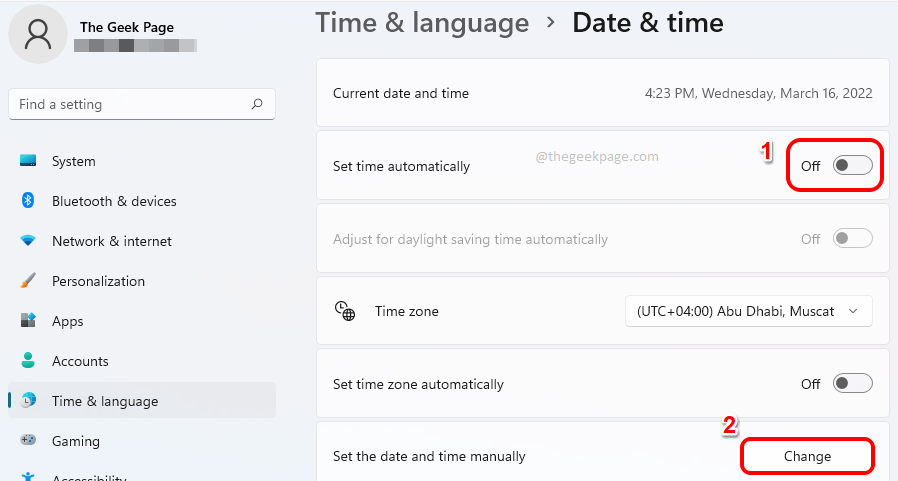
Paso 2: Now in the Date and Time settings window, turn the toggle button OFF by option Set time automatically.
Then click the button called Change corresponding to the option Set the date and time manually.
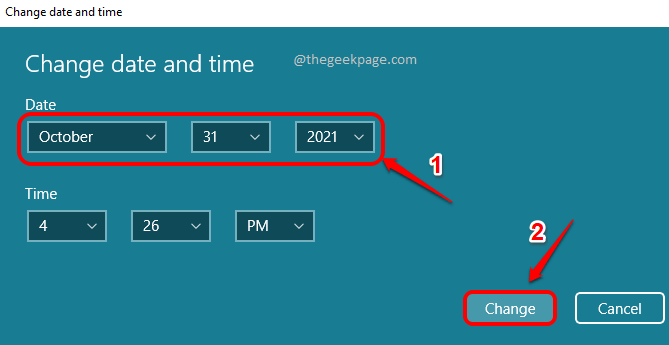
Paso 3: At Change date and time window, set the Date What October 31, 2021and then press the button Change button.
Note: Somehow the last date of October is solving this problem.
That’s it. Treat relaunching crop tool once and click on the New button. Most likely the issue will be resolved.
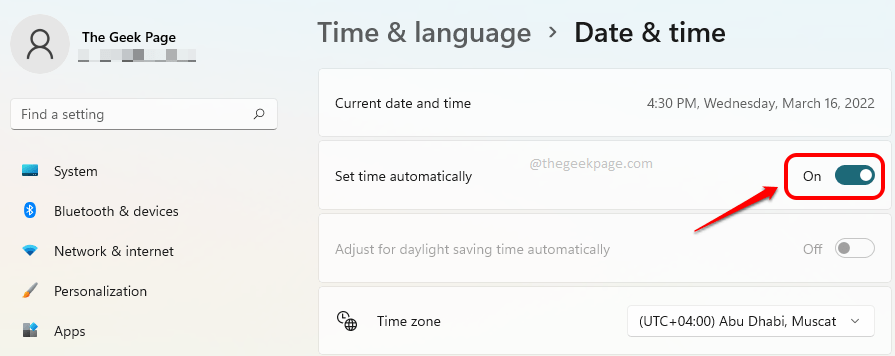
Once your issue is resolved, you can return to the Date and time settings window and then turn the toggle button On by Set time automatically. This would instantly set your system time to your geographic time zone.
Even if your issue is not resolved after this solution, you still need to activate the toggle button On by Set time automatically.
The above solution works perfectly for most users. In case it doesn’t work for you, you can try the other solutions listed below.
Solution 2 – Get the latest Windows updates
Getting the latest Windows updates is the best solution for most Windows problems. Follow the steps below to update your Windows to the latest version.
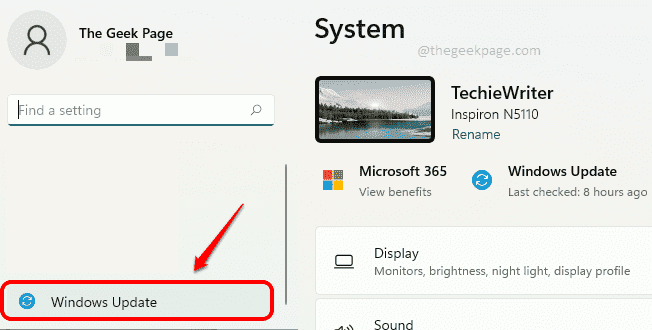
Paso 1: Start the Settings window by pressing the button win + me keys together.
About him left window panel, click the windows update tile.
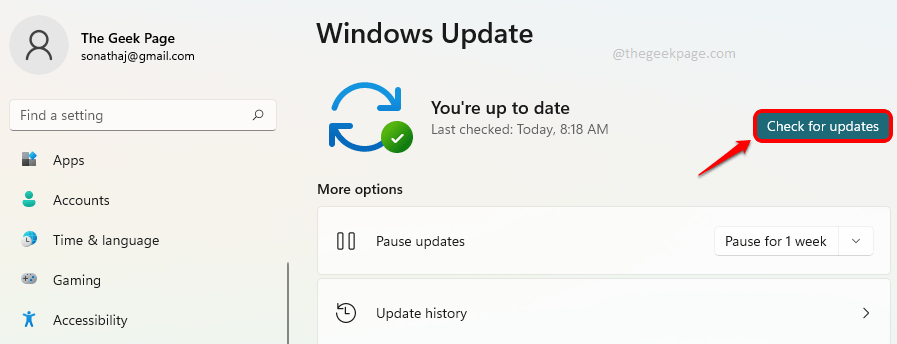
Paso 2: At right window panel, you can now see the Windows Update settings.
Click on the button called Search for updates to check for the latest available updates.
Once the updates are found and downloaded, install on pc they.
That’s it. Please try it restarting you machine after updates and try to launch Snipping Tool and click on the New button to check if the problem is solved or not. If the issue is still not resolved, try the next solution.
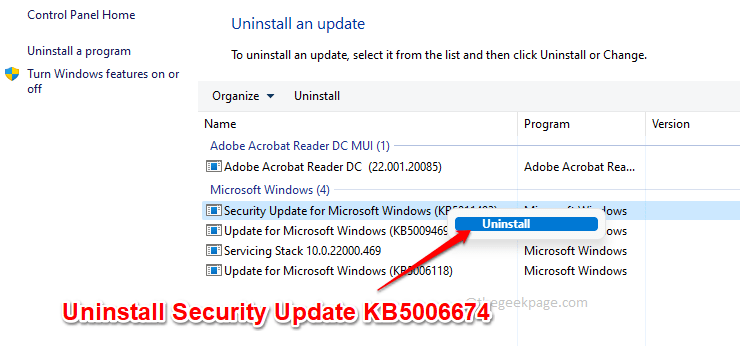
Solution 3 – Uninstall security update KB5006674
Sometimes the problem can be caused by a Microsoft security update called KB5006674. For some users, uninstalling this update fixed the issue.
Paso 1: Click on the Search icon on the taskbar.

Paso 2: Write control panel and click on the Control Panel application of the best match section.

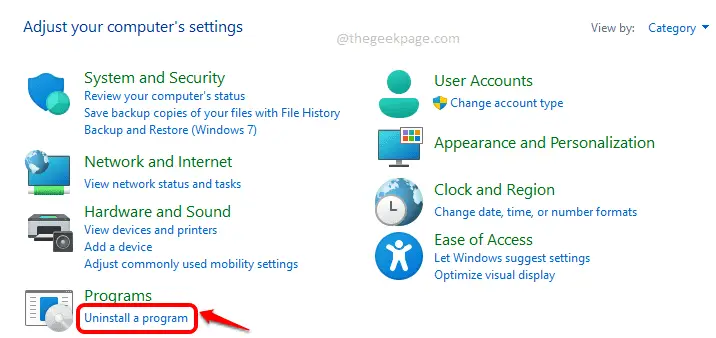
Paso 3: At Control Panel settings window, click the uninstall A program button under the programs category.
Stage 4: In the next window, in the left window dashboard, click the link View installed updates.

Paso 5: At Uninstall an update window, check for an update by ID KB5006674. If you find it, the right button of the mouse on it and then click on the uninstall button.
If you can’t find it, you can move on to the next solution.
After uninstalling the update, reopen the Snipping tool once and check if the problem is gone or not.
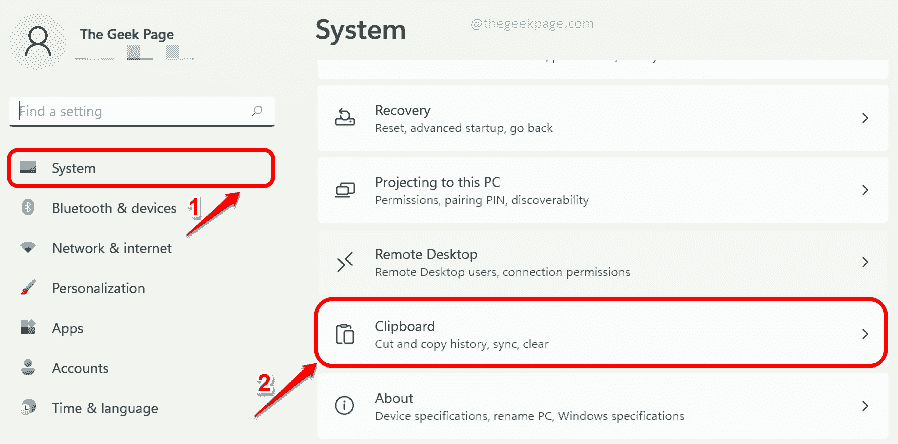
Solution 4 – Turn on clipboard history
Paso 1: Open the Settings window by pressing the button win and me keys simultaneously.
About him left window panel, click the System tab and on the right window cristal, scroll down and click on the Clipboard tab.
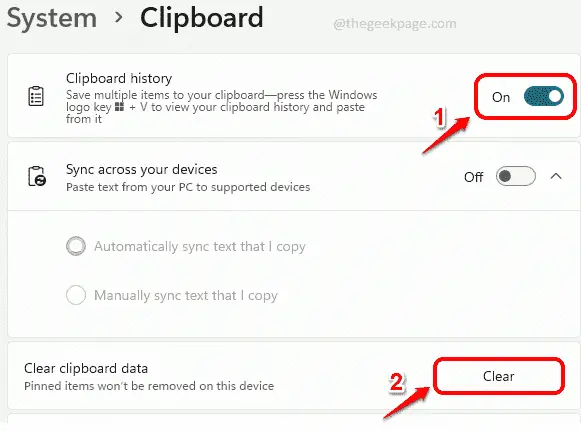
Paso 2: Now in the Clipboard settings window, turn on toggle button corresponding to the option Clipboard history. This feature allows you to have multiple items on your clipboard and allows you to view your clipboard history and paste items from it. To view your clipboard history, you need to press the keys Ganar + V together.
Then press the button Of course corresponding to the option Clear clipboard data.
Solution 5 – Turn on background app permissions for the snipping tool
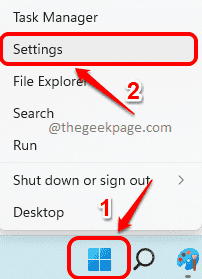
Paso 1: The right button of the mouse about him Windows Start menu icon and then click the Settings option.
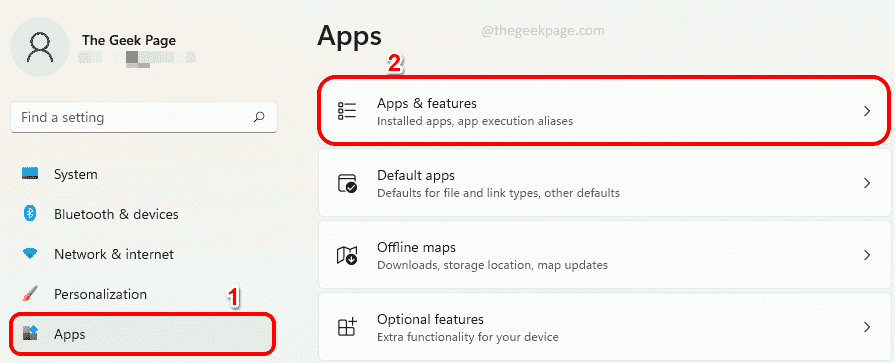
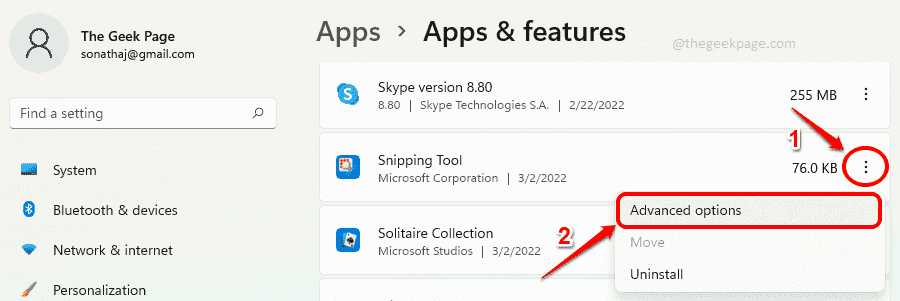
Paso 2: Now in the left window panel, click the Applications tile and on the right window panel, click the Applications and features tab.
Paso 3: Now click on the 3 vertical points icon associated with Crop tool under the Applications section and then click Advanced Options.
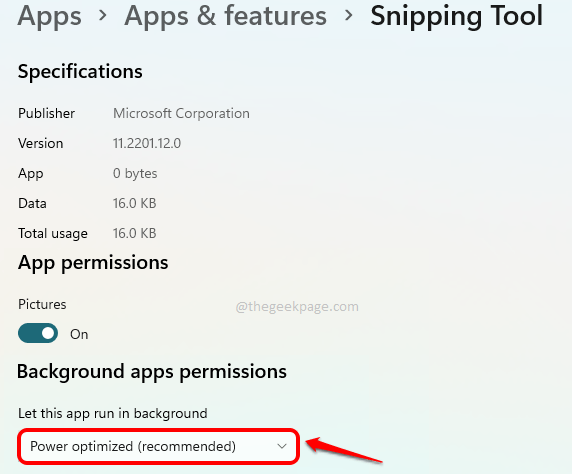
Stage 4: Now in the section Background app permissionsmake sure the dropdown against the option Let this app run in the background is set to Optimized energy (recommended) the stop Always.
Solution 6 – Repair Snipping Tool
In this solution, we will try to repair your Snipping Tool to fix any corruption with it.
Paso 1: press win and me keys at the same time to bring up the Settings window.
About him left window panel, click the Applications tile and on the right window dashboard, click Applications and features tile.
Paso 2: Travel all the way down about him right window pane and locate Trim Tool.
Click on the 3 vertical points icon associated with it and then click Advanced Options.
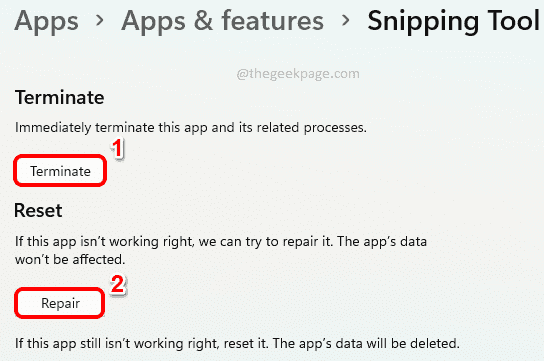
Paso 3: Now scroll down to find the section called Finish. In the Finish section, click the End up button first.
Next, in the Reset section, click on the button named Repair to repair the app.
Once the repair is complete, check if the issue is resolved or not.
If the issue is still not resolved, let’s try to reset the app in the next solution.
Solution 7 – Reset Snipping Tool
Paso 1: As in the previous method, open the Settings application first, pressing the button win + me keys together.
now in the left window dashboard, click Applications and then in the right window dashboard, click Applications and features tab.
Paso 2: Move to down find Crop tool under the Applications section.
Click on the 3 vertical points icon and then on Advanced Options.
Paso 3: Click on the End up in the Finish section and then on the button Restart in the Reset section.

That’s it. Your Snipping Tool app will now be reset. Treat launching and check if the problem is gone.
Solution 8 – Uninstall and reinstall PowerShell Snipping Tool
If you are still facing the issue even after trying all the solutions listed above, let’s try uninstalling and installing the app once.
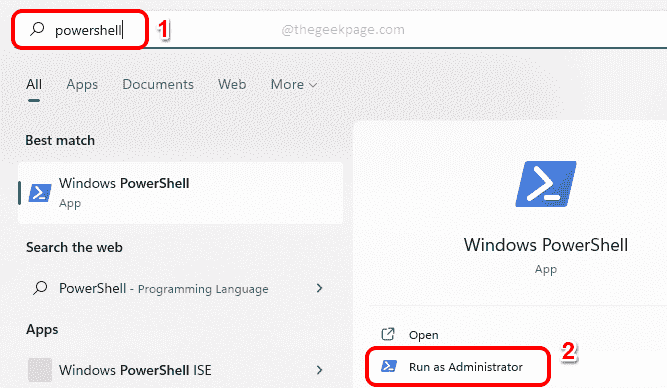
Paso 1: Click on the Search icon on the taskbar.

Paso 2: At search barto write Potencia Shell and hit the Execute as an administrator option to launch PowerShell with administrator privileges.
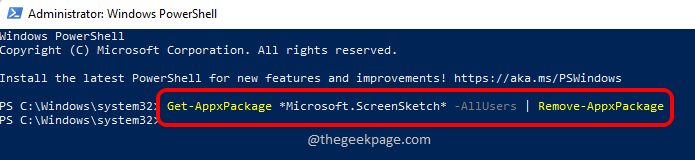
Paso 3: Next, copy and paste the following command in the PowerShell window and press the button Get into key to uninstall the Snipping Tool package from your machine.
Get-AppxPackage *Microsoft.ScreenSketch* -AllUsers | Remove-AppxPackage
Stage 4: Finally, run the following command to install Back Crop Tool.
Get-AppxPackage -allusers Microsoft.ScreenSketch | Foreach {Add-AppxPackage -DisableDevelopmentMode -Register "$($_.InstallLocation)AppXManifest.xml"}
That’s it. Check if your problem is already solved.
Tell us in the comments section which method worked for you.
Related posts:
 How to access Steam games without an internet connection
  How to view FPS with Xbox Game Bar in Windows 10: Steps Made Easy
  Hacked account? How to check and remedy
  How to make video calls from WhatsApp Web
  How to increase the RAM memory of a desktop or laptop + Tips and Tricks
  How to organize your YouTube subscriptions into categories
+ Tips and Tricks
How to organize your YouTube subscriptions into categories
+ Tips and Tricks


