


What is tamper protection and how to enable it for Windows Defender in Windows 11?
Windows Defender is an amazing antivirus software that comes with Windows 11 by default. While Windows Defender is great at protecting your machine, what if some malicious code corrupts Windows Defender? Well, unfortunately, this is a very possible scenario for malicious apps to change Windows Defender settings. But luckily, you can prevent this from happening. Yes, you heard right. You can prevent any external application or code from altering Windows Defender security settings.
This is exactly where the tamper protection feature comes into the picture of. Tamper protection, if enabled, prevents malicious apps from changing Windows Defender security settings. In this article, we have explained in some simple steps how you can easily turn on tamper protection for your Windows Defender on your Windows 11.
NoteNote: Please note that the steps explained in this article would turn on tamper protection only for Windows Defender and not for any other third-party antivirus software applications.
How to enable tamper protection
Paso 1: Right click on the Windows Start Menu icon and click the Settings option.
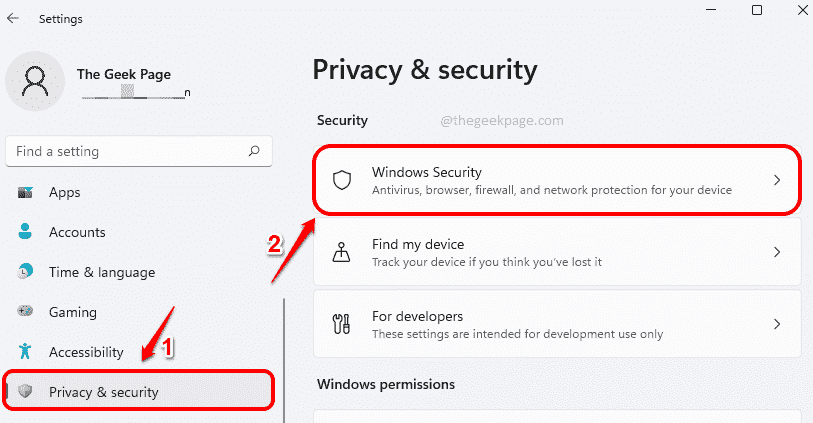
Paso 2: At Settings window, click the Privacy & Security tab on the left window pane and click on the windows security tab on the right window cristal.
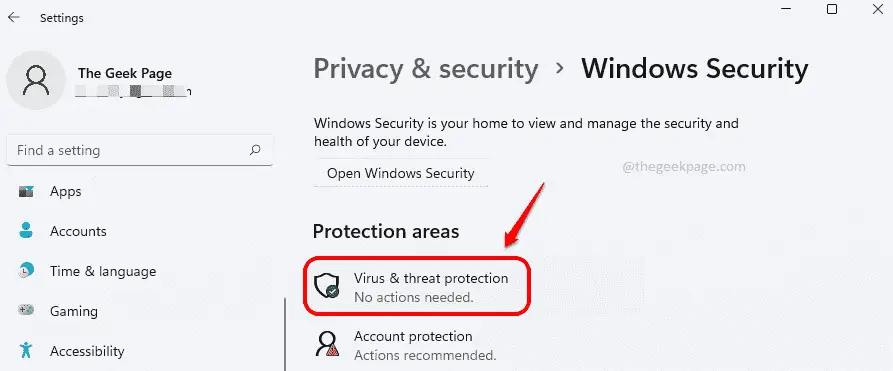
Paso 3: Next, in the section protection areasclick on the tile Protection against viruses and threats.
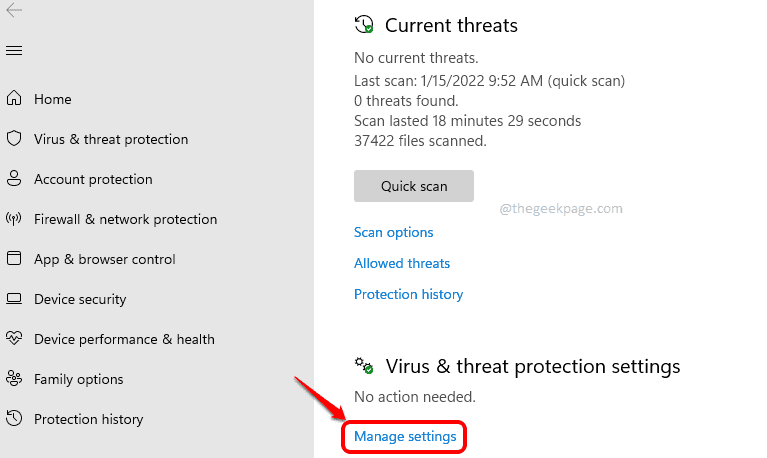
Stage 4: In the window that follows, click the Manage settings link associated with Virus and threat protection settings.
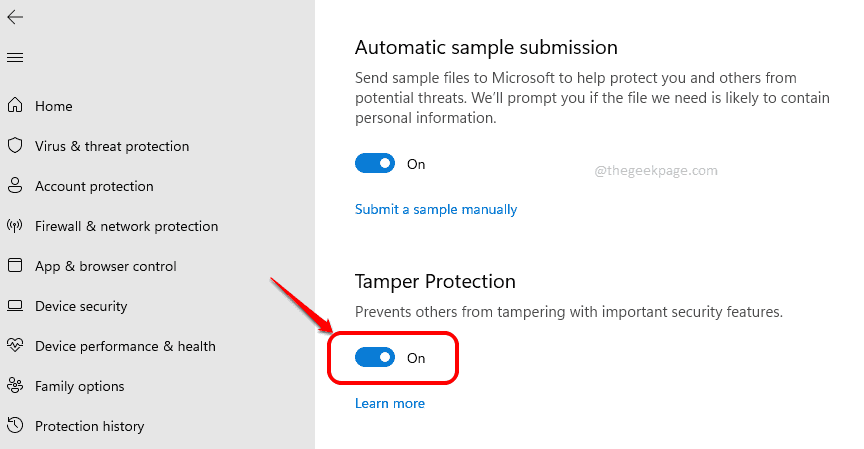
Paso 5: Now scroll down and look for the section called Tamper Protection.
Once located, turn the toggle button to About been to let Tamper Protection for your Windows Defender.
That’s it. Tell us in the comment section if you found the article useful or not.
Related posts:
 How to access Steam games without an internet connection
  How to view FPS with Xbox Game Bar in Windows 10: Steps Made Easy
  Hacked account? How to check and remedy
  How to make video calls from WhatsApp Web
  How to increase the RAM memory of a desktop or laptop + Tips and Tricks
  How to organize your YouTube subscriptions into categories
+ Tips and Tricks
How to organize your YouTube subscriptions into categories
+ Tips and Tricks


