


Could not load XPCOM issue in Mozilla Firefox
Mozilla Firefox occupies the third position in the list of browser users in the middle of Google Chrome, Safari, Opera, etc. But sometimes when opening Firefox, users have complained about an error message “Could not load xpcom!“. This error does not allow Mozilla Firefox to open at all. If you are one of those users looking for an urgent solution, you have just landed on the right place.
quick fixes –
COMMERCIAL
1. Try to reboot the device once. Then try to open Firefox again.
2. Check the Internet connection.
Solution 1 – Update Firefox
Try updating Firefox before doing anything else.
1. You have to press the ⊞ Tecla Win+R.
2. In the Run terminal, to take this and hit Get into.
appwiz.cpl
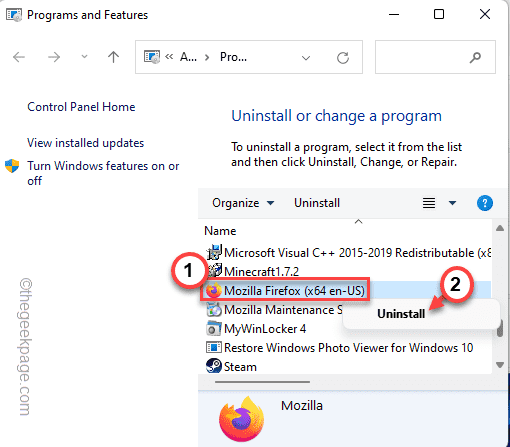
This will open Programs and Features.
3. In this list of installed apps, right-tap on “Mozilla Firefox (x64 en EE. UU.)” and touch “uninstall“.
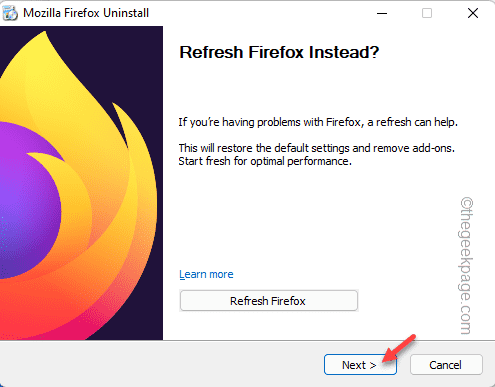
4. In the Firefox Uninstaller window, click “Update Firefox“.
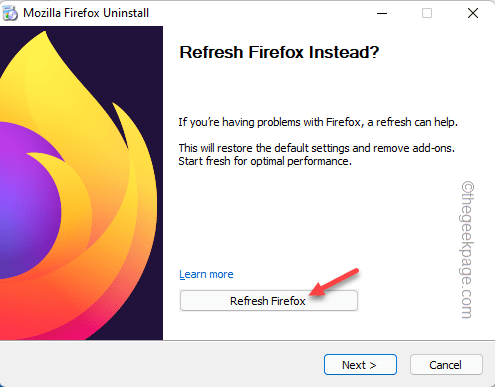
This will automatically update Firefox in the background. Once it’s updated, Firefox will open automatically.
Try if this works or not.
Solution 2 – Uninstall Firefox and do a clean install
The best way to fix this problem is to uninstall Firefox from the system and reinstall it.
Step 1: Uninstall Firefox
1. What you have to do at first is press the button tecla de Windows and the X keys together.
2. Then click the button “Apps and features” to access the Settings page.

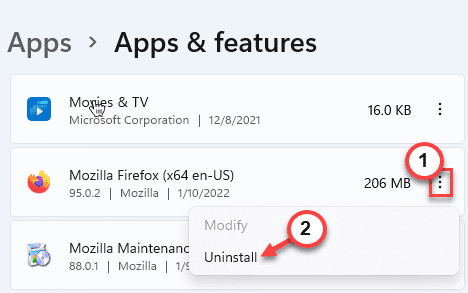
3. When you get to the Settings window, scroll down to “Mozilla Firefox (x64 en EE. UU.)“.
You will see Mozilla Firefox in the search results.
4. Next, tap on the three points (⋮) menu and click “uninstall“.
5. Also, touch “uninstall” to completely uninstall the browser from your device.
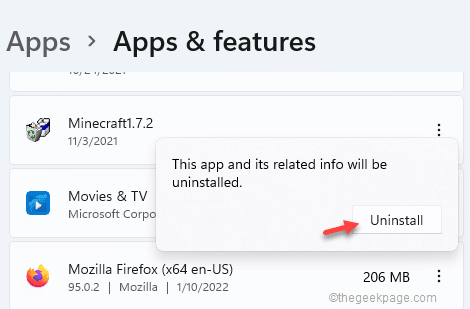
6. Now touch “Next”In a Firefox uninstaller.
Now follow the steps to completely uninstall Firefox from your device.
7. Once you have uninstalled Firefox, go back to the Settings page.
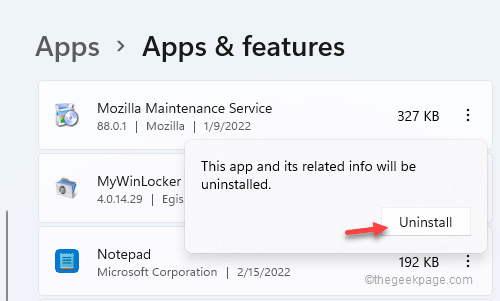
8. Look for the “Mozilla Maintenance Serviceapplication. Then tap on the three-dot menu and tap “uninstall“.
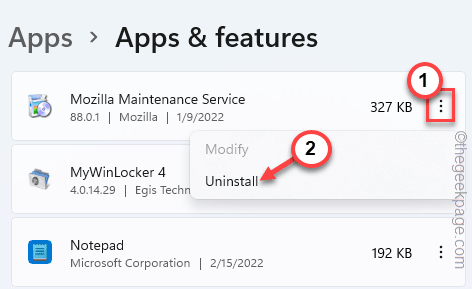
9. Again, touch “uninstall“.
Then close the Settings page after uninstalling the app.
Step 2: Delete temporary files
Clearing temporary files should remove the corrupt Firefox files.
1. At first, press the button Tecla de Windows+R keys together.
2. Then, writes this code in the Run panel and press Get into.
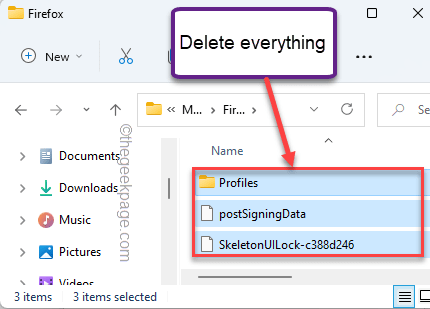
C:Users%username%AppDataLocalMozillaFirefox

[
If you can’t access the Mozilla folder from the Run terminal, follow these steps –
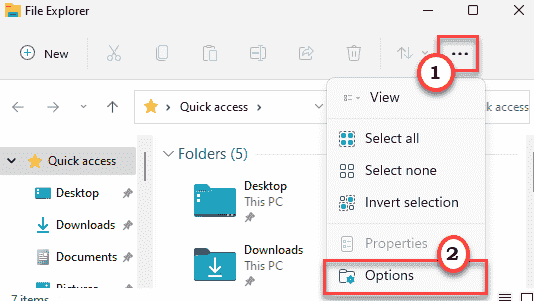
a. Open File Explorer.
b. When File Explorer opens up, tap the three-dot (⋯) option on the menu bar.
c. Then, tap on the “Options“.
d. In the Folder Options screen, head on to the “View” tab.
e. After that, toggle the “Show hidden files, folders, and drives” menu.
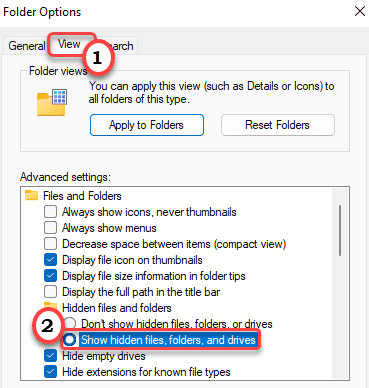
f. Finally, tap “Apply” and “OK” to save this modification.

This will help you view hidden files and folders.
g. Then, head on this way –
C:Usersyour user nameAppDataLocalMozillaFirefox
Here, “your user name” represents your account name on your system.
]
3. Get rid of all from the Firefox folder.
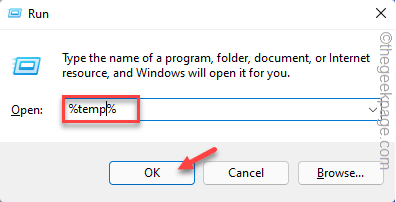
4. After this, right-tap ⊞ Win and touch «Run“.
5. After that, writes this code and press Get into to access the Temp folder.
%temp%
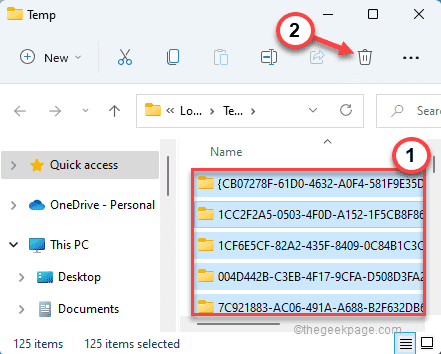
6. When the Temp folder opens, use your mouse to select all the content you see there.
7. After that, press the button ‘Erase‘ to remove everything from the Temp folder.
8. On the File Explorer screen, please follow this way:
C:WindowsTemp
9. Here you will see various folders and log files. Select all and touch the trash can icon to remove everything.
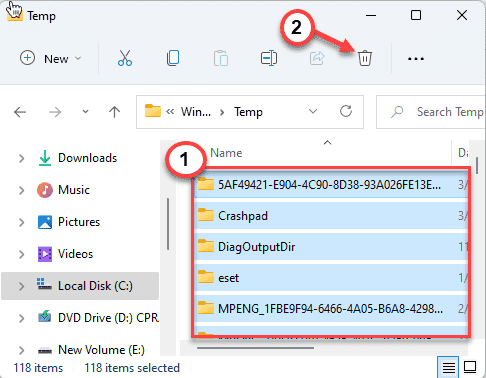
Once you’re done, close the File Explorer window.
Step 3: Download and install Firefox
1. Now, download and install the latest version of Mozilla Firefox.
2. Then just run the setup file.
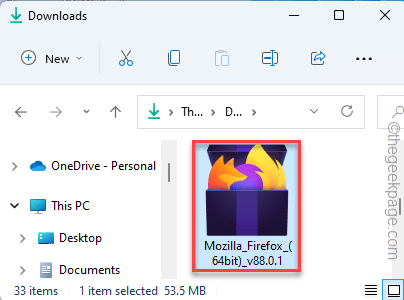
Now follow the instructions on the screen to complete the installation process.
Once it’s installed, open Firefox and see if it works. If he “Could not load xpcom!” keeps appearing, go to the next solution.
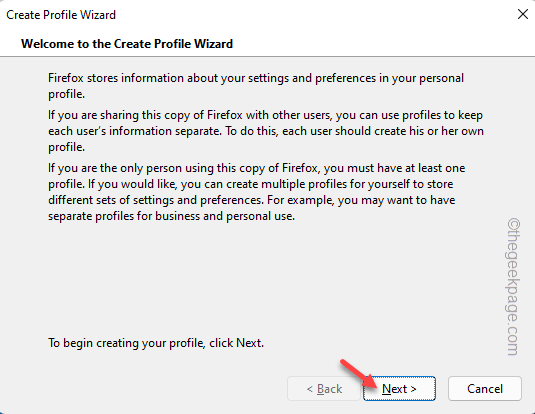
Solution 3 – Create a new Firefox profile
This may be a problem of corruption of your profile. So, you can just create a new Firefox profile.
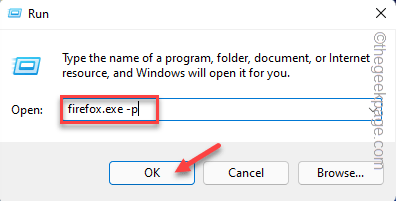
1. Right click on the ⊞ win key and touch «Run“.
2. In addition, writes this and click “OK“.
firefox.exe -p
3. When the Choose Firefox User Profile page opens, tap «Create profile…“.
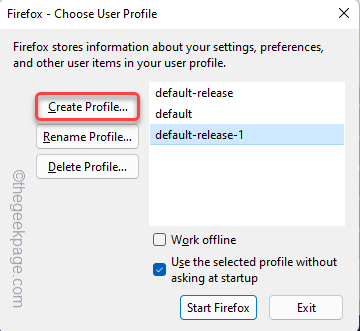
4. Then touch “Next” to go to the profile creation step.
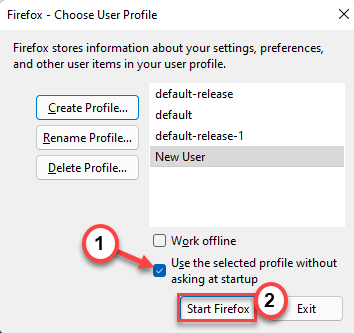
5. Also, type the username (such as – New User, etc.) that you prefer in the box.
6. Finally, touch “Finalize” to complete the process.

7. Once you get to the final step, make sure the “Use the selected profile without prompting at startup” box is checked.
8. Finally, touch “Iniciar Firefox”To start Firefox immediately.
Once it starts, test if the browser is working or not. If it works perfectly, you can resume your work as before.
Also, you can delete the old profile completely and use the new one to avoid further problems.
Solution 4 – Check for pending Windows updates
Some users blame paused Windows updates for this issue.
1. Open the Settings app.
2. On the left side, tap «windows update“.
3. Then click “Search for updates“.

Windows will check for pending updates and download them accordingly.
4. Once the update is downloaded, tap “Restart now“.
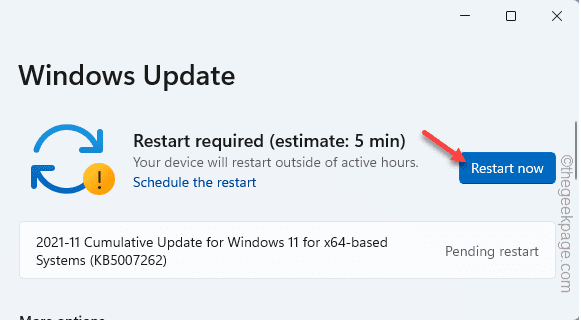
This will reboot the system and complete the installation process.
Solution 5 – Disable third-party antivirus
You need to disable background antivirus and test whether it is interfering with Firefox or not.
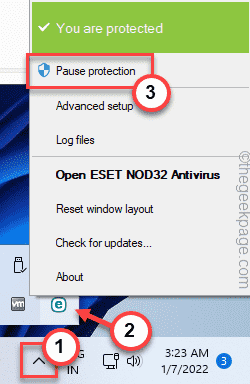
1. At first, tap the arrow icon on the taskbar.
2. Then right click on your antivirus and click “pause protection” to restrict the antivirus very briefly.
Then just start Firefox and see if this works.
Your problem will be solved for sure.
Related posts:
 How to access Steam games without an internet connection
  How to view FPS with Xbox Game Bar in Windows 10: Steps Made Easy
  Hacked account? How to check and remedy
  How to make video calls from WhatsApp Web
  How to increase the RAM memory of a desktop or laptop + Tips and Tricks
  How to organize your YouTube subscriptions into categories
+ Tips and Tricks
How to organize your YouTube subscriptions into categories
+ Tips and Tricks


