


Edit PS4 firmware 9.0 | Tips and Tricks
– Learn these tips and tricks on how to use your devices in a much easier way as well as solved some of your common problems that are difficult.
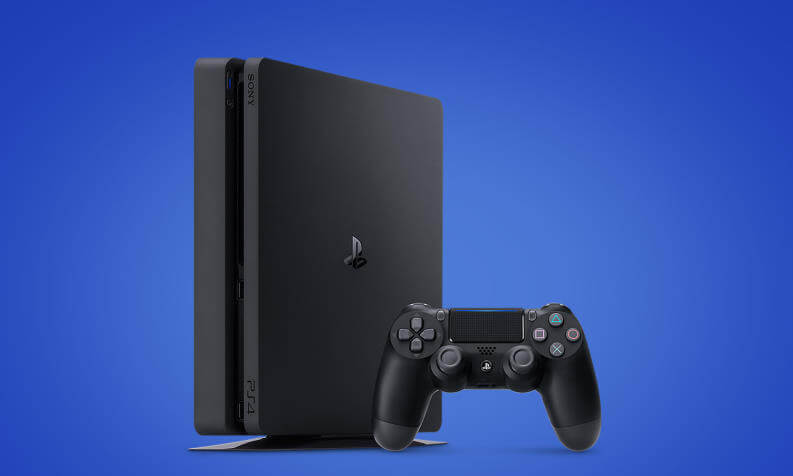
La Playstation 4 (PS4 for friends) is a console that has made history, although it has practically reached the end of its life cycle, it continues to give emotions. Who has a few years on his shoulders knows the changes well, which allowed backup copies to be played on consoles and convenient homebrew applications.
Over the years the protections have been refined and it has become increasingly difficult to circumvent the protections. Recently, at least on PS4, making software changes just got easier and within everyone’s reach.
As you know, Giardiniblog has always been an important source regarding the modifications of a good number of consoles from the Wii, passing through the PS3, PS4 and many others.
As usual, we can limit ourselves only to informing you that the procedure exists, but we do not advise you to undertake it, furthermore, we decline any responsibility for damage to your console. In this blog we are versus piracy. Used solo backup copies of games you regularly purchase and own.
PS4 modification prerequisites, risks and limitations
If you want to modify your console this it must be at firmware 9.00 (if it is at a lower version, you will have to download the firmware package and update to version 9.00).
Caution
Do not update through the automatic procedure otherwise the console will be brought to the fw. 9.0.3 that it is not compatible to date with any modification.
From a risk standpoint, we must tell you that the procedure is illegal and violates the license so proceed at your own risk. From the standpoint of hardware corruption, this is remote because the modification is temporary, and just stop or restart the console to bring it back to its original condition.
In the environment, one starts talking about one permanent modification, if it comes out we will try it for you and then show you the procedure.
If you decide to use the modification, you have to stay with firmware 9.0.0. This means that it will not be possible to access the Playstation Network and play online and multiplayer games.
Here is a quick review of the prerequisites:
- a PS4 of any model (Fat, Slim or Pro) with firmware 9.00;
- a USB stick of any size (even 2 GB) without personal files;
- a computer (for our guide we used a Windows PC).
From a software point of view you have to download:
PS4 Editing Preparations
First, before proceeding to the console, we recommend that you disable Automatic Downloads, to do this it is enough: go to “Settings“; then move to “System“And finally on”Automatic downloads”Then uncheck all options.
Also, make sure that the PS4 successfully goes into rest mode so as not to lose the change at each shutdown and have to redo it every time. Even doing this is simple, just: go to “Settings”; then go to “Energy saving settings“And then on”Sets the functions available in sleep mode“. Then make sure the same screen options are selected.

Finally, before proceeding, make sure that the console firmware is at the correct version, just: go to “Settings“; then move to “System“And finally press on”System information“.
Prepare the USB stick for PS4 editing
Creating the key is really simple, just:

- connect the USB pen you want to use to the PC;
- open the Win 32 Disk Imager program (downloaded previously);
- the program will open, on the screen select the drive of the USB key e
Inside the screen that will open, in correspondence with the section “Image file“, Select the file”exfathax“(Downloaded first); - then press on “you write“, A dialog screen will warn us that all the files on the key will be deleted, press on”Yup“.
- once writing is complete, you can remove the key to use it at the appropriate time on PS4.
Edit PS4
To modify the PS4, turn on the console (do not insert the prepared USB stick), and make sure you are connected to the Internet. At this point you can:
- go to the console browser (the icon is characterized by the word WWW);
- press on “Enter URL“And then write the following address:” http://karo218.ir/900NA/index.html “(without quotes) and press the”R2“To open the page;
- then a percentage will appear indicating the saving the page in the cache of the browser so as to allow theuse without active internet connection;
- at the end of the procedure, it will be necessary to exit the browser and disable the Internet connection.
The first part of the procedure has ended happily, this part will not be repeated if the console is turned off (the data remains stored in the browser cache); now returning to the browser you will notice the following page.

At this point the second part of the procedure begins which will be repeated every time the console is turned off to reactivate the change.
Here’s how to proceed for activate the GoldHEN:
- go to the browser page shown on the screen and press the “GoldHENV2b” button to wait for the time necessary to load;
- then the dialogue screen will appear inviting you to insert the key created in the USB port of the console;
- insert the key and wait for the notification that says that the file system of this storage device is not supported at the top left;
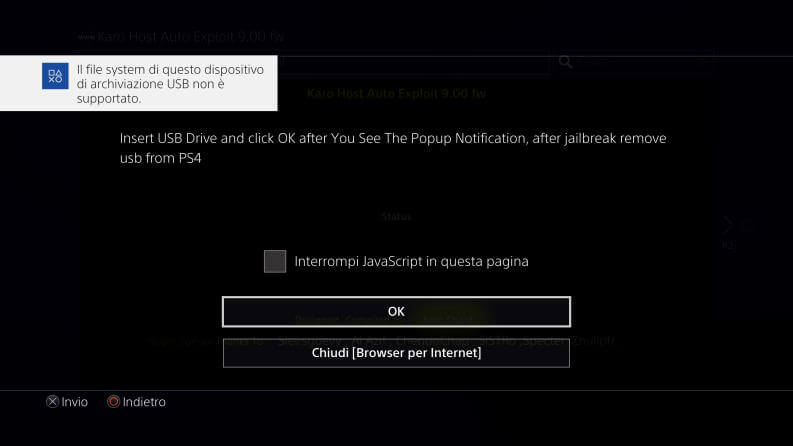
- at this point (and not before!) it is possible to press the “OK” button;
- after a short processing, a message will warn us that the modification was successful and that we must remove the key and press “OK”;
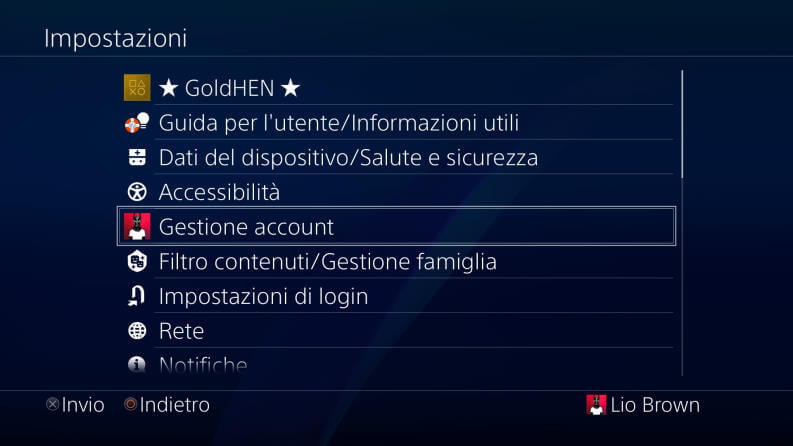
- once this is done, the change will be made, to check just open the “Settings“At the top there will be the item”GoldHEN“.
In this mode, you can install and run game backups and homebrew applications.
Install PKG file on modified PS4
Once the change has been made most people ask what should I do with it? Let’s see how to install .pkg files on the PS4 so you can play backups of your titles and start homebrew applications.
Installation is very simple just:
- equip yourself with a large enough USB memory drive (a key or better an external HD);
- remove all files of interest and format with exFAT file system;
- then load the PKG files that you want to install on the PS4 into the root folder (therefore in the drive but outside any other folder);

- insert the unit thus prepared on the PS4 and go to “Settings“,”GoldHEN“, And on the option”Package install“;
- select the PKG file you want to install and press the X key.
The installation time depends on the size of the pkg file; it usually ranges from a few seconds to a few minutes. At the end of the process, a notification will warn us that the game has been downloaded successfully and that we can play it.
If you don’t own a large enough unit to be used for pkg files you can consult our purchase guide dedicated to convenient external hard drives.
Our guide has ended and we wish you a lot of fun with your modified Playstation 4.

Related posts:
 How to access Steam games without an internet connection
  How to view FPS with Xbox Game Bar in Windows 10: Steps Made Easy
  Hacked account? How to check and remedy
  How to make video calls from WhatsApp Web
  How to increase the RAM memory of a desktop or laptop + Tips and Tricks
  How to organize your YouTube subscriptions into categories
+ Tips and Tricks
How to organize your YouTube subscriptions into categories
+ Tips and Tricks


