


Failed to create list of regular subfolders with error in Windows 11/10
Many users have encountered an error when trying to reset some of the user folders (such as Desktop, Downloads, Pictures, Music, etc.) to default location using File Explorer. Generally, this error is reported when you try to change the folder location and it doesn’t work, so you try to restore it to the default settings. The error message displayed to the user is:
Could not create regular subfolder list in “D: System Volume Information”.
Access denied.
Possible reasons for this error are:
- Lack of administrative permits
- Problems when transferring folders between drives
- Drive folder mapping is corrupted.
In this article, you will see a list of solutions to help you overcome this error on your Windows PC.
Solution 1: try resetting and restarting the folder location
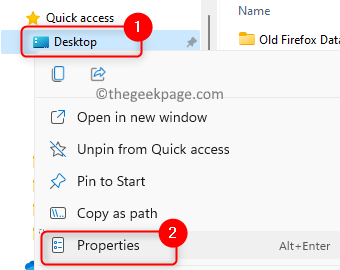
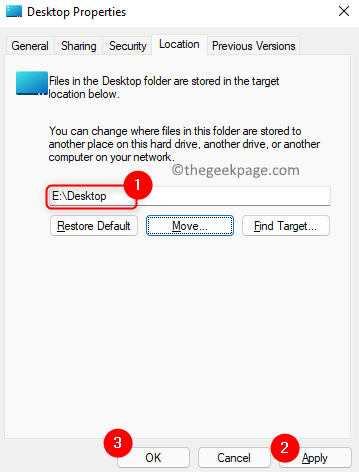
1. Go to the folder that is giving this error. The right button of the mouse on it and choose Properties.
2. Select the Location tab.
3. Click the Restore defaults button.

4. In the window that appears, click No.
5. Restart your system. Check if the problem is solved.
Solution 2: create a new folder and point to the location
Suppose you are trying to move the Desk folder Unit C to another unit (i.e. D or E). There may be a problem with moving this folder as the entire drive may be displayed on the desktop. When you try to reset the default folder location to get rid of this problem, you see the error. So you can try to ignore the problem folder by creating another folder, moving the content to it, and then pointing to the location.
We will detail the steps considering that we are trying to move the Desktop folder on drive C to drive E. Make changes based on the folder and drive that you are trying to move.
1. Open File Explorer (Windows + E). Navigate to the drive you were trying to move the folder to. We have considered And drive here.
2. Click the New menu item at the top to create a new item in the And drive. Select option File.
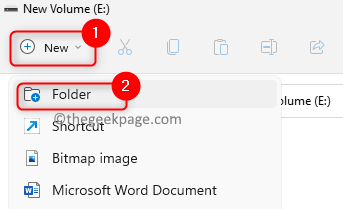
3. Name the folder, here we will name it as Desk.
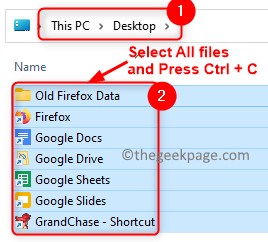
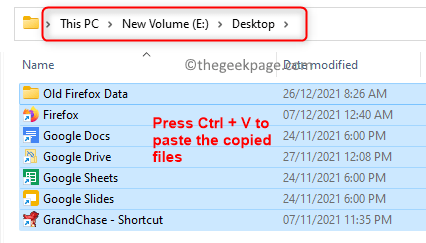
4. Copy the files to the Desktop folder on drive C what were you trying to move using Ctrl + C.
5. Go to the newly created folder (Desk in unit E) and paste the files here using Ctrl + V.
6. In the File Browser left panel, below the section named Quick access, you will see the Desk file. The right button of the mouse on it and choose Properties.
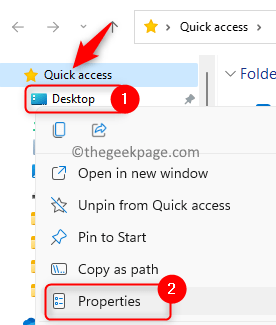
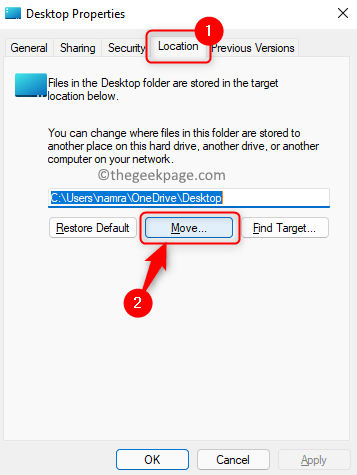
7. In the Properties (edit) window, go to the Location tab.
8. Click the Move on… button.
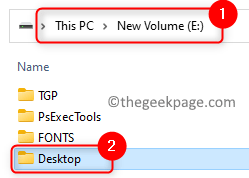
9. Go to the location where the new folder was created. Here the location is E: Office.
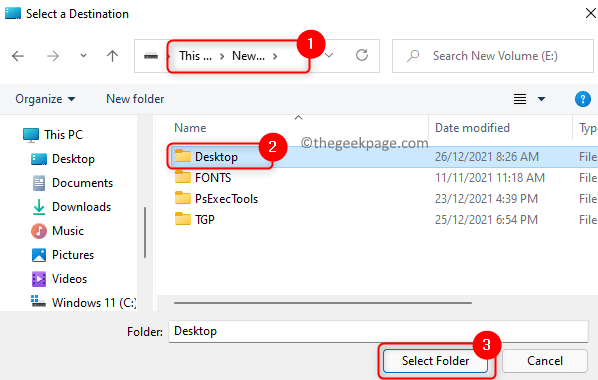
This location will change based on where you created the new folder in Steps 1 and 2.
10. Click Request and then in it’s fine.
11. Restart your computer. Check if the problem folder points to the correct location.
Solution 3 – Clean up disk space
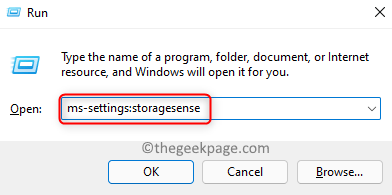
1. Use the Windows y R keys to open the To run dialogue.
2. Type ms-settings: storagesense to open the Windows system storage settings.
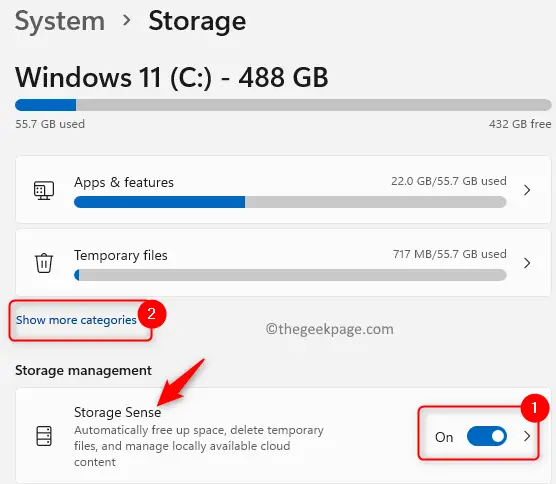
3. Here, light the lever associated with Storage direction under Storage management.
4. Then click Show more categories to view the storage usage and clear the storage as temporary files.
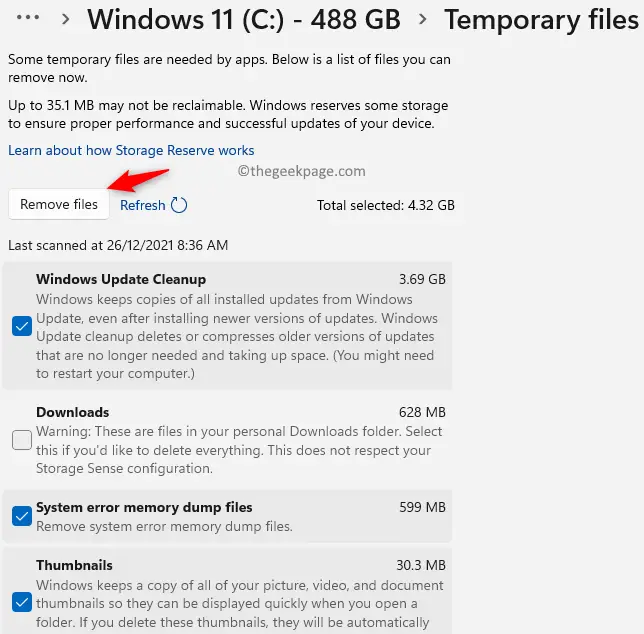
5. Click Temporary files. It will show the list of files that can be deleted.
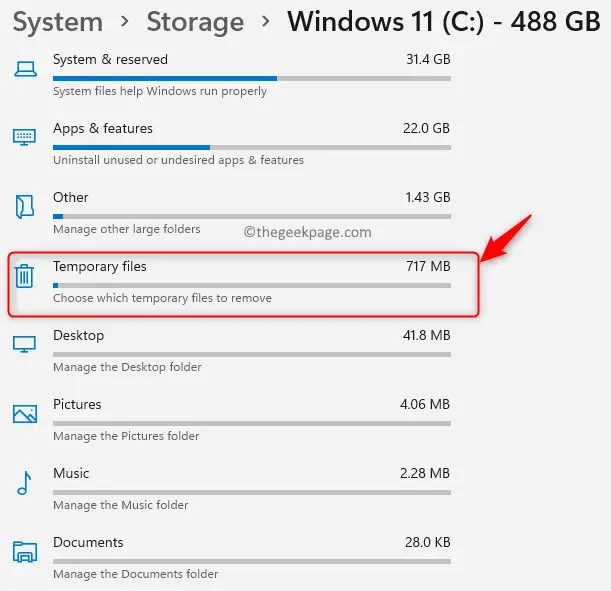
6. Cheque the boxes associated with the Temporary files storage you want to delete, and then click the Remove files button.
7. Similarly, you can free up storage space from other categories like Pictures, Mail, Documents, Videos, etc.
8. Now check if this has helped to correct the error.
Solution 4: take ownership of the folder
1. Press Windows + E to open File Browser.
2. The right button of the mouse in the folder that is causing this problem and select Properties.
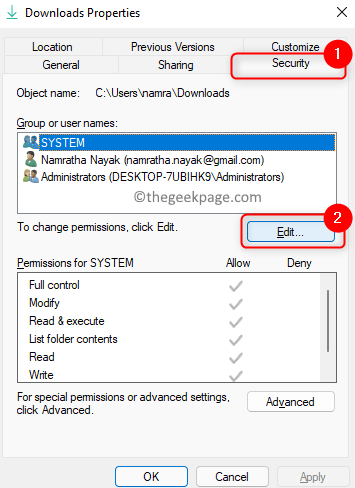
3. Go to Security tab.
4. Click the Edit button to change permissions. Click on Yes if requested User account control.
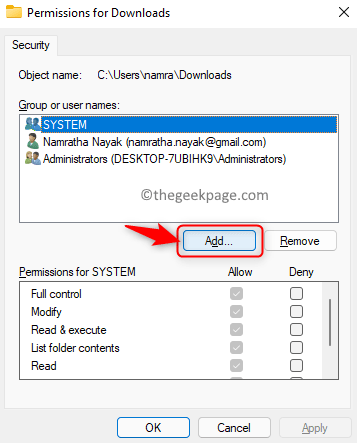
5. In the Permissions window, click Add… to add permissions for another user or group.
6. Click the Advanced button on the Select user or group window.
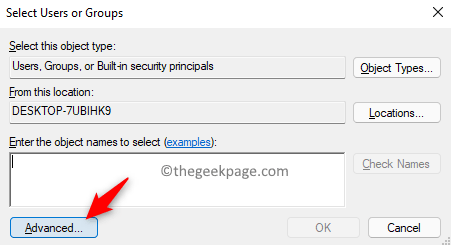
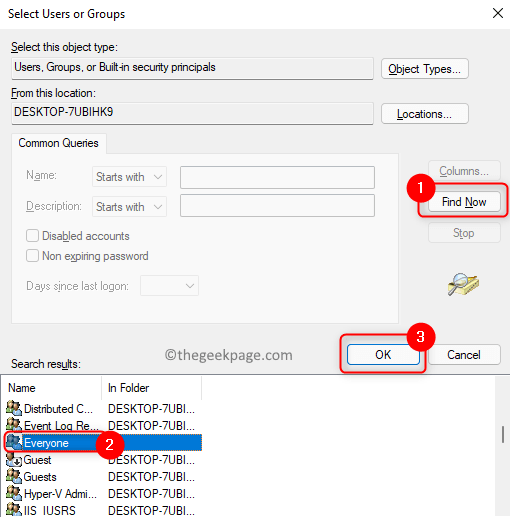
7. In the new window that appears, click Find now …
8. Select Everyone in the search result at the bottom. Click on it’s fine.
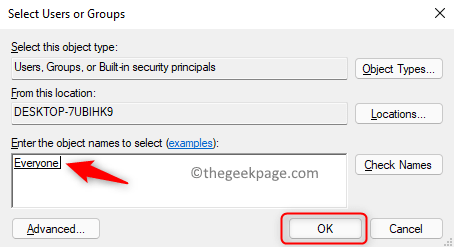
9. You will see Everyone under Enter the name of the object to select. Click on it’s fine.
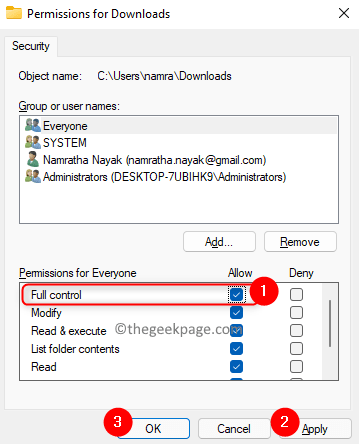
10. Low Permissions for all, make sure cheque the box next to the option Total control under the Let column.
11. Click Request and then in OK for the changes to take effect.
12. Check if the problem with the folder is resolved.
Solution 5: separate user folders and restore to defaults
Sometimes there are situations where you may have dragged and dropped a User Box (such as Desktop, Documents, etc.) into another User Box. In this case, you need to separate the folders and then restore them to their default location.
A. Separate user folders
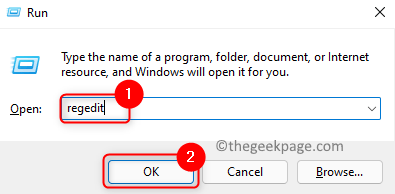
1. Press Windows + R to open Run.
2. Type regedit and click OK open the Registry editor.
3. Navigate to the path mentioned below.
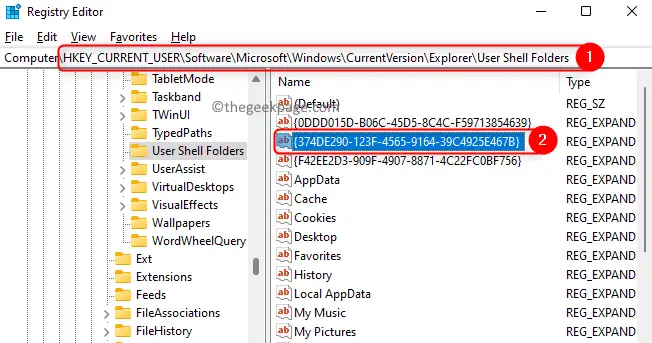
HKEY_CURRENT_USERSoftwareMicrosoftWindowsCurrentVersionExplorerUser Shell Folders
4. Once you are in User shell foldersYou will see a list of items with the same name as the user folders, such as Desktop, Music, Pictures, etc. Consider that we are having a problem with the downloads file.
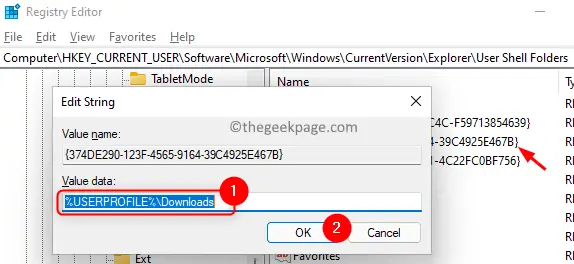
5. Double click in the article {374DE290-123F-4565-9164-39C4925E467B} on the list. This multi-string value is key to the downloads folder in the registry.
6. make sure Value data the field is set to % USER PROFILE% Downloads. Click on it’s fine.
Note: Similarly, if you have this problem with any other user folder, change your value data field with him predetermined values indicated in the following list
Escritorio:% USERPROFILE% Desktop
Documentos:% USERPROFILE% Documents
Favoritos:% USERPROFILE% Favorites
Music -%USERPROFILE% Music
Images:% USERPROFILE% Images
Videos -%USERPROFILE% Videos
7. Restart your system.
B. Restore to default location
1. To open File Browser hold the Windows + E keys together.
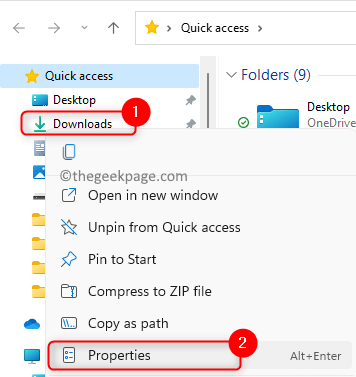
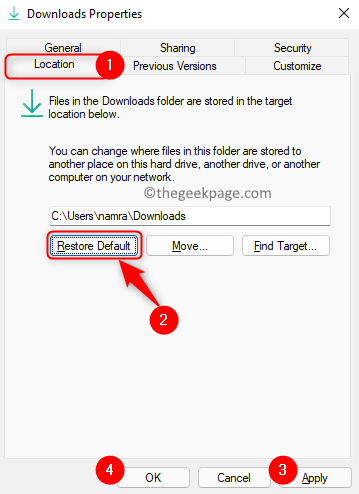
2. The right button of the mouse about him downloads folder in the left pane and choose Properties.
3. Go to Location tab.
4. Click the Restore defaults button.
5. Now click Request and then in it’s fine.
6. You will see that the Downloads folder location will now be restored.
Thank you for reading.
You should now be able to reset your folder location to the default path without seeing the error message. Please comment and let us know the solution that worked for you.
Related posts:
 How to access Steam games without an internet connection
  How to view FPS with Xbox Game Bar in Windows 10: Steps Made Easy
  Hacked account? How to check and remedy
  How to make video calls from WhatsApp Web
  How to increase the RAM memory of a desktop or laptop + Tips and Tricks
  How to organize your YouTube subscriptions into categories
+ Tips and Tricks
How to organize your YouTube subscriptions into categories
+ Tips and Tricks


