


[FIX] The file is corrupted and cannot be opened Error in Microsoft Excel
You may have spent hours on that Excel file and then finally transferred it from your home computer to your work computer. That’s exactly when you might be getting that heartbreaking dialog that says The file is corrupted and cannot be opened. Nothing can miss your heartbeat more than this mistake. Well, it can happen due to many reasons such as unsupported extensions issues, or maybe due to some security settings configured on your machine, or even maybe because your file doesn’t have enough permissions. Whatever the reason, you don’t have to worry, we’re here to order.
In this article, we have lined up some very effective solutions that you can try to resolve the Excel error. The file is corrupted and cannot be opened. Try the methods listed below one by one to fix your problem in seconds.
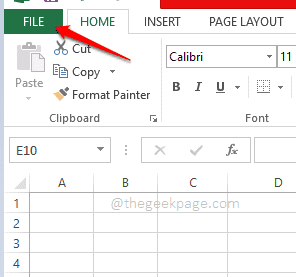
Method 1: change the file extension
Paso 1: First, create a copy of the file and keep it. If your file gets corrupted in any way, you can use save original this way.
To copy the file, click on the file and then press the keys CTRL + C together.
To paste it somewhere, press the keys CTRL + V together.
Paso 2: Next, click on the copy of the file you created and press the button F2 key to rename that.
If the file extension is .xlsx, remove the x from the end of the file so that the extension becomes .xls.
If the file extension is .xls, add an x to the end of the file name so that the extension becomes .xlsx.
Hit the Get into key once done.

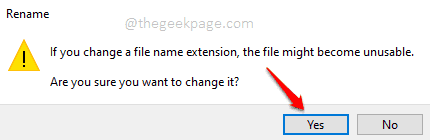
Paso 3: When the Rename confirmation window opens, click the Yes to continue.
Try double-clicking the copy of the file and opening it to see if your problem is resolved.
Method 2: change trust center settings
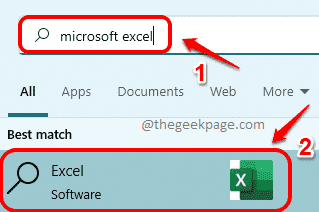
Paso 1: Click on the Look for icon in the Taskbar.

Paso 2: In the search window, launch Microsoft Excel looking for him.
Paso 3: Once MS Excel starts, click on the PROCEEDINGS tab at the top of the window.

Paso 4: As below, in the left panel from the window, click Choices.
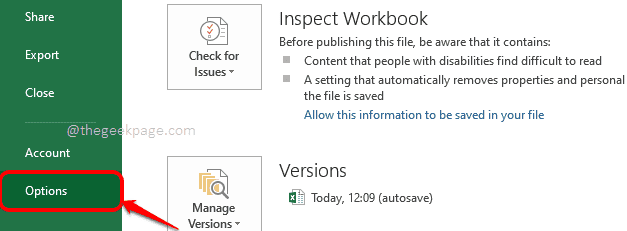
Paso 5: Right nowXcel options the window would open before you.
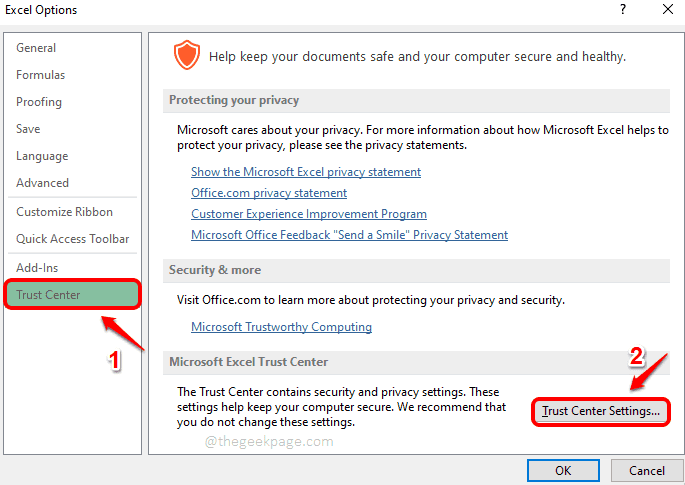
About him left side from the window, find and click the tab that says Trust Center.
About him right side of the window, under the section Microsoft Excel Trust Center, Click the button Trust Center Settings.
Paso 6: In the window that follows, click Protected view at left panel.
About him right side, Make sure the check box is not checked for the following configurations.
- Enable Protected View for files originating from the Internet.
- Enable Protected View for files located in potentially unsafe locations.
- Enable Protected View for Outlook attachments.
Once done, press the OK button twice return.
Paso 7: Now that you are on the main page, click the PROCEEDINGS tab once more.

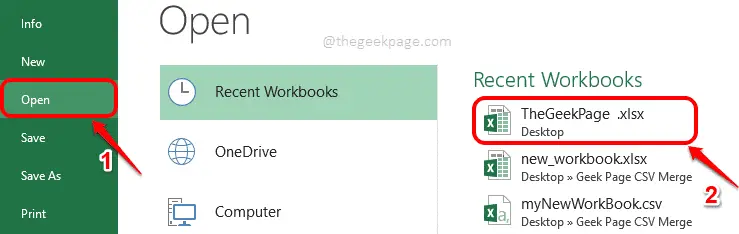
Paso 8: About him left panel, click the tab Opened.
About him Right panel, you need to locate and click on your excel file under the Recent workbooks section to open it.
Note: If you can’t find the file below the Recent workbookyes, you can use the Browse to find your file.
That is all. Your problem should now be solved. If not, try the next method.
Method 3: repair and open
Paso 1: On the taskbar, click the Look for icon.

Paso 2: Look for Microsoft Excel and launching from the search results.

Paso 3: When Excel opens, click the PROCEEDINGS tab at the top.
Paso 4: As below, click the Opened tab on the left window panel, then on Computer at center panel, and finally in the Browse button on the Right side of the window.
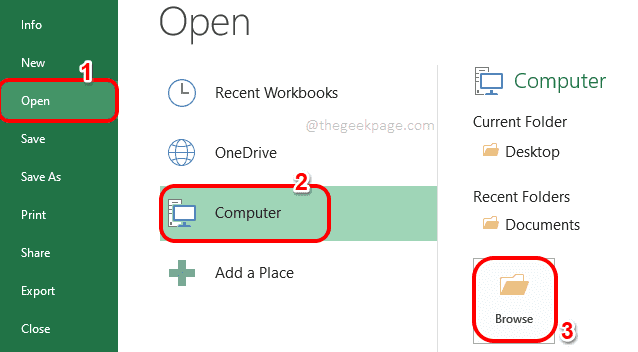
Paso 5: Navigate to the location where your file is in, and click on it to select it.
Then click on the Dropdown menu associated with the Opened at the bottom and select the option Open and repair from the drop-down list.

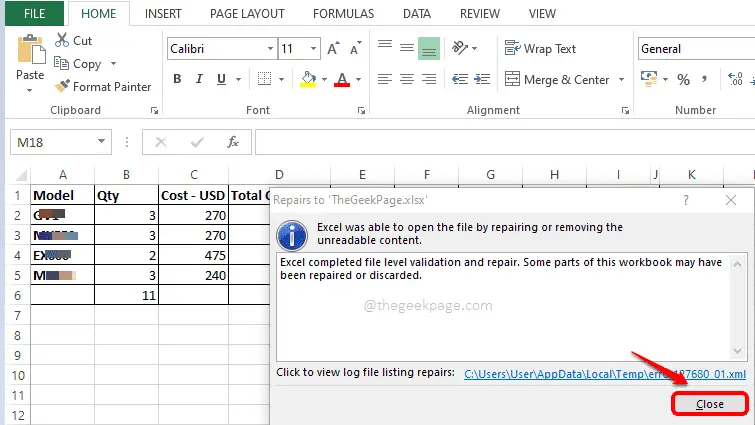
Paso 6: In the next window, click the Repair button.

Paso 7– Excel would now perform all possible repairs and your file will most likely be recovered and viewable in the background.
Click on the To close after the repair process is complete.
Method 4: from component services settings
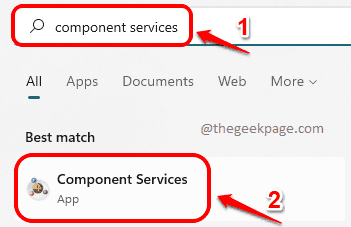
Paso 1: Click on the Look for on the taskbar.

Paso 2: In the search bar, type component services and click Component Services Best match.
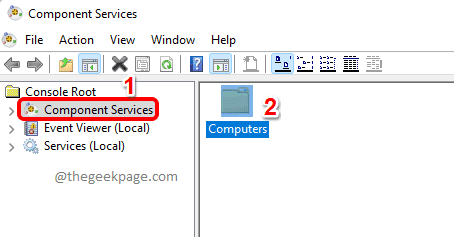
Paso 3: When the Component Services window opens, in the left panel from the window, click Component Services As shown below.
At right window panel, double-click the Computers icon.
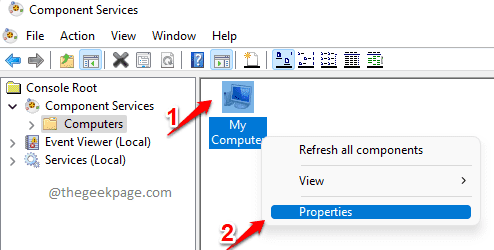
Paso 4: Right click on My Computers and then click Properties.
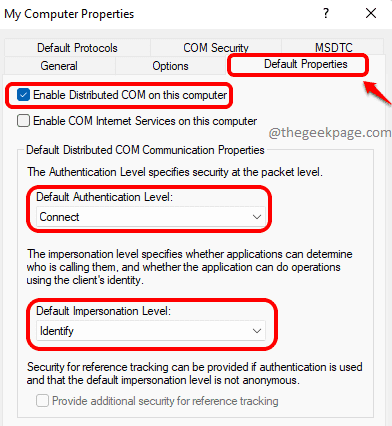
Paso 5: When My Computer Properties opens, click the Default properties tab. After that, make sure the following are configured correctly.
- Check the box corresponding to Enable distributed COM on this computer
- Default authentication Level be set to Connect.
- Default impersonation level be set to Identity.
Press the Enter button once done.
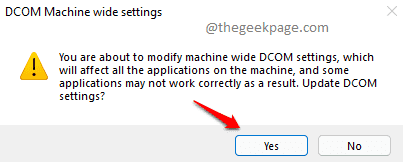
Paso 6: When the following window opens asking for confirmation, click the Yes button.
That is all. Try to open the file again. If the problem is still not resolved, continue to the next step.
Method 5: change file permissions
Another reason you might be facing the problem could be due to file permissions. In this method, we will give full access to the file to try to open it.
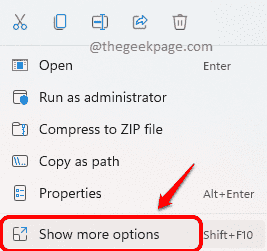
Paso 1: Right click on the Excel file and then click the option Show more options.
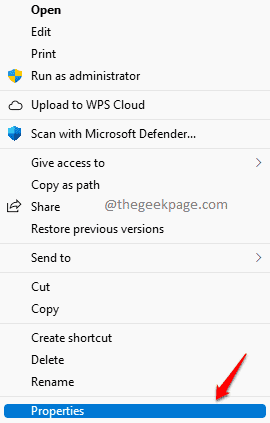
Paso 2: In the more options window that opens, click the Properties option.
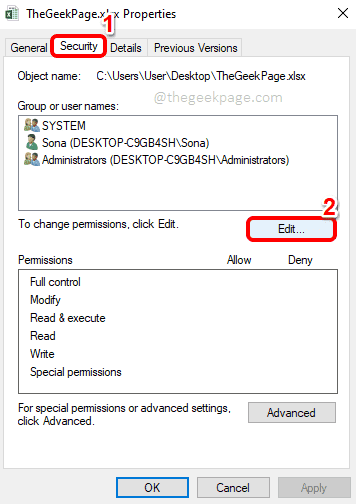
Paso 3: In the file properties window, click the Security tab first.
Then click on the Edit button against To change the permissions, click Edit.
Paso 4: In the window that follows, click the Add button.
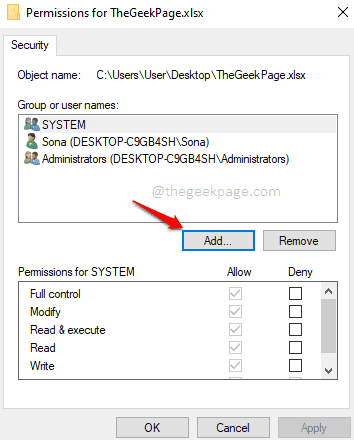
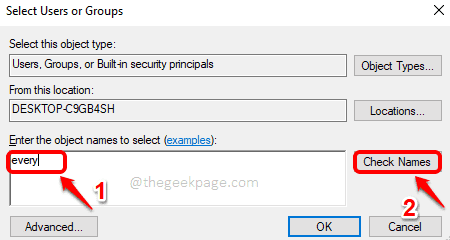
Paso 5: At Select users or groups window, under section Enter the names of the objects to select, writes on each, and then press the button Cheque Names.
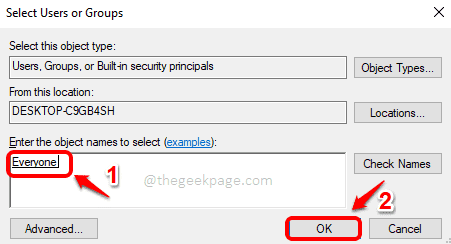
Paso 12: Performing the previous step would fill Enter the names of the objects to select with the text All the world. Hit the OK button.
Paso 13: Now click All the world from Group or user names. Under the Permissions for all section, click the check box to Total control.
Catch Request and OK buttons once you’re done.
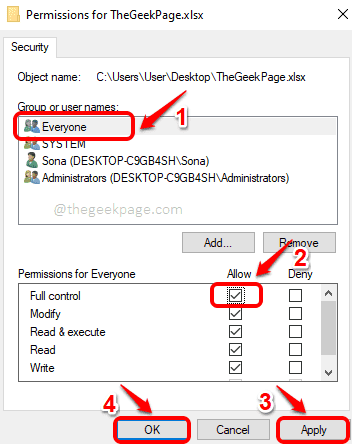
Try to reopen the file once you are done.
That is all. One of the 5 methods listed in this article should definitely solve your problem. If still not resolved, let us know in the comments.
Related posts:
 How to access Steam games without an internet connection
  How to view FPS with Xbox Game Bar in Windows 10: Steps Made Easy
  Hacked account? How to check and remedy
  How to make video calls from WhatsApp Web
  How to increase the RAM memory of a desktop or laptop + Tips and Tricks
  How to organize your YouTube subscriptions into categories
+ Tips and Tricks
How to organize your YouTube subscriptions into categories
+ Tips and Tricks


