


Hiveos set rig password as system: Burning image USB Flash Drive( Rig, Wallet & Farm): The launch of mining on Hive OS is several times faster and more convenient than on Windows, since there is no need to download, update drivers for devices, various programs for mining cryptocurrency, overclocking video cards and monitoring the system, as well as messing around with alternately connecting the GPU to motherboard in some cases. In Hive OS, all the necessary software is available and the cards do not need to be connected one by one!
Attention!!! An article on installing and configuring Hive OS 2.0 is here .
Burning the Hive OS image to a USB flash drive
We will write the system to a flash drive with a volume of 8 gigabytes or more (I have a 32 GB sample).
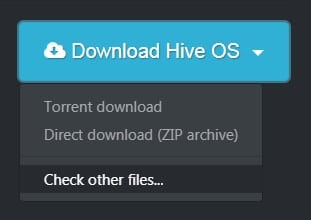
Go to the official website hiveos.farm, press the blue button on the right ” Download Hive OS ” and select the item ” Check other files ” from the drop-down list.
In the table that appears, the first two lines are a Windows program with which we will write the system to a USB flash drive.
We download two files: HDDRawCopy1.10Portable.exe (we download the portable version so as not to install it on our computer) and hive-0.5-12-20171211.zip with the size of 1.91 GB.
If the speed of your Internet connection is poor, then download the file hive-0.5-12-20171211.zip.torrent via torrent.

After downloading all the files, you should unpack the archive with the system image, for example, on the desktop.
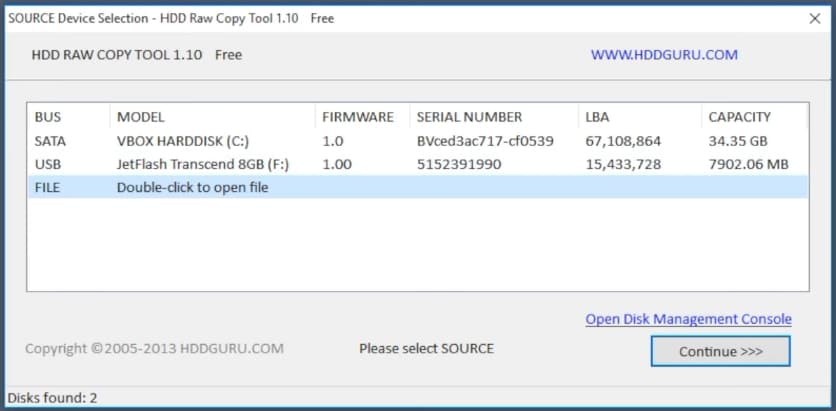
Insert the USB stick into a Windows computer and run HDDRawCopy. In the window that opens, select the last item from the bottom ” Double-click to open file ” and specify the path to our unpacked Hive OS image, click ” Continue “.
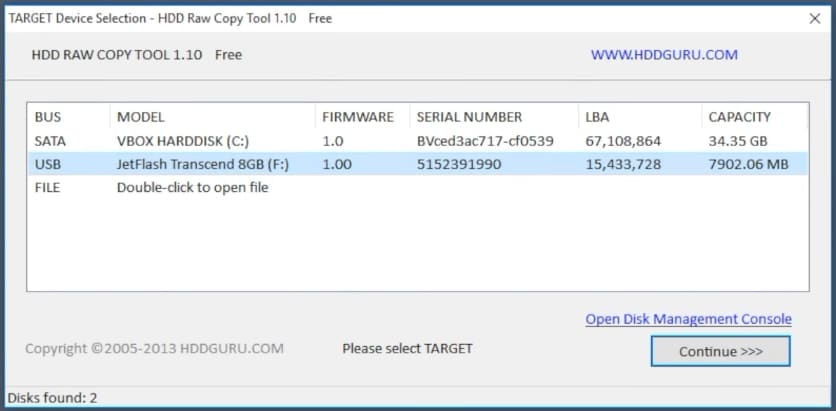
In the next window of the program, select the disk to which the system will be recorded, in our case this is the second USB item. You may have more drives in this dialog, as it displays all the storage devices on the system. Click ” Continue “.
In the window that appears, click the ” Start ” button and agree with the message about formatting the flash drive in the pop-up window by clicking ” Yes “.
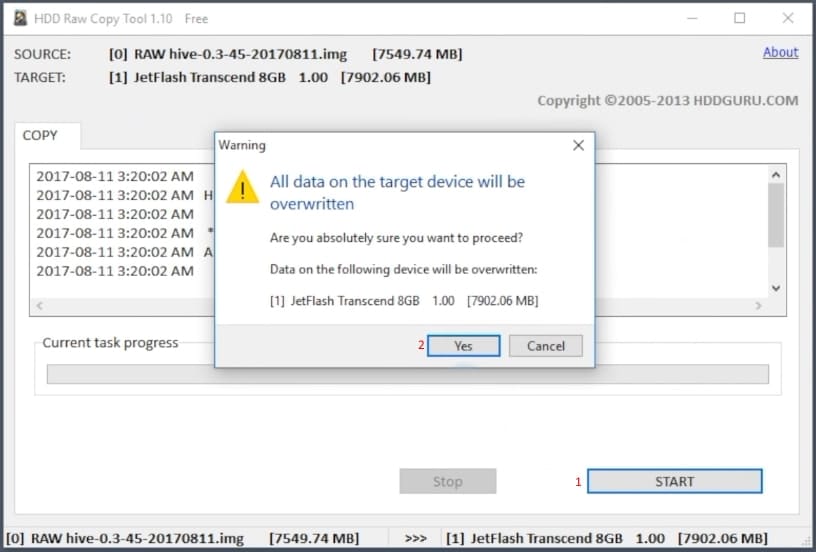
We are waiting for the end of copying files to the USB-drive. The green status bar will fill up, and the window will display the inscription ” Task complete “, which means “Task completed”.
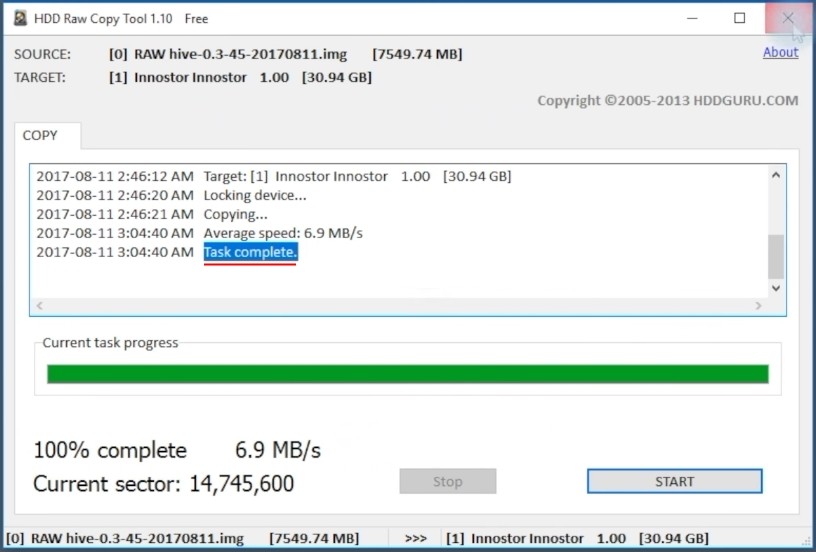
This completes the process of unpacking the Hive OS system to a USB flash drive. We remove the media and insert it into the USB port on the motherboard of the rig (farm), which should already be fully assembled – all video cards are connected.
After turning on the computer, it remains only to wait until the system finishes automatic configuration and asks to enter the Id of our rig with the password to it.
For clarity, I use a monitor, which must be connected to a video card inserted into the main PCI express 16 slot (directly or through a riser). You can also watch the process of starting the system via SSH, but I will talk about this in the next article.
Registration at hiveos.farm, rig and wallet creation
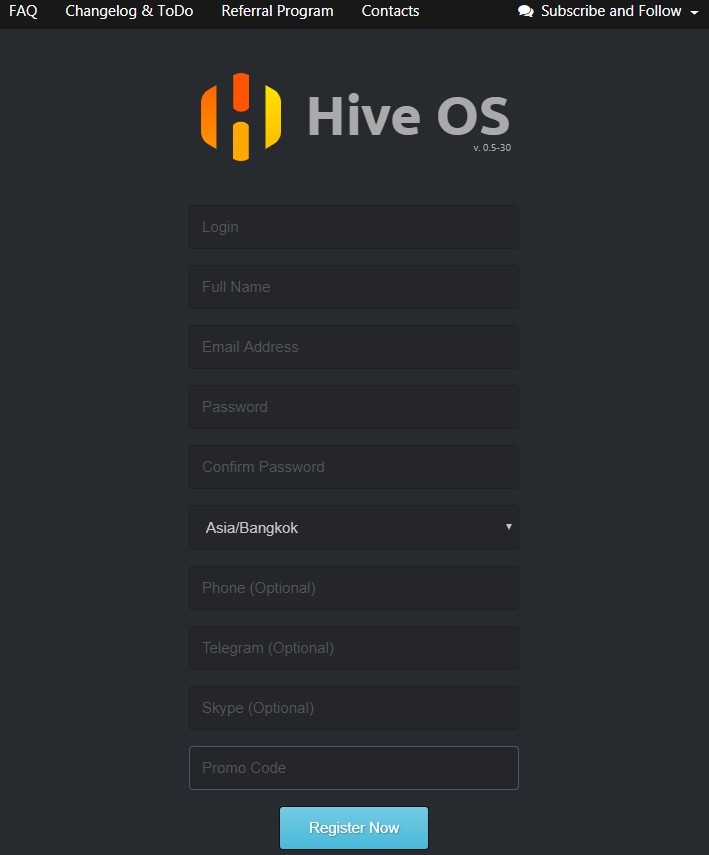
While the system configuration is being configured, do not waste precious time, go to the hiveos.farm website and register.
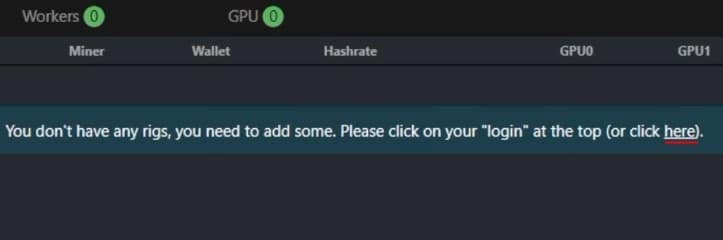
After entering the control panel, the system will notify you that you need to create your first rig. Click on the ” Here ” link .
Read also: Mining on Windows or on Hive OS, which is better?
In the window that appears, enter: the name of the rig, description and password. Leave the rest of the fields as they are and click ” Add “.
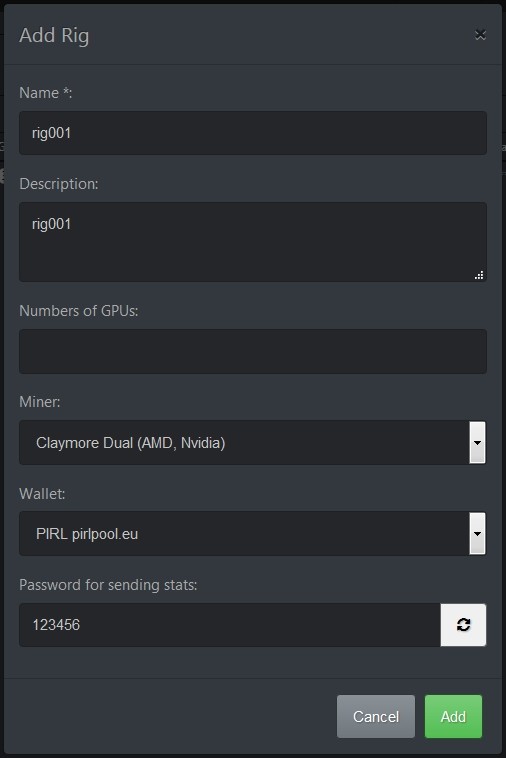
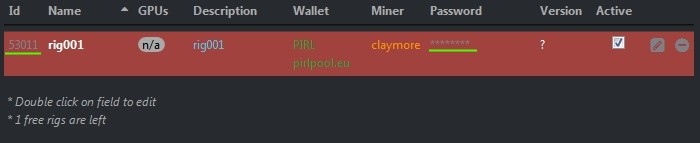
That’s it, our rig is ready, but not yet active. Remember its Id and password, as they will still come in handy.
If you hover your mouse cursor over the password hidden by asterisks, it will be displayed!
Now let’s create a Wallet. In Hive OS, a wallet is not just the address of your coin’s wallet, it is a config file that specifies the settings for miners to connect to pools. Something similar to bat-files in Windows, only more functional.
In the upper right corner there is a menu: Reload / Monitor / Stats / Rigs / Wallets .
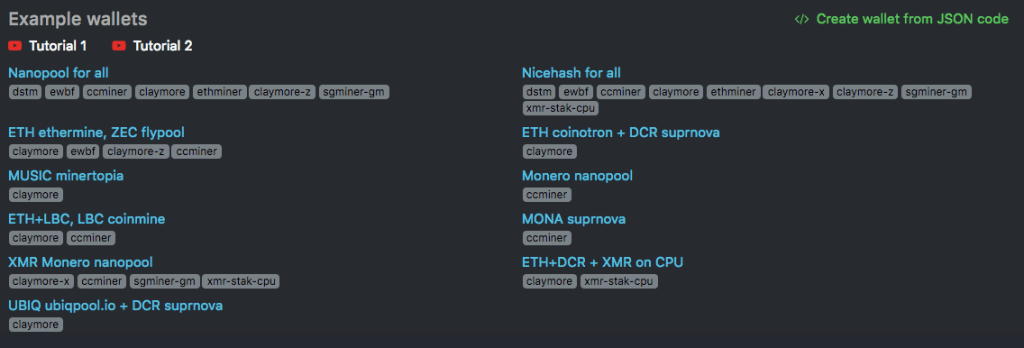
Go to Wallets. By default, the system provides us with several templates with pre-defined settings.
A detailed article on working with wallets in Hive OS will be here.
Let’s say we need to mine Ethereum, then select the ” Etherium 2miners.com ” wallet .
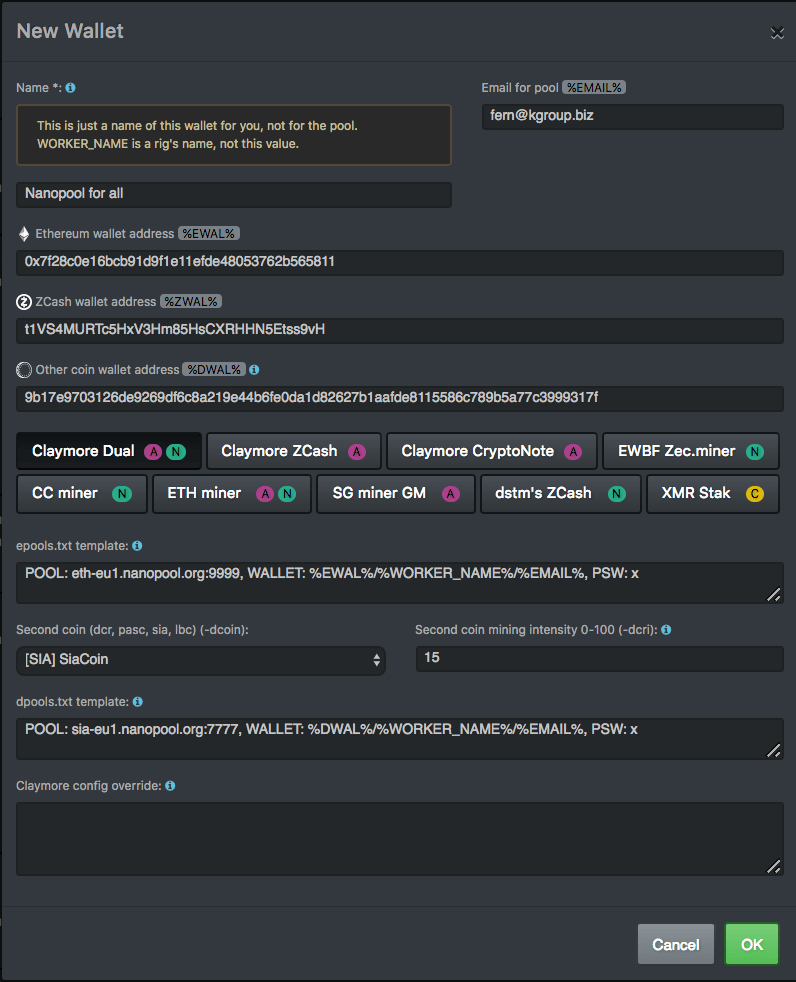
There are several fields in the window that opens:
- Name – name.
- % EWAL% – a field for inserting your address for any of the coins on the Ethash algorithm.
- % ZWAL% – a field for coin wallets based on the Equihash algorithm.
- % DWAL% – wallets of other algorithms.
Next are the tabs with the names of the miners’ programs. There are several of them here – I talked about this in the Main advantages of Hive OS . We select the desired miner, for Ethereum, Claymore Dual is activated by default .
epools.txt template – this field contains settings for the pool. For 2Miners.com, the settings are as follows: POOL: eth.2miners.com:2020, WALLET:% EWAL%, WORKER:% WORKER_NAME%, PSW: x .
There is nothing complicated here, the values taken from the pool are substituted into the string, these are the address and port. We filled in “% Wallet% ” above by inserting our wallet ethereum address into the field, % WORKER_NAME% is the name of our rig that was assigned to it when it was created, in our case rig001. The password “x” is also taken from the pool (you can change it to any, it does not matter). Click ” Ok ” to save the settings.
Rig activation and mining start
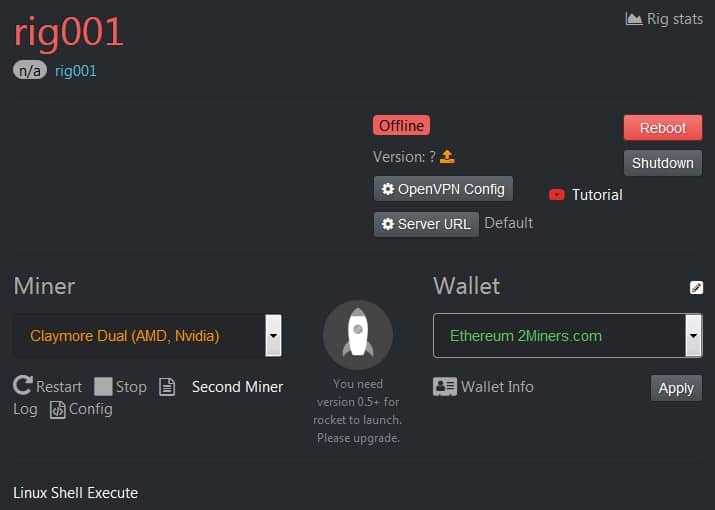
After setting up the wallet, in the top menu, go to the ” Rigs ” tab . Click on its name to open the personal control panel for the rig. In the ” Miner ” tab, select Claymore Dual (AMD, Nvidia), on the right from the drop-down list, select the previously edited wallet ” Etherium 2miners.com ” and click on the rocket to apply the settings.
We return to our farm where Hive OS has already completed its setup. The Hive logo should appear on the screen and the ID of the rig should be requested. We enter it, then the system will ask for a password, enter and press ” Enter “.
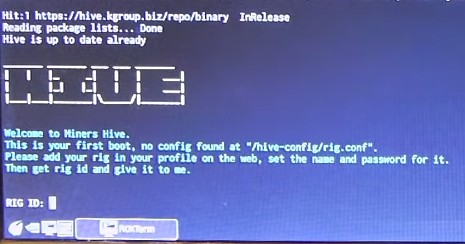
If everything is entered correctly, the system will make a couple of settings and the following message will appear – “Happy mining”.
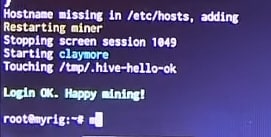
This means that the installation and configuration is complete. The mining process has been launched in accordance with the parameters we previously selected (Claymore + Etherium).
To check the mining process, on the farm, enter the miner command after root @ myrig: ~ # (the cursor will blink there) and press ” Enter ” – The miner will open.
At this point, you can disconnect the monitor and keyboard from the farm. In the event of a reboot, the system will auto-start every time, but you will not have to enter anything else. Mining will start automatically according to the last specified settings saved in the Config file.
Read also: How to download Hive OS from the official website
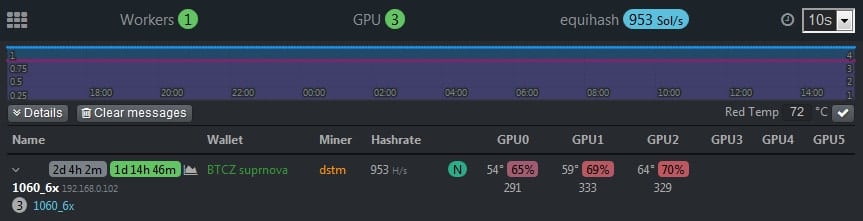
Now all system administration can be done through the web interface. To update the data, click the Reload button in the top menu.
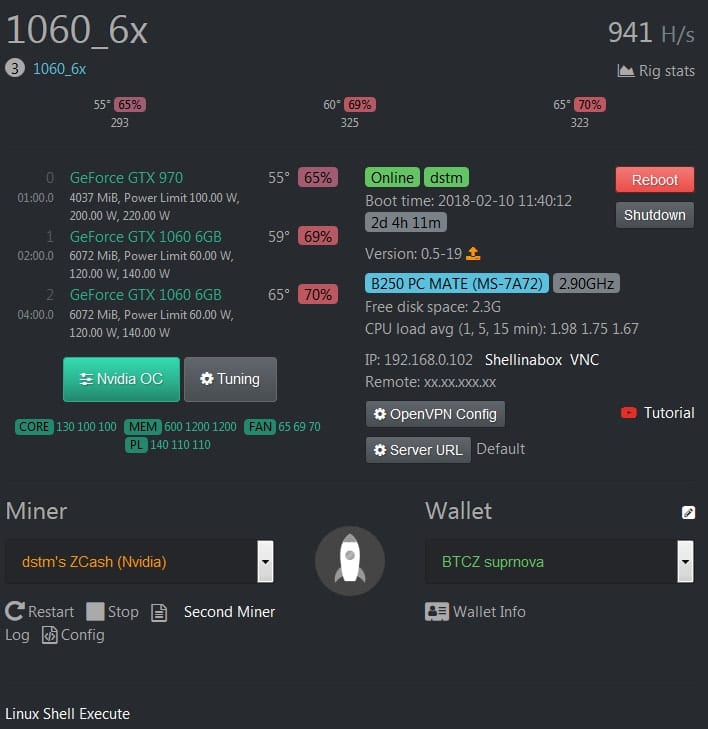
In the Monitor tab, you can watch the system in real time. It displays the number of GPUs, the total hash rate and algorithm, hash rate for each video card, stability on the timeline, the temperature of the video cards, the wallet used, the miner program.
The Stats menu tab displays farm statistics.
Overclocking settings for video cards in Hive OS, rig control
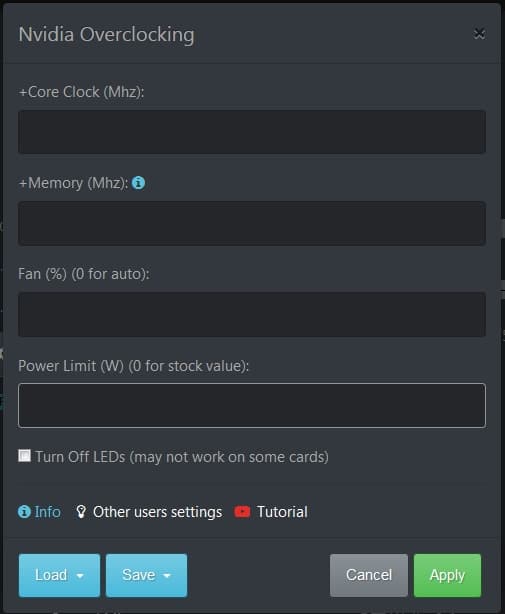
As for overclocking video cards and setting the fan speed, see the details here. To go to the overclocking menu, you need to click on the name of the required rig, after which its administration panel will open, with which we are already familiar. Since I have Nvidia cards and no AMD, the ” Nvidia OC ” button will be active . When you click on it, a window will open where you can specify an increase in the frequency of the video chip, an increase in memory (for Nvidia cards, you need to enter the memory parameters multiplied by 2. If in Windows you add 300, then you need to register 600 here. This is a feature of video drivers on Linux ), fan speed in percentage and Power Limit (absolute value in watts is entered.)
Riga operation management
Right there, on the administration panel of the selected rig, you can restart, stop, request the log or config of the active miner program, view information about the wallet used.
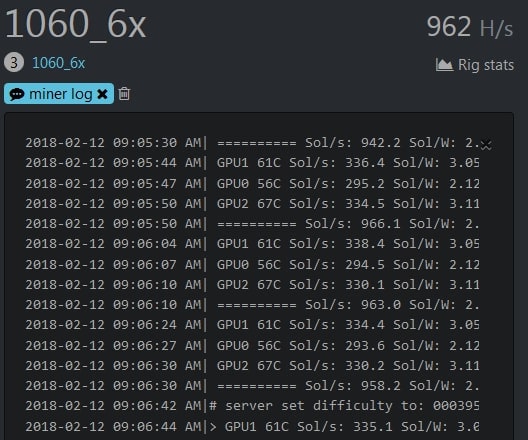
Log – is a snapshot of the miner’s working screen. When you click on the ” Log ” link, a command is sent to the Hive OS server, and from it to your rig, after which the requested data is returned from the rig to the server and to your web interface.
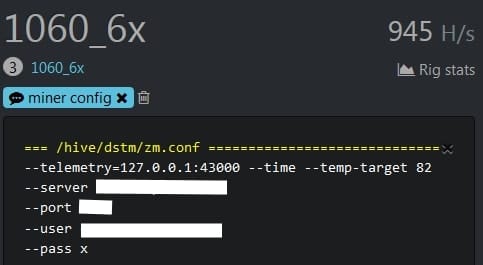
Config – will display the miner program settings that we entered in the wallet.
To completely shutdown or reboot the farm, you must use the ” Reboot ” and ” Shutdown ” buttons next to which the system information and technical characteristics of the computer on which the system is running are displayed (online-offline status, miner status, operating time, motherboard name and Ip adress) …
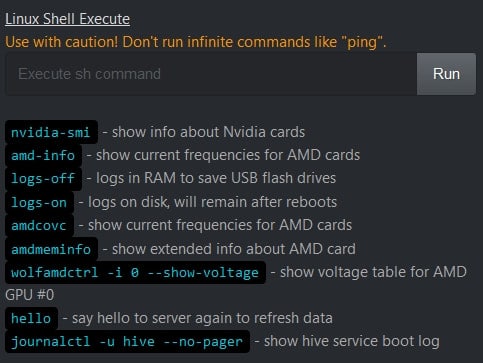
Linux Shell Execute
Designed to enter Shell commands. By default, the system has several commands for requesting information about the operation of video cards.
Connection using Shellinabox, VNC
To access the rig, there are tools such as Shellinabox and VNC. They will work if the computer from which the connection is made is in the same network as the farm. The first tool does not have a graphical interface, and all commands will need to be entered manually. The second tool is somewhat similar to TeamViewer and provides a graphical interface.
To connect, you need a login: user and a password: 1 .
I think it’s time to end this article on starting and configuring Hive OS . I hope you did it like me. Detailed overviews of all the functions of this operating system are coming soon. Happy mining!
Hive OS launch video
Related posts:
 How to connect to hive using OpenDev Watchdog: Lets Take a Peak
 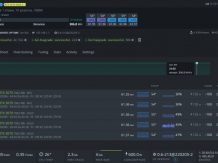 Dual Mining ETH + TON on Hive OS: Overclocking | 2022 Profitability | TONCOIN
  How to set up your Hive OS wallet 2022: ETH+DCR| Config EWBF Zec.mine + Ccminer
  Hiveon ASIC firmware: Cryptojacking | Hashrate Theft | Mining on Hive OS (Safe?)
  Dual mining ETH + TON Ethereum: I TON Coin lolMiner (HiveOS) | Max Loss 2022 Guide
  Dual mining ETH + ALPH: Ethereum I Alephium | T-Rex miner 0.25.0: ETH + ALPH (No LHR)


