


How to add a printer to the desktop “Send to” context menu in Windows 11/10
The right-click context menu on the Windows 11/10 desktop is a quick way to perform many actions, such as opening a file, copying, pasting, deleting, compressing to a zip file, creating, editing, sharing, and much more. The menu also allows you to send the file to a Bluetooth device, fax, mail recipient, and even a printer. Also, if you want to add items to the context menu, and even delete or edit the menu, you can do so using a third-party application or by editing the registry editor. In fact, you can also restore what is missing «New“Choice or lack”Opened”In the context menu.
But, if the printer is not already added to the «send to”In the desktop context menu or does not select it automatically, you will need to add the printer separately. Let’s see how.
Add the printer Send to menu on your Windows operating system helps you send documents directly for printing, to the printer you have selected, without having to open the file. Also, if you have multiple printers, add those printers to the Send to menu, on your network, allows you to have the option of getting your printing from any of the added printers.
Let’s see how to add a printer to the Send to menu on your Windows 11/10 PC:
Paso 1: press the Win + R keys simultaneously on your keyboard to open the Run command window.
Paso 2: Copy and paste the path below into the Run command search bar and press Get into to open the Printers folder at File Browser window:
shell:PrintersFolder
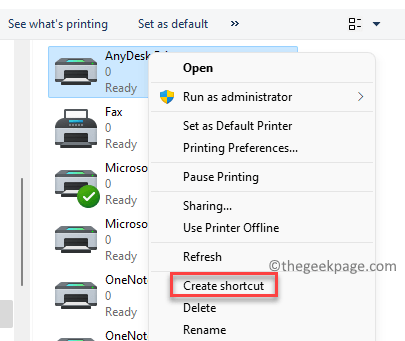
Paso 3: At Printers folder, go to the right side, find the printer you want to add to the Send to menu, right click on it and select Create shortcut.
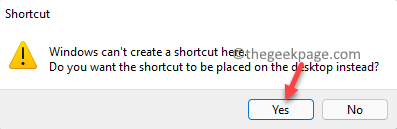
Stage 4: Now you will see a message: Shortcut, what does it say ” Windows cannot create a shortcut here. Do you want the shortcut to be placed on your desktop instead?“.
Click on Yes to proceed.
Paso 5: Now, go to the desktop and copy the newly created shortcut for the selected printer.
Paso 6: Now go to Start, right click on it and select To run.
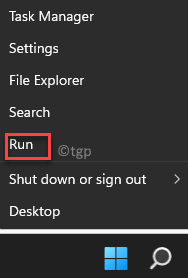
Paso 7: This will open the Run command window.
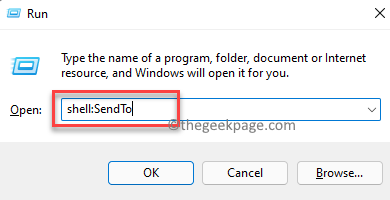
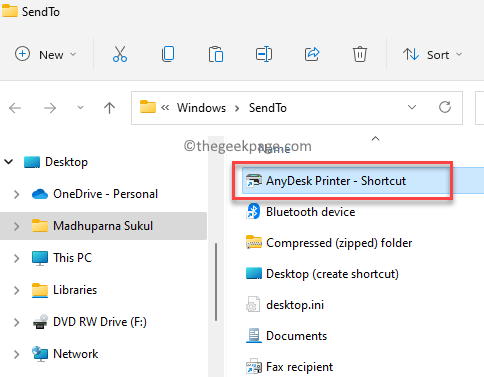
Here, type the path below in the search field and hit OK to open the Send to file:
shell:SendTo
Paso 8: Then in the Send to folder in the File Browser, paste the shortcut for the selected printer that you copied from the desktop into Paso 5.
Now when you want to print a file with this printer, you can right click the file, select Show more options, click on Send to and you will see the printer you just added. Select it to print your document.
*Note – To add more printers to the Send to desktop context menu, repeat the Paso 1 through 8.
Related posts:
 How to access Steam games without an internet connection
  How to view FPS with Xbox Game Bar in Windows 10: Steps Made Easy
  Hacked account? How to check and remedy
  How to make video calls from WhatsApp Web
  How to increase the RAM memory of a desktop or laptop + Tips and Tricks
  How to organize your YouTube subscriptions into categories
+ Tips and Tricks
How to organize your YouTube subscriptions into categories
+ Tips and Tricks


