


How to Backup Files in Linux with Pika Backup
Borg Backup is a command line tool that has been around for quite some time. It is beneficial and makes backtracking very easy. However, Borg is not very useful for new users who are not comfortable with the terminal.
That’s where Pika Backup comes in. It is an elegant user interface on Borg. It makes the use of the Borg backup tool much easier. Here’s how to use it to back up your files on Linux.
Installing Pika Backup on Linux
The Pika Backup tool works great for backing up files on Linux. However, the application is not pre-installed on any Linux operating system, so you will need to get it working before trying to use it.
The main way to install the Pika Backup tool is through the Flathub app store as a Flatpak package. However, it is also possible to make it work via Arch Linux AUR, the OpenSUSE RPM package, and source code.
To get the Pika Backup tool up and running on your Linux computer, start by opening a terminal window. You can open a terminal window on the Linux desktop by pressing Ctrl + Alt + T on the keyboard. Or search for “Terminal” in the application menu and run it that way.
With the terminal window open and ready to use, the installation can begin. By following the installation instructions below, get the latest version of Pika Backup up and running on your Linux PC.
Flatpak
The Flatpak version of Pika Backup is the easiest to get up and running. To start the process, you will need to configure the Flatpak runtime. Runtime configuration is a one-time process, and once configured, you can install Pika.
To configure the runtime on your Linux PC, follow our guide on the subject. After setting it up, you can start the installation of Pika Backup. Using the remote flatpak-add command, enable the Flathub app store.
flatpak remote-add --if-not-exists flathub https://flathub.org/repo/flathub.flatpakrepo
After setting up the Flathub app store on your computer, use the flatpak installation command to configure the Pika Backup application.
flatpak install flathub org.gnome.World.PikaBackup
Arch Linux
If you are an Arch Linux user, you will be able to install the Pika Backup application through the Arch Linux user repository. To get started, you need to install the Trizen AUR helper tool using the commands below.
sudo pacman -S git base-devel

git clone https://aur.archlinux.org/trizen.git

cd trizen/

makepkg -sri
With the Trizen application installed on your Arch Linux computer, you will be able to install AUR’s Pika Backup tool on your computer using the trizen -S command.
trizen -S pika-backup
OpenSUSE
Apart from Arch Linux, OpenSUSE Linux is the only Linux operating system with an installable package for Pika Backup. To get it working on your OpenSUSE PC, start by going to the Pika Backup OpenSUSE Software Page.
Once on the page, find the version you are using, select “Show Community Packages” and click the “1 Click Install” button to configure it on your OpenSUSE Linux system.
Source code
If you want to compile the Pika Backup application from source code, you can. Head over to Pikay’s Backup Gitlab Page and follow the build instructions.
How to Backup Files in Linux with Pika Backup
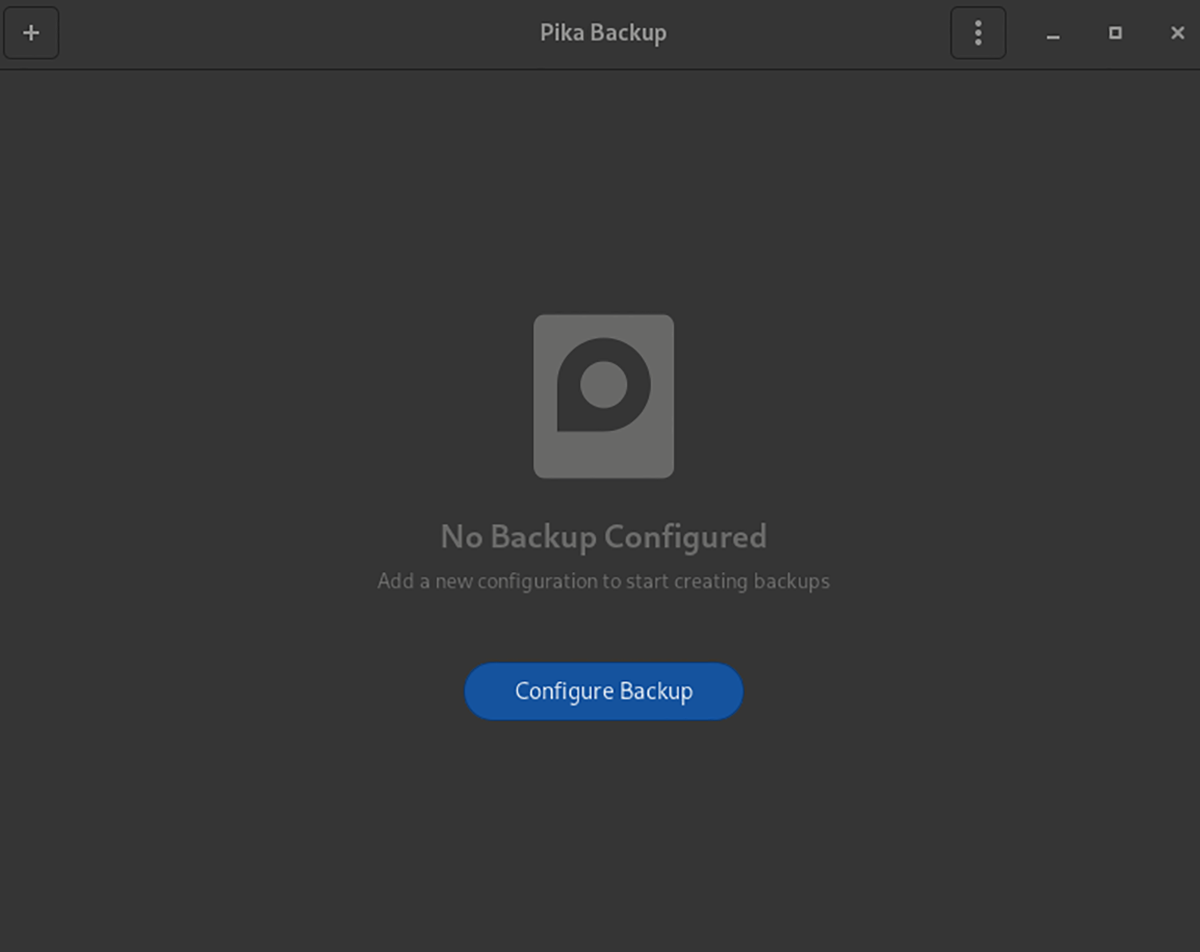
To make a backup with Pika Backup, start by launching the application on the desktop. You can open the application by searching for “Pika Backup” in the application menu. Once the app is open, follow the step-by-step instructions below.
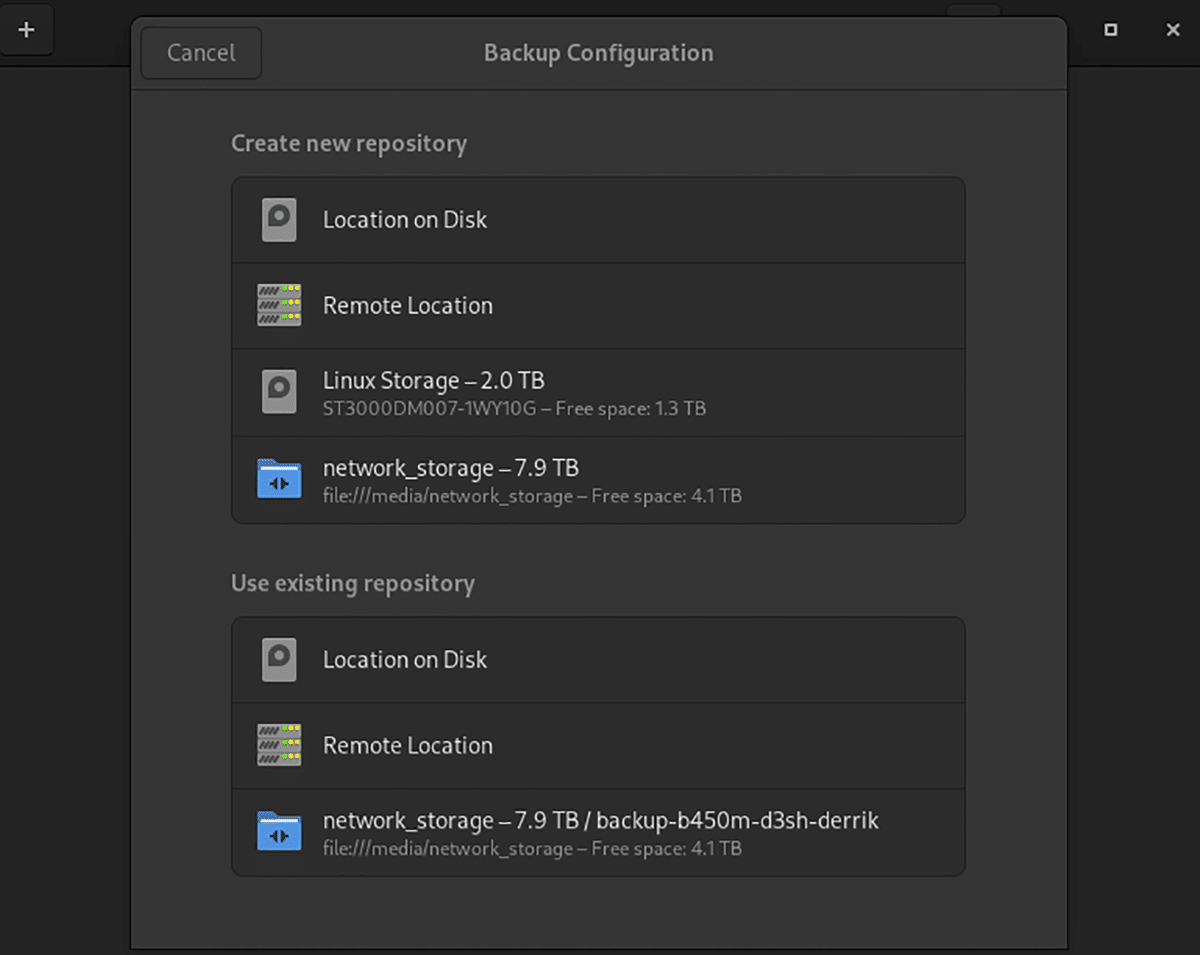
Paso 1: Find the “Configure Backup” button and click on it with your mouse. When you click this button, you will be prompted to create a new repository. Select a network location, a location on the disk, or a separate hard drive.
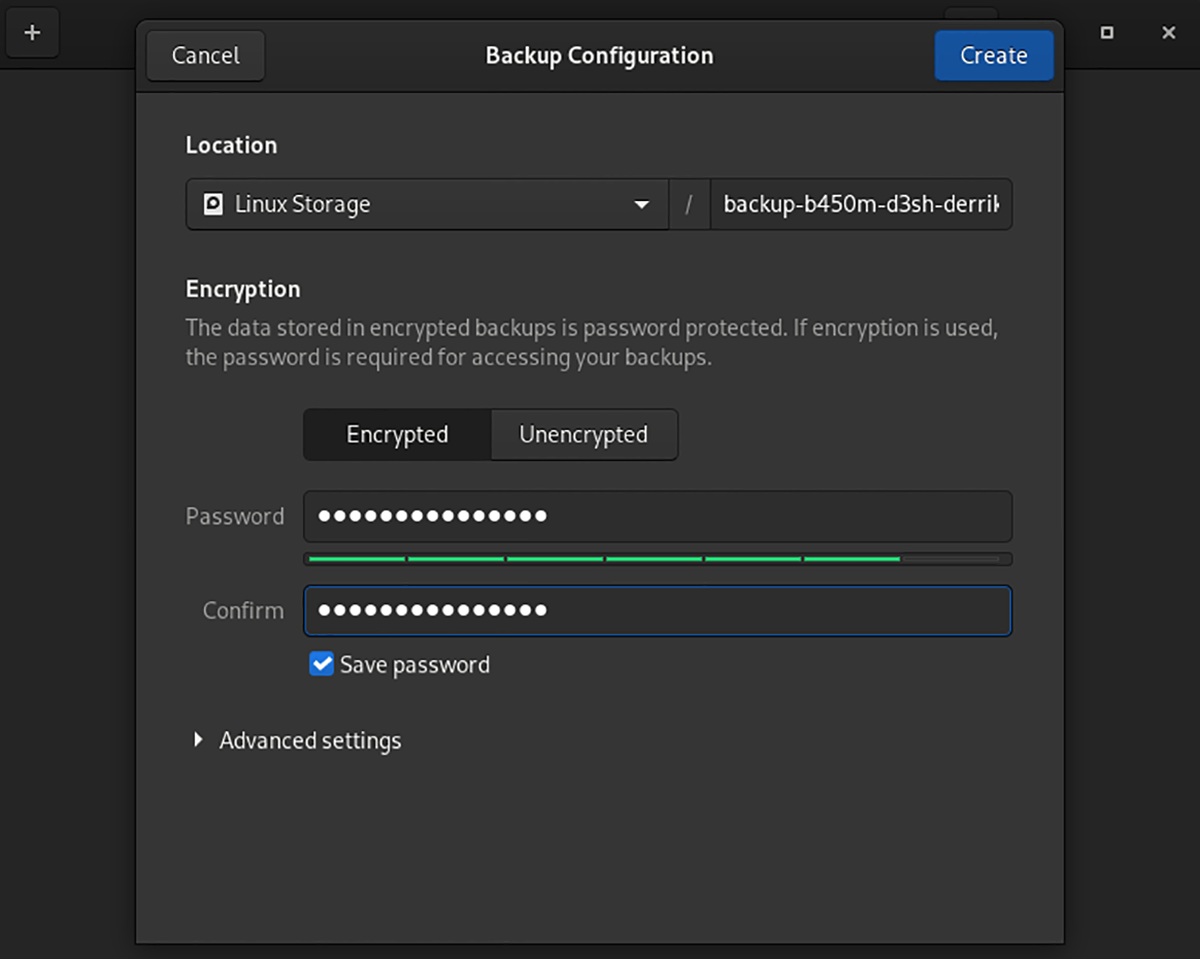
Paso 2: When you choose a location, you will be asked about encryption. We highly recommend using the encryption feature built into Pika. When you have set up your encryption password, click the “Create” button.
Paso 3: Look for the “Files to Backup” section within Pika. Then click the “+” button to add folders to backup. By default, only the home folder is included. However, feel free to add other locations on the system to add to your Pika backup.
Paso 4: After adding locations to the backup, you may want to refer to the “Exclude from backup” section. Use this section to exclude any backup locations.
Paso 5: Find the blue “Backup Now” button and click on it with your mouse. Selecting this button will start the backup with Pika. The process will take some time. When complete, click “Files” to view your backups.
Feel free to click the backup button at any time to create additional backups in Pika Backup.
Related posts:
 How to access Steam games without an internet connection
  How to view FPS with Xbox Game Bar in Windows 10: Steps Made Easy
  Hacked account? How to check and remedy
  How to make video calls from WhatsApp Web
  How to increase the RAM memory of a desktop or laptop + Tips and Tricks
  How to organize your YouTube subscriptions into categories
+ Tips and Tricks
How to organize your YouTube subscriptions into categories
+ Tips and Tricks


