


How to configure Asus router with Huawei modem (Bridge, Wan, Vlan)
– Take a look at these tips, tricks, and solution you can use to make your life much easier with your devices whenever problems arrive and complications which you may find difficult to deal with.
In order to improve the quality of the internet in my home, I have purchased the Asus RT-AC68U router, a device launched back in 2014. Despite its age, I must say that I think it is more than enough for my home (and I would dare to say for most average users). But it is not what I will talk about for now here, but its configuration.
In my house I have a fiber optic Internet connection, which is managed by a Huawei HG8546M modem / router, insufficient equipment for the amount of equipment that connects here (up to 15 computers in peak hours), which is why I bought this Asus router. The idea then is to transfer the router functions of the Huawei team to the Asus, the latter that will do it much better and relieve the load of the first, leaving it working only as a modem.
How to configure the WAN of the Asus RT-AC68U router
I have done this before with a TP-Link router with DD-WRT firmware and the process has not been much different with this Asus router with original or stock firmware (Asuswrt). Before starting I must clarify that here I will use several terms about networking or networks with which you should be familiar.
First, you must enter your provider’s modem configuration (you must know their IP, username and password or you will have to ask your ISP). There you should review the data in the WAN section, mainly the MAC Address of the router, IP Acquisition Mode, VLAN and its priority (if it is the case of your connection). Write down all these data because they will be used to place them in the router.
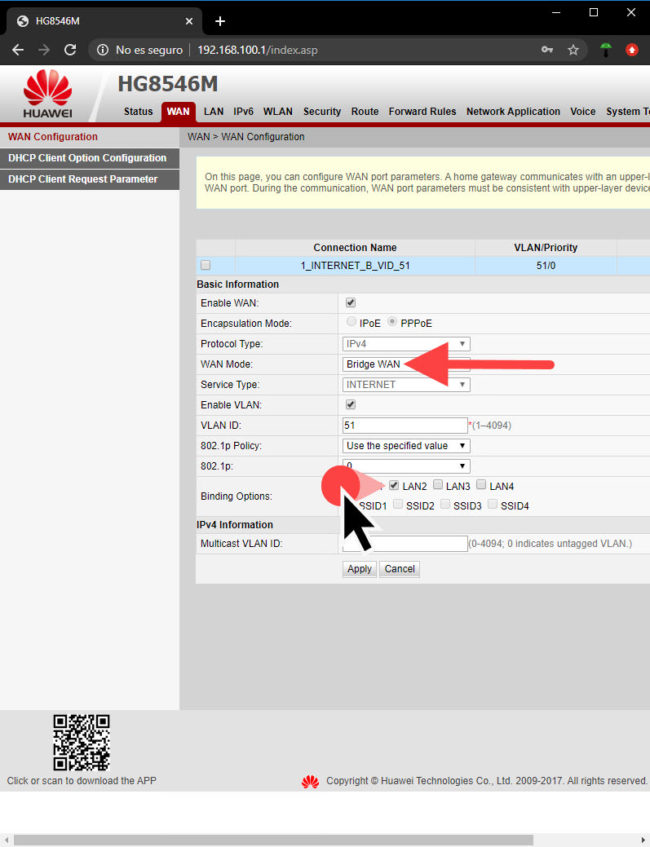
Next you must configure your modem in “Bridge” mode as seen above, and in “Binding Options” mark the LAN port through which you will bridge the WAN to the router (in my case I chose LAN 2). This port is where we will connect the router.
Once this is done we will have to enter the ASUS router configuration and go to the WAN section (if it is the first time you enter, you can put any information in the configuration wizard that you can later modify).
As there is no direct VLAN support, it is necessary to make this setting, thus sacrificing a LAN port on the router. The WAN port is unusable. This can probably be solved with Merlin and a few SSH commands.
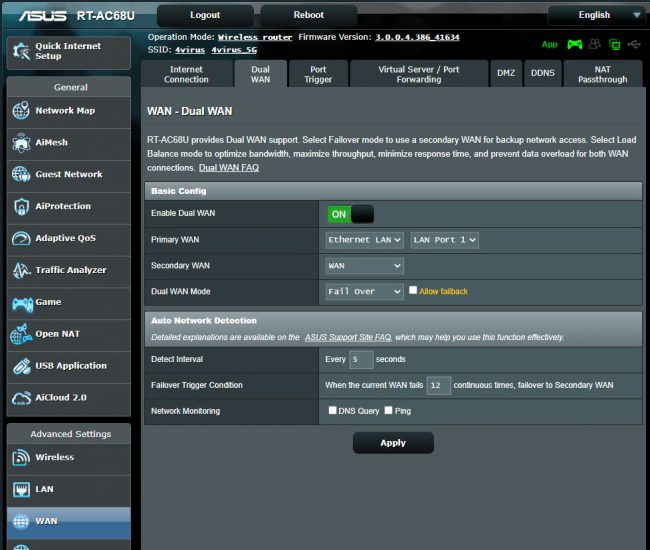
Since in my case my provider uses a VLAN for the WAN and that the ASUS RT-AC68U router does not offer direct support for it, we will have to use a trick that consists of activating the Dual WAN function, which is in the section of WAN of the router. There we must leave the option “Ethernet LAN” selected as «Primary WAN» and choose the «LAN Port 1» next to it. As «Secondary WAN» we will leave the «WAN» option selected. The rest of the settings will not be touched and we will leave the default values. We will click on the «Apply» button.
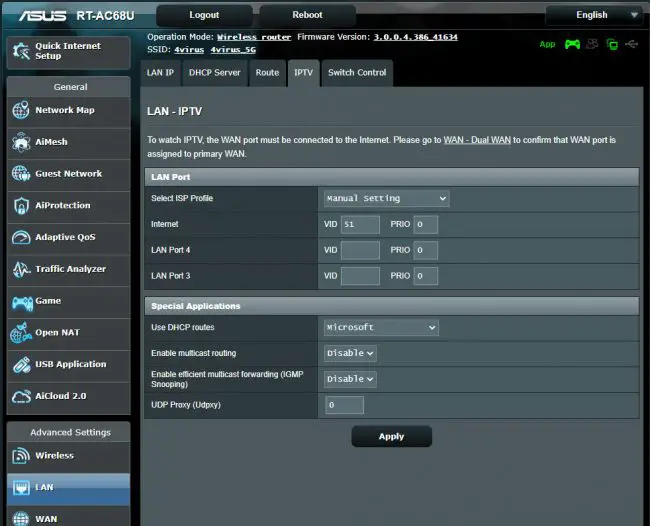
Once we have LAN port 1 working as WAN, now we can assign it the ISP’s VLAN, which in my case is 51. This is done by going to the LAN section, “IPTV” tab. Where it says “Select ISP Profile” we will leave selected “Manual Setting”. At the bottom, in the “Internet” row, we must enter the value of 51 (or the one that corresponds to your case) in the VID (VLAN ID) field and next to the priority, which in my case is 0. The rest of the parameters remain as they are. Similarly, click on «Apply».
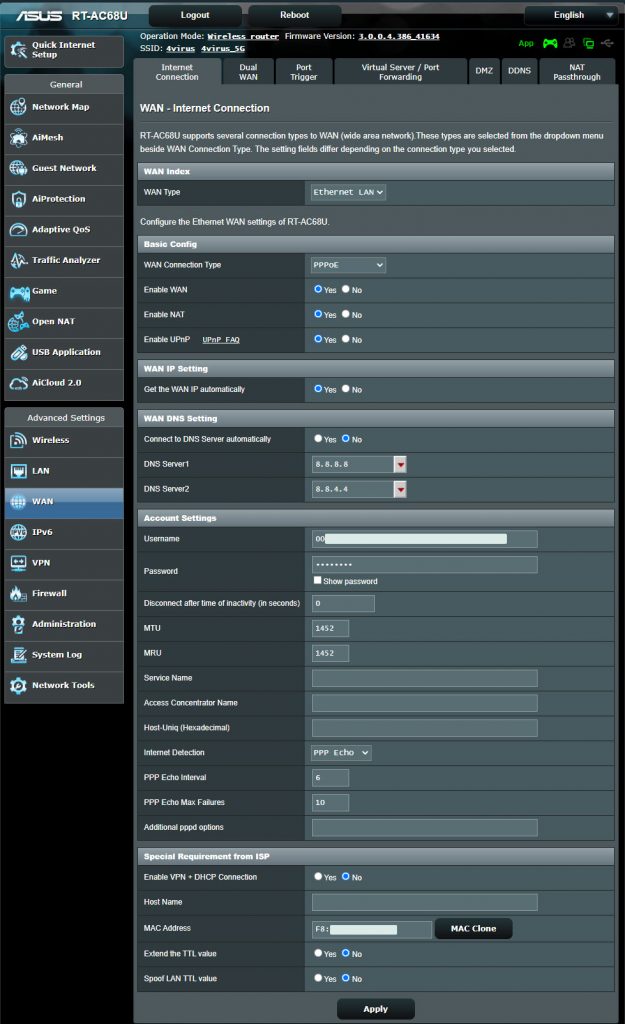
You can change some WAN settings on the router optionally. For example, I have changed the MTU and MRU to 1452 (1492 was the default value). I have set manual DNS (which were on automatic) and I have disabled the “Enable VPN + DHCP Connection” option.
We will return to the WAN section to complete the configuration in the “Internet Connection” tab. We will see that the WAN Type option will already be selected “Ethernet LAN” due to the change we made before. This is how it should look. We will leave the rest of the parameters by default, changing only those of our Internet provider. In my case, the type of WAN connection to PPPoE, the username and password for Internet access (which I requested from my ISP) and the MAC address of the modem, which is entered in the MAC Address field. Finally we will click on «Apply» and we will restart the router from the «Reboot» option at the top (this is very important!).
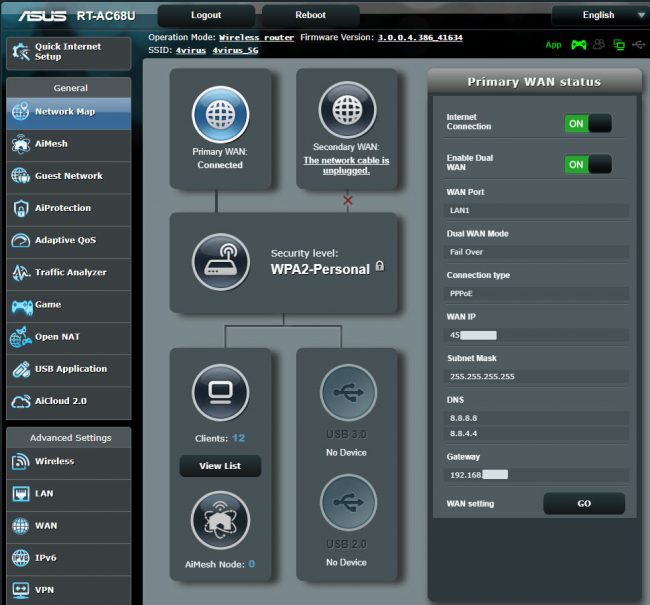
I have not been able to configure my ISP’s gateway on this router, although it was not necessary either, because it was automatically detected. However, on clients the IP address of this router will appear as gateway, in this case 192.168.1.1.
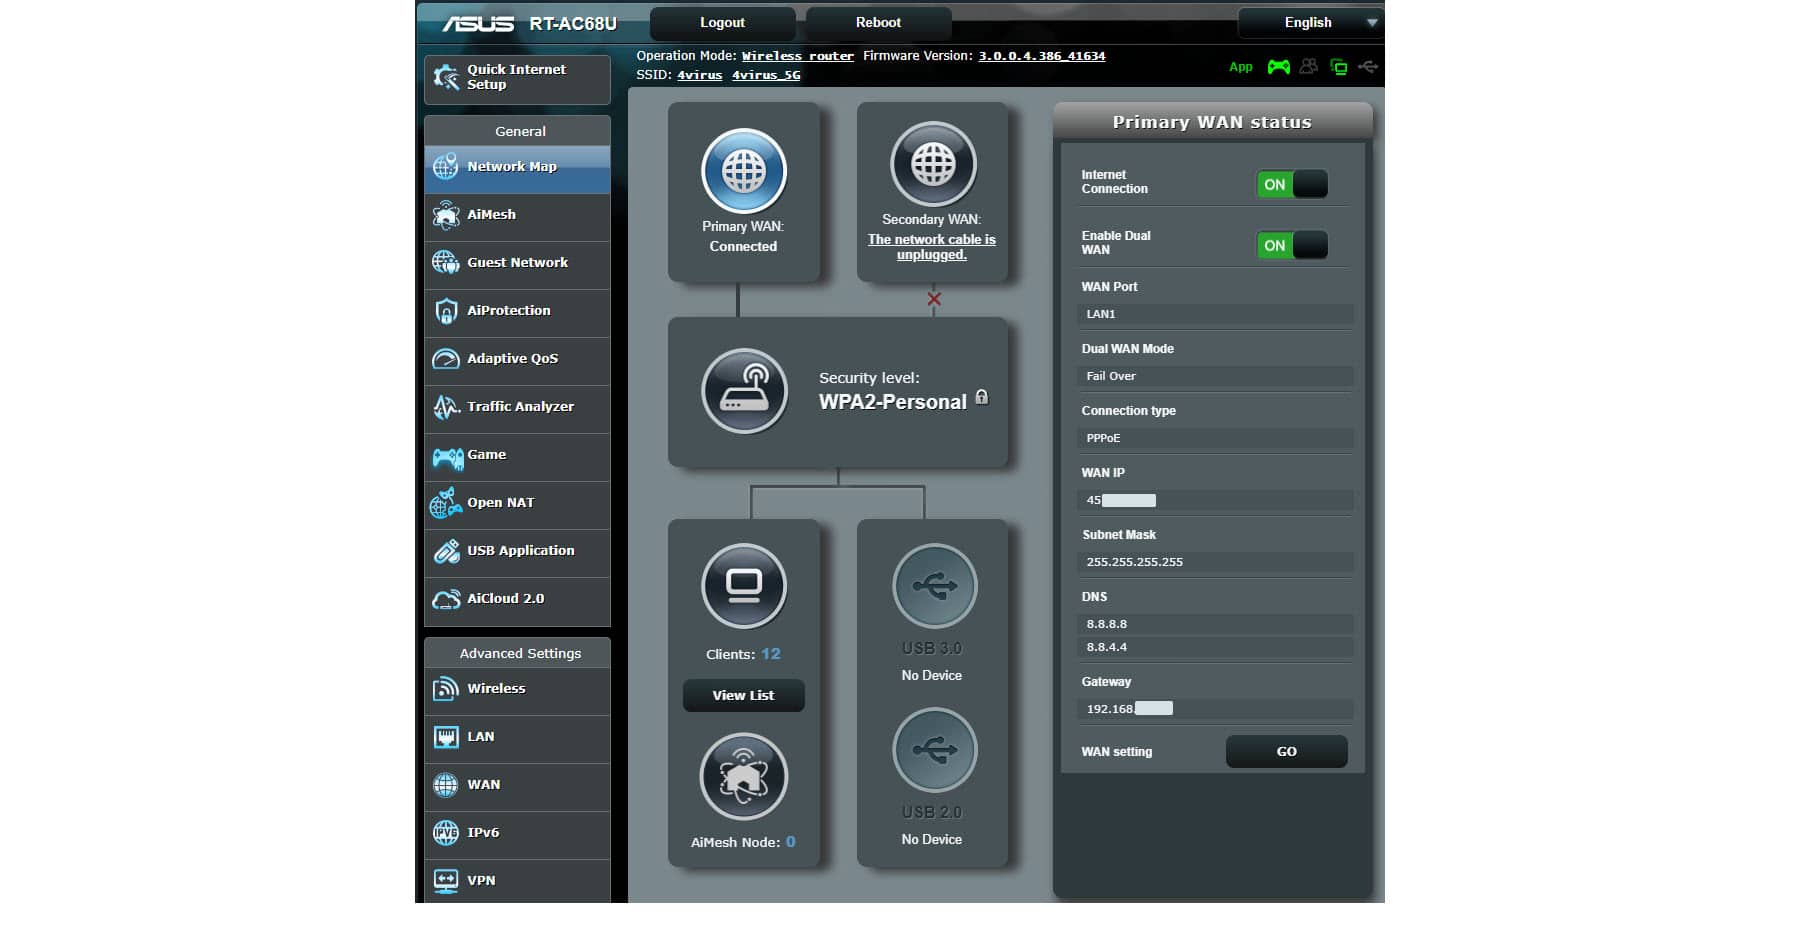
Finally, with everything already configured, we will connect the LAN 1 port of the router with the LAN port of our modem that we chose above for the bridge (in my case the LAN 2) and with this the router should already hook up and inherit the Internet connection. It should show ‘Connected’ under ‘Primary WAN’ as seen above. By touching there we can see the data of the Internet connection, including our IP.
Conclution
For now, this ASUS router seems to have improved the performance and speed of the network, considering that before it was using a modest TP-Link WR941ND router with just 32 MB of RAM and a 700 MHz CPU. Although the CPU of this Asus does not exceed around 15-20% usage even with 12-15 clients (on TP-Link it also had similar low CPU usage), RAM if more than 50% (approx. 140MB) was used, proving probably negligible which was in my case having a router with just 32 MB of RAM. Another thing that I really like about this ASUS router is that I have much friendlier QOS functions than DD-WRT. On the other hand, the range of this ASUS router is less, with just 23.5dBm of transmission power (command wl txpwr_target_max by ssh or telnet), compared to the 28 dBm I had in the TP-Link (thanks to DD-WRT). Also, with no direct VLAN support, you lose a LAN port due to the indicated configuration. However, with the help of the Merlin firmware, apparently it is possible to upload its transmit power from an ASUS router.
More information: ASUS (VLAN Tagging), SNBforums (VLAN tagging in Merlin)
Speed up your SLOW Internet in 5 steps
How to “change” your Internet provider’s router for a faster and more powerful one
Double NAT, cause of a slow or “LAG” Internet
Related posts:
 How to access Steam games without an internet connection
  How to view FPS with Xbox Game Bar in Windows 10: Steps Made Easy
  Hacked account? How to check and remedy
  How to make video calls from WhatsApp Web
  How to increase the RAM memory of a desktop or laptop + Tips and Tricks
  How to organize your YouTube subscriptions into categories
+ Tips and Tricks
How to organize your YouTube subscriptions into categories
+ Tips and Tricks


