


How to enable or disable core isolation memory integrity in Windows 11, 10
Virtual machines are used by most Windows users today. When kernel isolation on your system is disabled, security risks and attacks are expected. Even if kernel isolation is set, if the user upgrades the system, memory integrity will be disabled.
The system will be protected against attacks if kernel isolation is enabled. For people who use virtual computers frequently, it is highly recommended that you enable them.
If you are looking for instructions on how to enable or disable Core Isolation Memory Integrity on any Windows 11 system, this page may help.
How to enable or disable Core Isolation Memory Integrity in Windows 11 using the Windows Security app
Step 1: Press the Windows key and type window security.
Step 2: Select the windows security application from the search results as shown below.
Step 3: Go to device security option in the menu on the left side.
Step 4: Then click Core insulation details below the core insulation section at the top, as shown below.

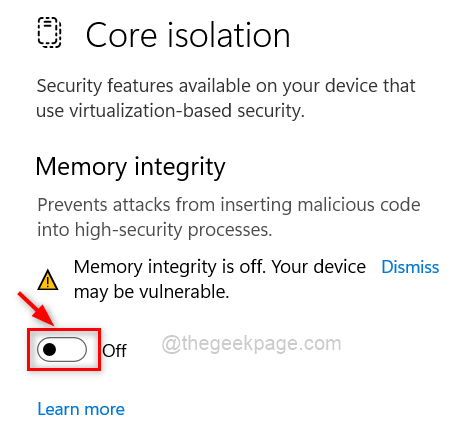
Step 5 – On the Core Isolation page, click the lever button memory integrity to convert it Off if you want deactivate as it’s shown in the following.
Step 6: If you want enable and then click the lever button to turn it On As shown below.
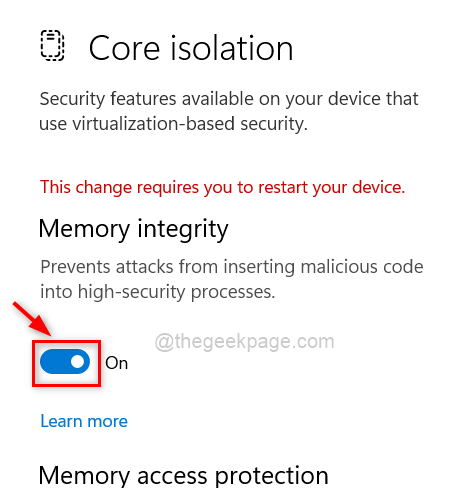
Step 7: After enabling it, reboot the system for the change to take effect.
That’s it.
How to enable or disable Core Isolation Memory Integrity in Windows 11 using Registry Editor
NOTE: Before starting, please save/export the log file so that the user can revert it if something goes wrong as it could completely damage the system.
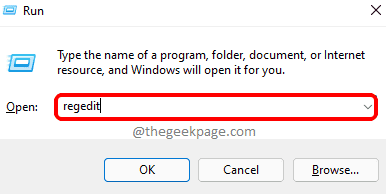
Step 1: Press Windows + R keys to open the Run command box and type regeditar
Step 2: Hit Get into key to open Registry editor.
NOTE: Accept the UAC prompt by clicking Yes continue.
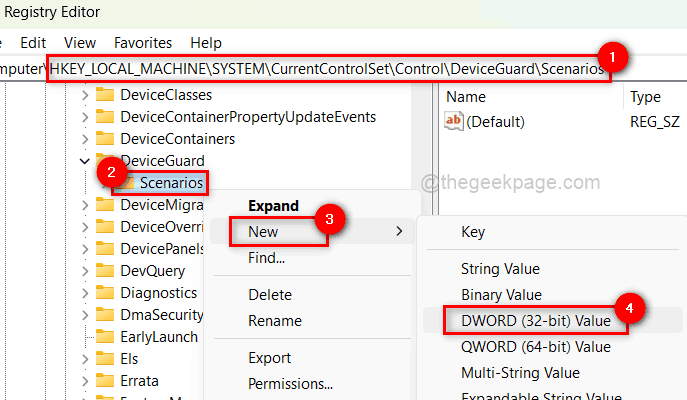
Step 3: In the Registry editor, copy and paste the following path into the address bar and press Get into key to get to scenarios Register key.
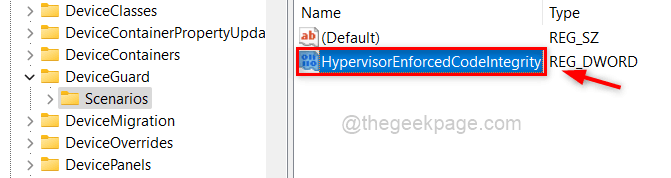
Stage 4: The right button of the mouse about him scenarios registry key and select Nuevo > Valor DWORD (32 bits) from the menu as shown below.
Step 5: Rename the new DWORD value to HypervisorEnforcedCodeIntegrity and double click on it to open it.
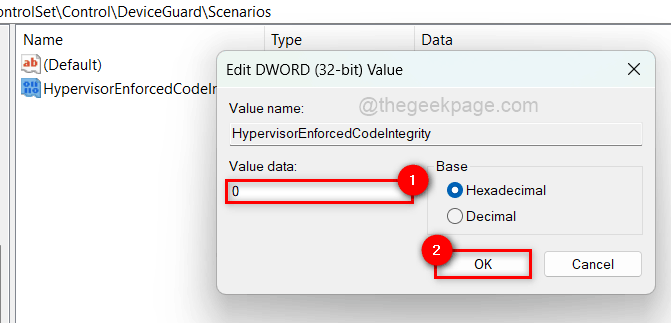
Step 6: Next, enter 0 in the Value Data field and click OK if the user wants deactivate that.
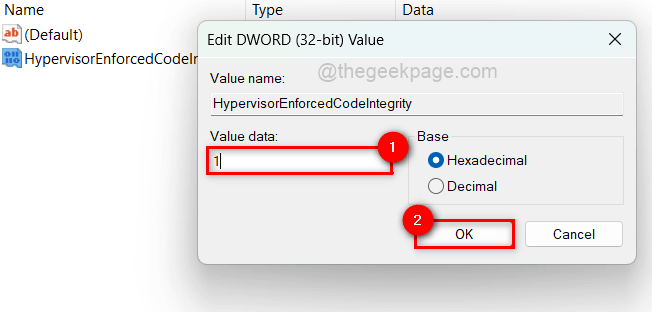
Step 7: If you want enable that, enter 1 in the Value Data field and click OK As shown below.
Step 8: Once done, close the registry editor.
Step 9 – Reboot your system once.
That’s it.
Related posts:
 How to access Steam games without an internet connection
  How to view FPS with Xbox Game Bar in Windows 10: Steps Made Easy
  Hacked account? How to check and remedy
  How to make video calls from WhatsApp Web
  How to increase the RAM memory of a desktop or laptop + Tips and Tricks
  How to organize your YouTube subscriptions into categories
+ Tips and Tricks
How to organize your YouTube subscriptions into categories
+ Tips and Tricks


