


How to enable Windows 11 hidden administrator account
Microsoft’s Windows 11 operating system includes several user accounts, including an administrator account, which are disabled by default. Users starting Windows 11 for the first time must create a user account to start using the operating system. The user account is administrative and other user accounts can be normal or administrative user accounts.
It is recommended to use standard user accounts in Windows 11, as it limits what malicious code can do on the system, since it runs with the same rights as the user account.
Tip– You can check out our guides for Windows 10 and Windows 8 here.
The Windows 11 administrator account
The Windows 11 administrator account is disabled by default. Administrative privileges are required to enable it on the device.
You may wonder why you want to enable the administrator account if you already have administrative rights. One of the main differences between a user’s account that is from the administrators group and the administrator account that is included by default is that the latter does not receive UAC notices.
It can also be a useful backup account in case things go wrong and you have been locked out of the system.
How to enable the default administrator account in Windows 11
The process requires only a few commands, in fact only one command if you’re in a hurry, running from an elevated command prompt window.
These are the steps:
Step 1: launch an elevated command prompt window
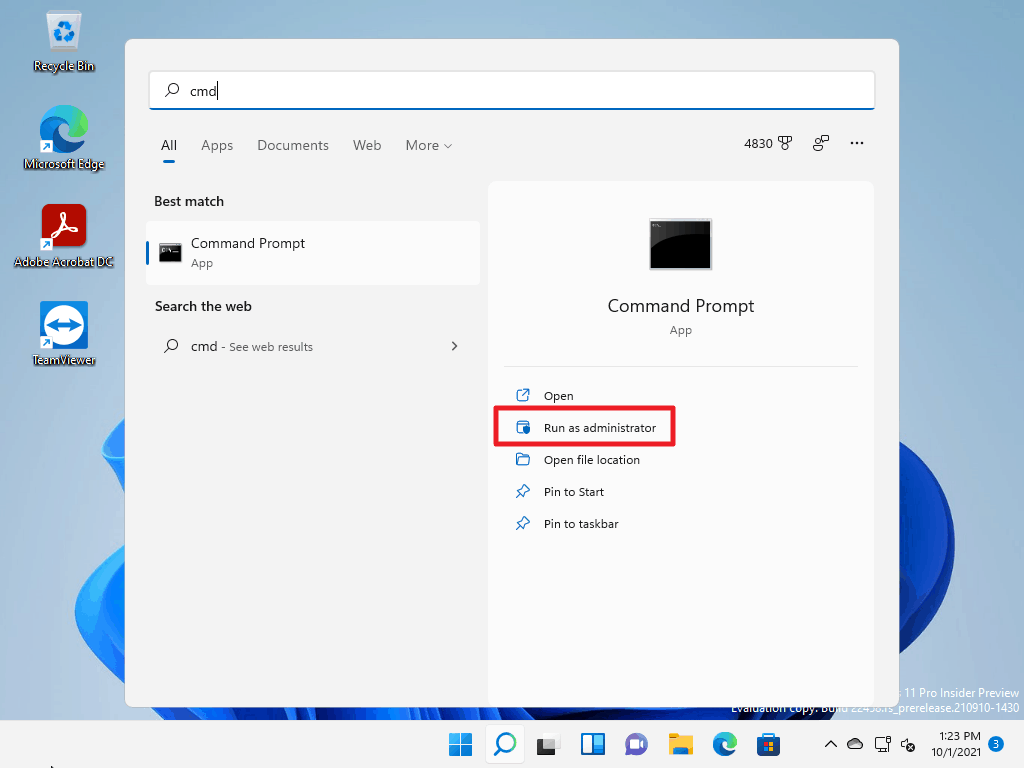
Launch an elevated command prompt window, for example by opening the Start menu, typing CMD and selecting “run as administrator” in the context options displayed by Windows 11. You must confirm a UAC prompt to launch the command prompt window high.
Step 2: check the list of user accounts on the system
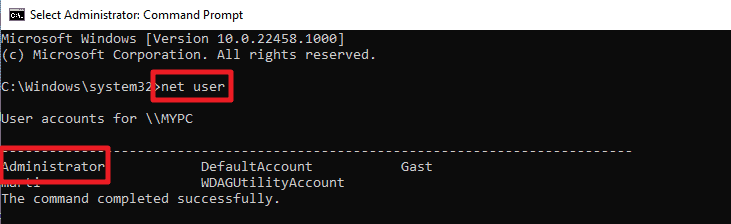
Run the command network user to display the list of all accounts that are available in the system. Note that the list does not reveal whether the accounts are active or deactivated.
Step 3: check the status of the administrator account
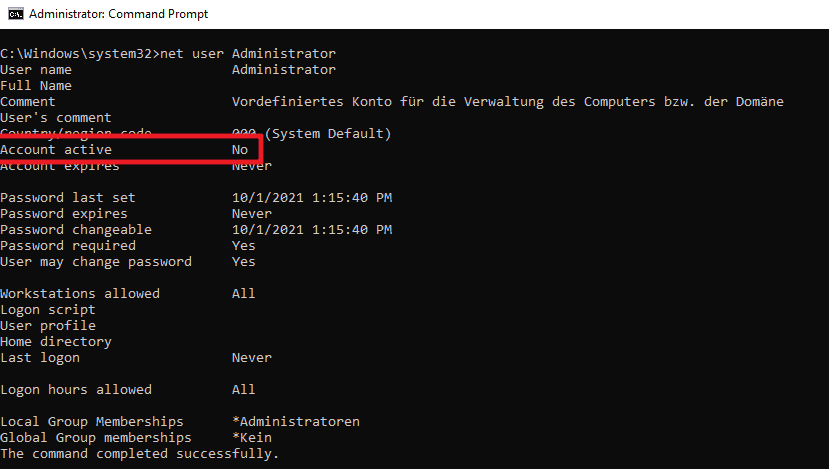
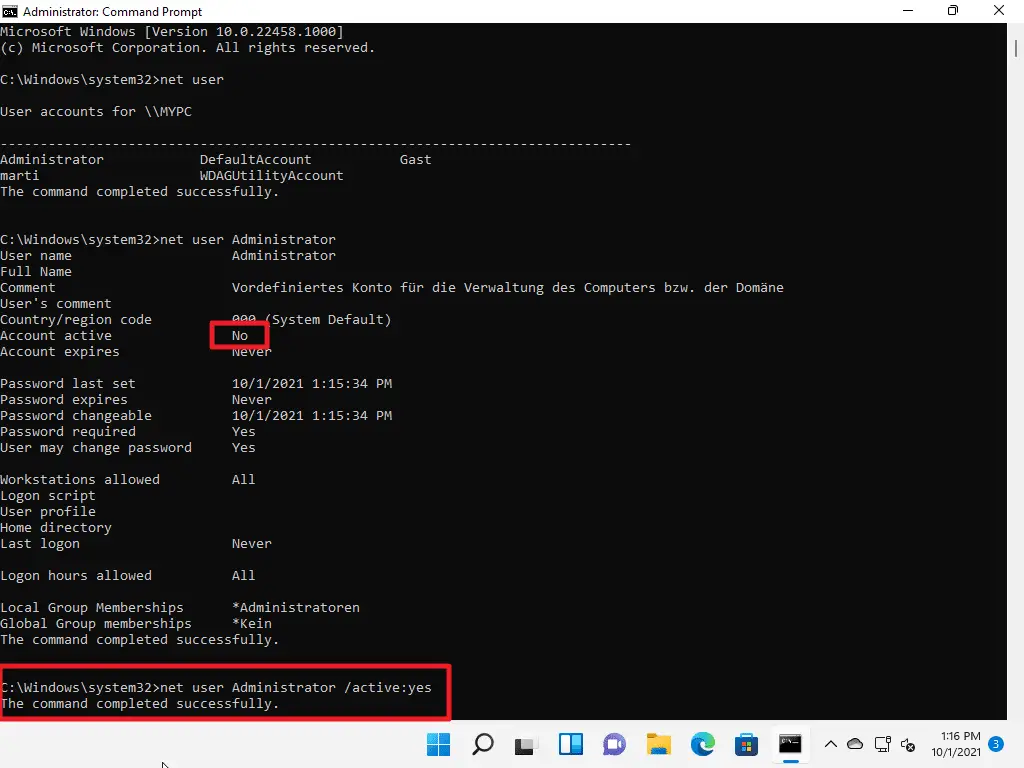
Run the command Network User Manager to display information about the administrator account. Check the “active account” status to find out if the account is active (yes) or not (no).
Step 4: enable the Windows 11 administrator account
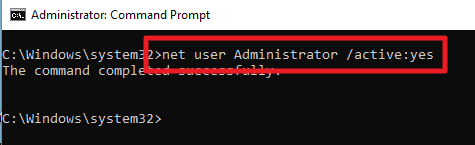
Run the command Network user manager / active: yes to enable the administrator account. Verify that the command was executed correctly by executing the command from step 3 again.
Tip: to disable the account, run the command Network user manager / active: no.
Step 5: change the administrator password
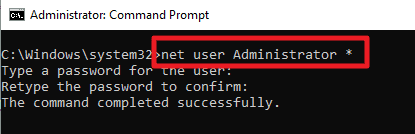
The default Windows 11 administrator account is not password protected. You can log in without entering a password. While that is useful in the same cases, it is generally better to set a password to protect it.
Run the command network user administrator * and hit the Enter key. Type the password you want to set and repeat the password after pressing the Enter key. If the passwords match, the new password is set and the account needs to be logged in.
Note– The password is not displayed when you type.
Enable Windows 11 Administrator Account on Local Users and Groups
Administrators can use the local user and group administrative interface to manage the built-in administrator account.
Step 1: Open local users and groups
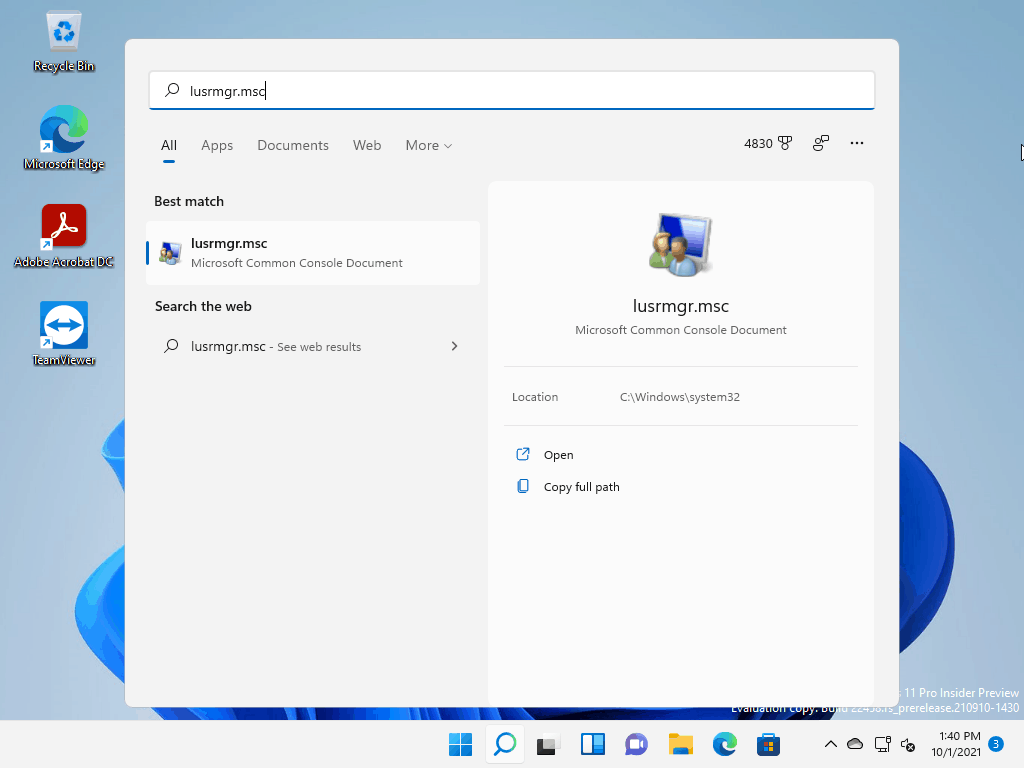
Open the Start interface, type lusrmgr.msc and hit Enter on the keyboard to load the admin interface.
Step 2: Show user accounts

Expand the Users folder shown on the left to display all known accounts on the system.
Step 3: enable the Windows 11 administrator account
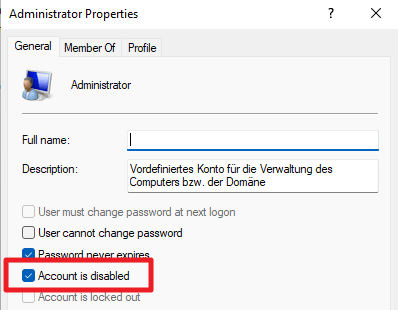
Right-click on the administrator account in the middle column and select Properties from the context menu. To enable the account, remove the check mark from “Account is disabled”, select Apply and then OK to complete the process.
The account is now active.
Step 4: set a password for the native administrator account

Right-click on Administrator again and select “set password” from the context menu. A warning is displayed, select Continue to continue.
Enter the password twice and select the OK button to configure it.
Now you: Do you use a normal user account or an administrator account when working on your devices?
advertising
Related posts:
 How to access Steam games without an internet connection
  How to view FPS with Xbox Game Bar in Windows 10: Steps Made Easy
  Hacked account? How to check and remedy
  How to make video calls from WhatsApp Web
  How to increase the RAM memory of a desktop or laptop + Tips and Tricks
  How to organize your YouTube subscriptions into categories
+ Tips and Tricks
How to organize your YouTube subscriptions into categories
+ Tips and Tricks


