


How To Fix Disk Too Fragmented Error Code 0x0000012E In Windows 11
Many Windows users have reported error code 0x0000012e on their Windows 11 system. This is because their system’s hard drive is fragmented and they need to defragment their hard drive quite frequently for the system to run smoothly. What do you mean by disk fragmentation? Why is it necessary to act on the system? Disk fragmentation means that files and folders are spread out on the disk and the system needs to organize them correctly for greater efficiency. This usually happens every time you delete a large set of files from the system or download and install any application / software. The disk defragmentation application collects all the sparse files and rearranges them. We have found some solutions for the disk too fragmented error code on your system in this post.
Solution 1: remove / erase any junk files
Step 1: Press Windows key on your keyboard and type disk cleaning.
Step 2: Then press the Get into wrench.
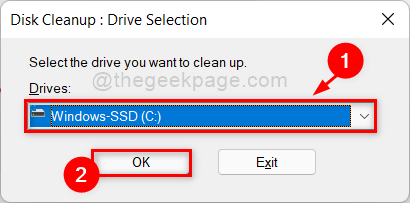
Step 3: Then select the Windows C: drive from the list and click OK to continue.
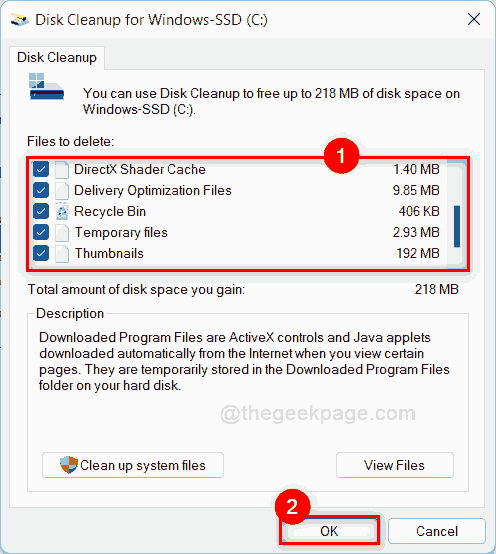
Step 4: Select all the files to delete by selecting all the checkboxes and finally click on OK button as shown in the following screenshot.
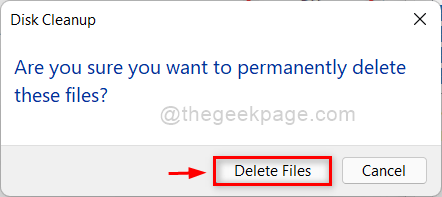
Step 5: Then click Delete files in the next window to continue.
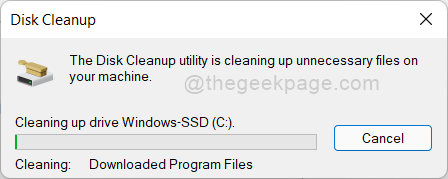
Step 6: As soon as you click Delete Files, Disk Cleanup will start to remove all the junk files that you have previously selected.
Step 7: Once this is done, your hard drive is cleared of unwanted junk files.
Step 8: Check if the error code still appears.
Hope this has solved your problem. If not, please try other fixes mentioned below in this post.
Solution 2: defragment your disk
Step 1: Press Windows key on your keyboard and type defragment and optimize units.
Step 2: press the Get into to open the application.

Step 3: select the drive (for example: – Windows C: drive) from the list and click Optimize button just below the Status section as shown below.
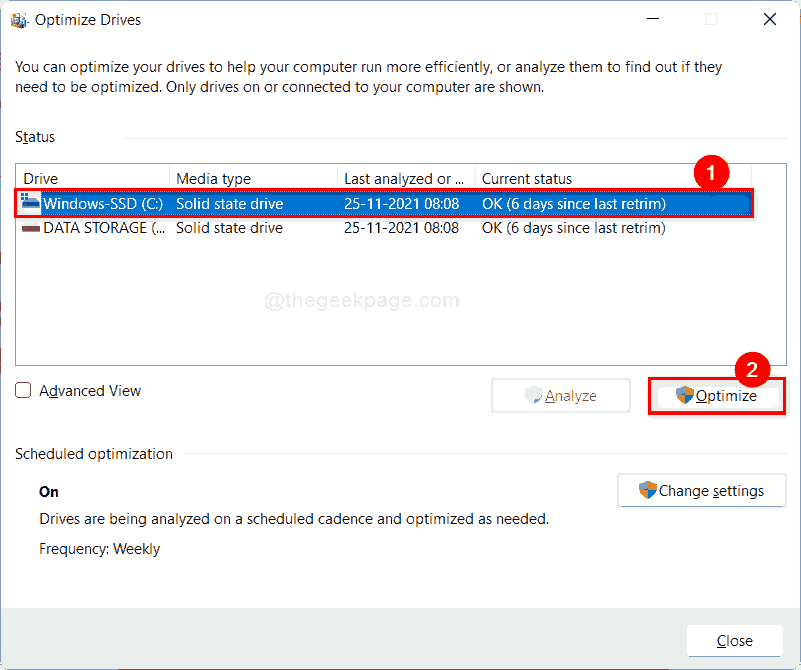
Step 7: This will optimize the drive you have selected and your system will run smoothly afterwards.
NOTE: – All SSD will show as days since last recovery and for the hard drive it will show as days since last run. Don’t worry, they are both the same.
Check if the problem is solved.
Hope this fixes your problem.
Solution 3: check hard drive status
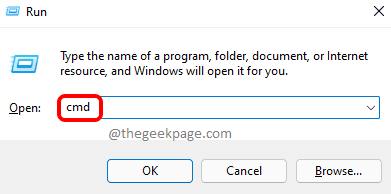
Step 1: Press windows + R keys together on your keyboard to open To run dialog box.
Step 2: Write cmd and hit the CONTROL + CHANGE + Get into key to open Symbol of the system as administrator.
Step 3: click Yes in the UAC message to continue.
Step 4: Then write wmic and hit Get into wrench.
Step 5: Once done, type diskdrive get status and hit Get into key to get results.
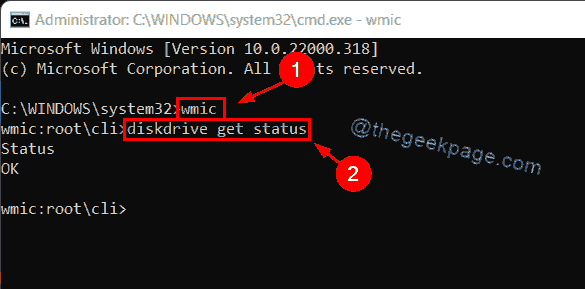
Step 6: Now you can see if the status of the hard drive and make a backup of the files on the hard drive.
That’s it.
Solution 4: restore the system using system restore
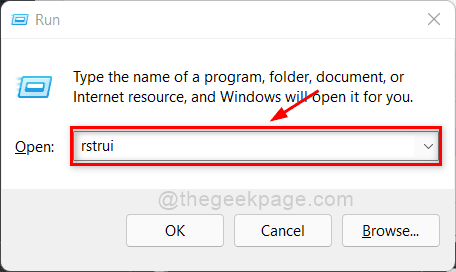
Step 1: Press Windows + R keys together to open To run dialog box.
Step 2: Write rstrui in the Run box and press the Get into to open the system restore wizard.
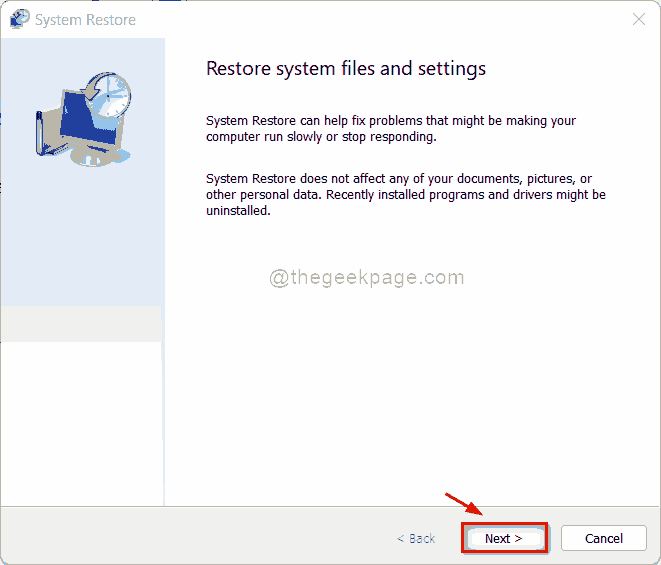
Step 3: In the system restore window, click next to continue.
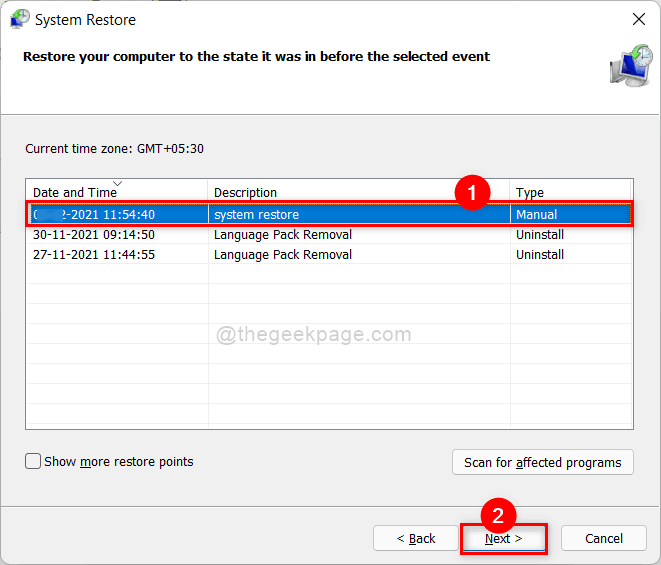
Step 4: Select the system restore point from the list as shown below.
Step 5: Then click next button.
Step 6: At last, click End up to continue restoring the system as shown in the following screenshot.
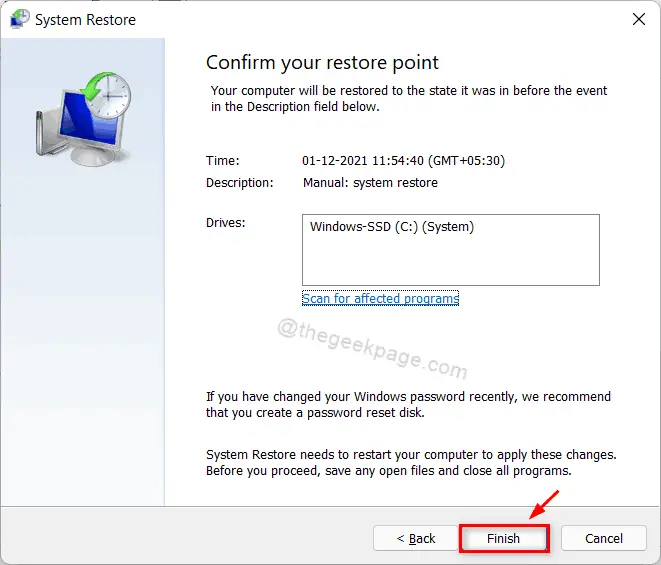
Step 7: This may take several minutes, so please wait patiently for it to complete.
After the system is restored, check if the problem persists.
Hope this has solved your problem.
Solution 5: perform CHKDSK on your system
Step 1: Press Windows + R keys together on your keyboard to open To run cash register.
Step 2: Write cmd in the run box and press CTRL + SHIFT + ENTER keys together to open symbol of the system What management.
Step 3: click Yes in the UAC message to continue.
Step 4: Type the following command at the command prompt and hit Get into wrench.
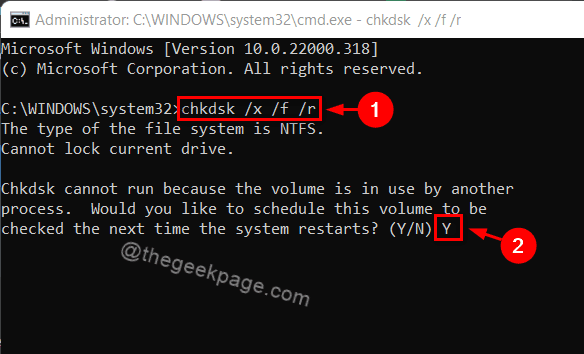
chkdsk /x /f /r
Step 5: After hitting the Enter key, it will say that Chkdsk cannot be run when the volume is still in use.
Step 6: Next, type Y and hit Get into to schedule the chkdsk volume the next time the system is rebooted, as shown in the image below.
Step 7: Then reboot your system once and observe that chkdsk is working on your system.
Step 8: Wait until it finishes and check if the problem persists.
Hope this has solved your problem.
That’s it guys!
Hope this post was helpful in solving the problem.
Let us know which solution helped you in the comment section below.
Thank you for reading!
Related posts:
 How to access Steam games without an internet connection
  How to view FPS with Xbox Game Bar in Windows 10: Steps Made Easy
  Hacked account? How to check and remedy
  How to make video calls from WhatsApp Web
  How to increase the RAM memory of a desktop or laptop + Tips and Tricks
  How to organize your YouTube subscriptions into categories
+ Tips and Tricks
How to organize your YouTube subscriptions into categories
+ Tips and Tricks


