


How to Fix Windows Defender Error Code 0x800705b4
Many users reported seeing an error installing updates in Windows 11, 10, and Windows 7. This error has two variations and is sometimes seen with a Windows update and sometimes with Windows Defender. The full error message says the following:
Windows Update
There were some problems installing updates, but we'll try again
later.If you keep seeing this and want to search the web or
contact support  para information, this may help: (0x800705b4)
The
Windows Defender
Real-time protection couldn't be turned on
This operation returned because the timeout period expired.
Error code: 0x800705b4
Possible reasons for seeing this error are:
- Windows update failed
- System file corruption.
- Presence of malware or virus on the system.
In this article, we have selected solutions to help you resolve the error with error code 0x800705b4.
Solution 1: enable Windows Defender service and firewall
1. Open the To run Dialog using the keys Windows Y R.
2. Type services.msc and press the Get into wrench.
3. The Services window opens. Scroll down to locate the called service Firewall de Windows Defender.
4. Right-click Windows Defender Firewall and choose Start.

5. Open the Run dialog box.
6. Type the following command and press Get into.
control firewall.cpl

7. In the initial window, select Enable or disable Windows Firewall.
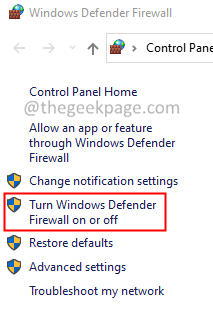
8. On the right side, click Turn on Windows Firewall.
9. Click Turn on Windows Firewall.
10. Click OK.

11. Restart the system.
Check if this helps. If not, try the next solution.
Solution 2: run the system in clean boot state
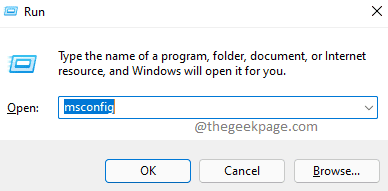
1. Open the Run dialog box with the Win + R keys.
2. Type msconfig and hit the Get into button.
3. In the General tab, select Selective start.
4. Make sure that Charging system services Y Load startup items are marked.

5. Go to Services tab.
6. Mark the Hide all Microsoft services option and then click the Disable all button.
7. Click Request and then click the OK button.

8. Restart your system.
Check if this helps. If not, try the next solution.
Solution 3: edit the registry key for Windows Defender
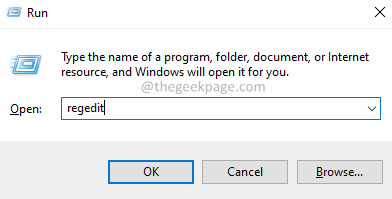
1. Open Run dialog holding keys Windows + R.
2. Type «Regedit» and press the Get into wrench.
3. If you see a User Access Control window appear, click Yes.
4. In the registry editor window, copy and paste the following location in the search bar and press the Get into wrench. Please see the screenshot below for more details.
HKEY_LOCAL_MACHINESOFTWAREPoliciesMicrosoftWindows Defender
5. Search for the key called DisableAntiSpyware On the right side.
6. If you cannot find the registry key, create one. The right button of the mouse anywhere on the right side and then choose Nuevo> DWORD (32 bits).

7. Set the key value to 1.

8. Click the OK button.
9. Restart the system.
Check if you can overcome the error. If not, try the next solution.
Solution 4: uninstall third-party antivirus
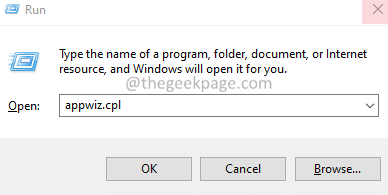
1. Open the To run dialog using Windows + R.
2. Type appwiz.cpl and press Enter.
3. In the Programs and characteristics window that opens, look for the third-party antivirus.
4. The right button of the mouse in your antivirus software and select Uninstall.

5. Follow the instructions on the screen and complete the uninstall process.
Check if this solution helps. If not, try the next solution on the list.
Solution 5: run the SFC and DISM scans
1. Open To run Dialog by holding the keys Windows + R.
2. Enter cmd and press the keys Ctrl + Shift + Enter. This opens the command prompt in Administrator mode.

3. In the User Access Control window that appears, click And.
4. Enter the following commands one after the other. These commands will repair any corrupt files on the system.
sfc /scannow
Dism /Online /Cleanup-Image /ScanHealth
Dism /Online /Cleanup-Image /RestoreHealth
5. After performing both scans, reboot the system.
I hope this helps.
That’s it.
We hope this article has been informative. Thank you for reading.
Please comment and let us know the solution that has helped you.
Related posts:
 How to access Steam games without an internet connection
  How to view FPS with Xbox Game Bar in Windows 10: Steps Made Easy
  Hacked account? How to check and remedy
  How to make video calls from WhatsApp Web
  How to increase the RAM memory of a desktop or laptop + Tips and Tricks
  How to organize your YouTube subscriptions into categories
+ Tips and Tricks
How to organize your YouTube subscriptions into categories
+ Tips and Tricks


