


How to install an S/MIME certificate in Outlook on Windows 11/10
S/MIME (Secure/Multipurpose Internet Mail Extensions) is a public key encryption and authentication standard used to send email messages. When an S/MIME certificate is used to sign an email message, it assures the recipient of the email that you actually sent it. It can also help you encrypt the message so they are safe and not spied on during transit.
In this article, we will discuss the detailed steps to install this S/MIME certificate for encryption and signing so that you can send secure emails using Microsoft Outlook on Windows 11/10 PC.
Steps to install the S/MIME certificate with Outlook
Step 1 – Get your encryption and signature certificate
1. Click on the Certificate activation link received in your email to download the Archivo PKCS#12 that contains your SSL provider account certificate.
2. Once you log in to your account, you need to click Generate Certificate.
3. After generating the certificate, enter a password before downloading the certificate. Create a password and click the Descargar and save this file to your PC.
Note: Remember this password, as you will need it during installation or when you want to import the certificate and private key from this file. Also, keep track of where this file has been saved so you don’t lose it.
Step 2: Install Certificate in Outlook
1. Launch Microsoft Outlook on your computer
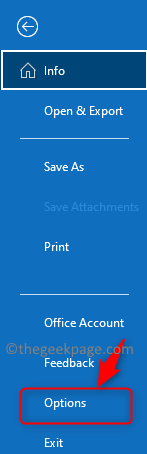
2. Click on the Archive menu.
3. Choose Options in the left pane.
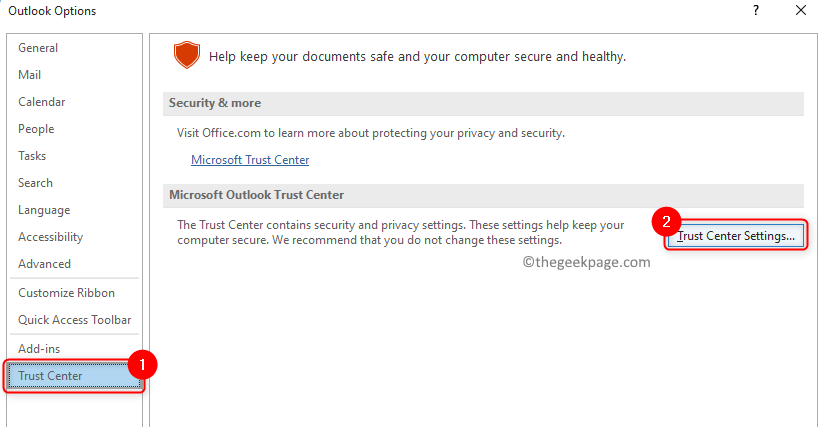
4. Select the Trust Center tab on the perspective options window,
5. Click on the Trust Center Settings… button on the right panel.
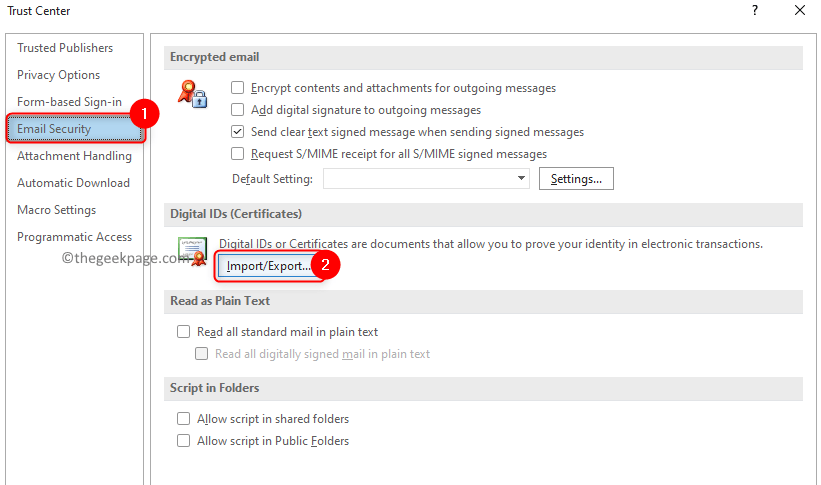
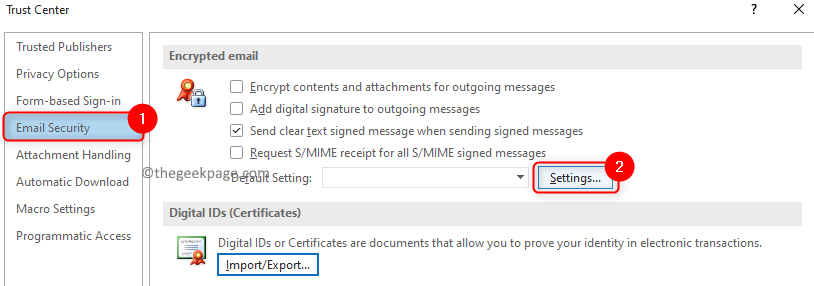
6. Once you are in the Trust Center window, select the email security tab on the left side.
7. On the right, in the Digital IDs (Certificates) section select the Import and export… button.
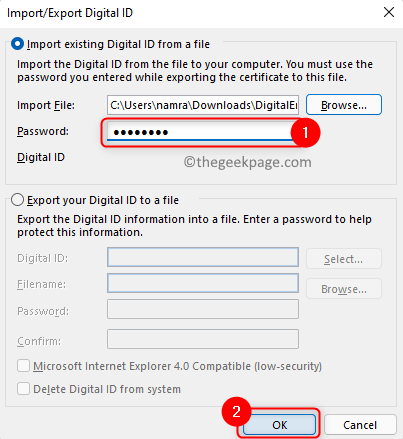
8. In the Digital Import/Export ID window that appears, select the option to import Existing digital ID of a file.
9. Now click on the Surf… to select the file to import.

10. Browse to the location where the file was saved. Select it and click Opened.
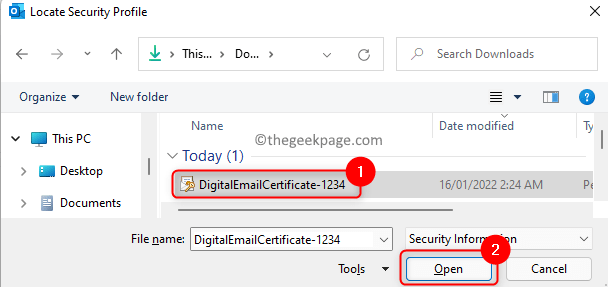
Note: This file will have a .p12 extension.
11. Once the file path is added in import file, write the file password which was to download this file in the text box next to Password.
12. Click it’s fine.
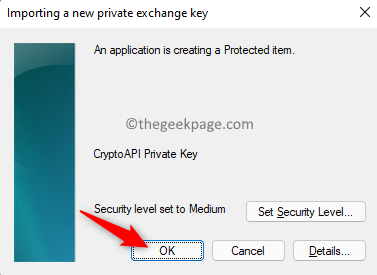
13. One security dialog appears indicating that you are importing a new private exchange key. Click on OK again.
14. Now you will be back in the Trust Center with the email security selected tab. At encrypted email section, click the Settings… button.
15. Enter a security setting Name in the text box below Security configuration name.
16. Click on the Choose… button associated with Signature certificate.
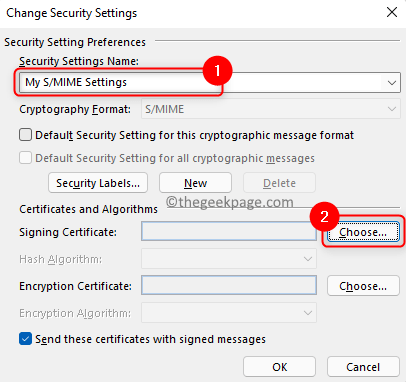
17. If there is only one certificate installed, click OK to confirm the certificate. Otherwise, click more choices and choose a certificate from the list of installed certificates and click it’s fine.

18. Use the dropdown menu next to the Algoritmo hash and select SHA256.
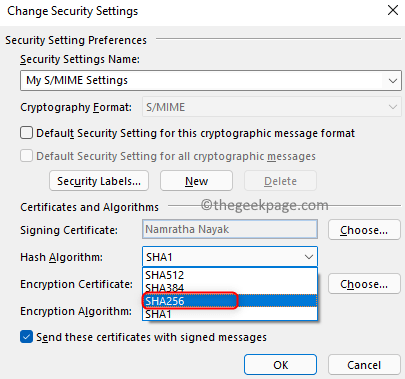
19. Click Choose… to select the Encryption certificate.
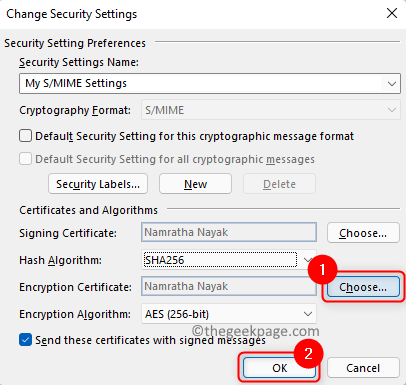
20. In the confirm certificate dialog box, click it’s fine. is the same as in Paso 17.
21. Click OK to get out of the Change security settings window.
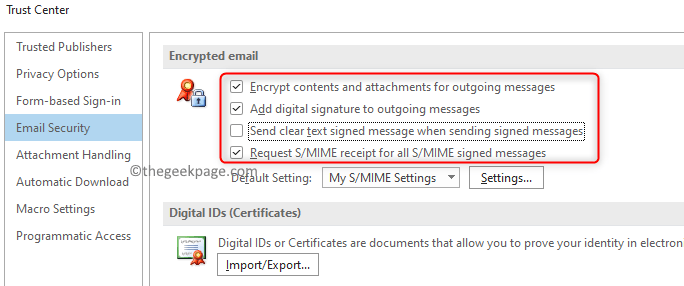
22. In the Trust Center, cheque the boxes next to the required options for S/MIME encrypted email in the encrypted email section. Click on it’s fine.
Now the S/MIME certificate has been successfully installed and can be used.
Step 3 – Create a secure message in Outlook
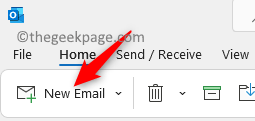
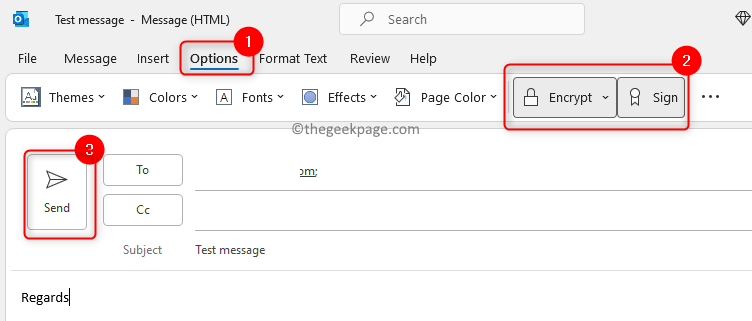
1. Click New Email in Outlook to open a new email message.
2. Click on the Options menu.
3. In the encrypt section, you can switch between encryption and digital signature settings.
4. To send a signed message, click Sign before sending the email.
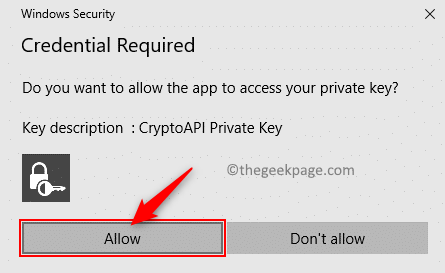
4. Once you send the email message, click Let in the dialog box to allow the Outlook app to use the private key.
5. While sending an encrypted email if the recipient’s public key is not with you, an error message is displayed. You can choose to send an unencrypted message by clicking Send unencrypted.
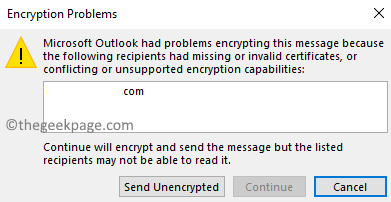
This problem can be fixed by asking the recipient to send a signed email. Then add them to your contact list in Outlook. Follow the steps below.
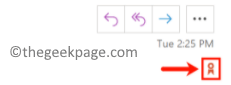
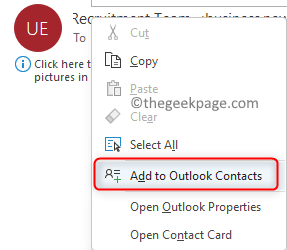
1. When you receive a signed mail from your recipient, there will be a little red ribbon icon in the message in the upper right corner.
2. Click on the icon to check the details of the certificate.
3. The right button of the mouse about him sender’s name and choose the Add to Outlook Contacts option.
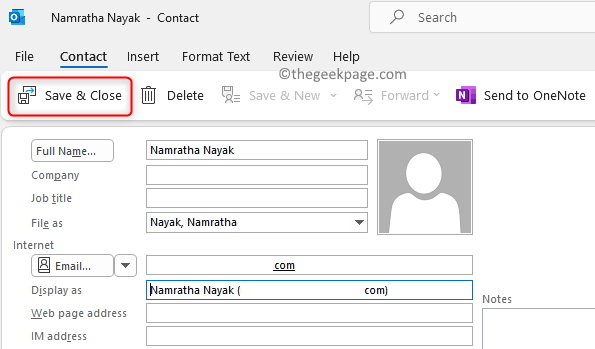
4. On the new contact page, add any other details if you like and click Save money & Cerca. Outlook now saved this contact with your public key.
An encrypted mail can now be sent to this particular contact with any errors.
Thank you for reading.
We hope the steps in this article helped you install an S/MIME certificate in Outlook and use it to send signed and encrypted email messages.
Related posts:
 How to access Steam games without an internet connection
  How to view FPS with Xbox Game Bar in Windows 10: Steps Made Easy
  Hacked account? How to check and remedy
  How to make video calls from WhatsApp Web
  How to increase the RAM memory of a desktop or laptop + Tips and Tricks
  How to organize your YouTube subscriptions into categories
+ Tips and Tricks
How to organize your YouTube subscriptions into categories
+ Tips and Tricks


