


How to share files between Mac and Windows PC
Do you need to transfer files from Mac to Windows PC and vice versa? There are several different approaches you can take, but you can easily perform a Mac to Windows or PC to Mac file transfer using the native tools of both operating systems. Alternatively, there are some third-party solutions worth checking out. Next we will tell you how to share files between Mac and Windows PC.
How to transfer files from Mac to Windows PC
The most obvious way to transfer files from Mac to Windows is to use the built-in features offered by both operating systems.
However, this has a major drawback. The process will only work if the Mac and Windows computers are on the same local network. If not, you can skip directly to the third-party solutions section below.
Set up file sharing on a Mac
You will need to change some settings to share files between Mac and Windows PC. First, you need to authorize your Mac to share your files. Follow these steps to do it:
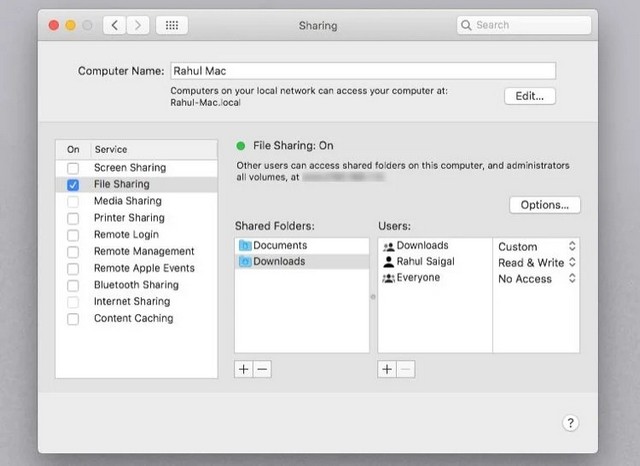
Click on the icon Apple in the upper left corner of the screen. Choose System Preferences > Sharing. Then check the box next to file sharing in the left pane.
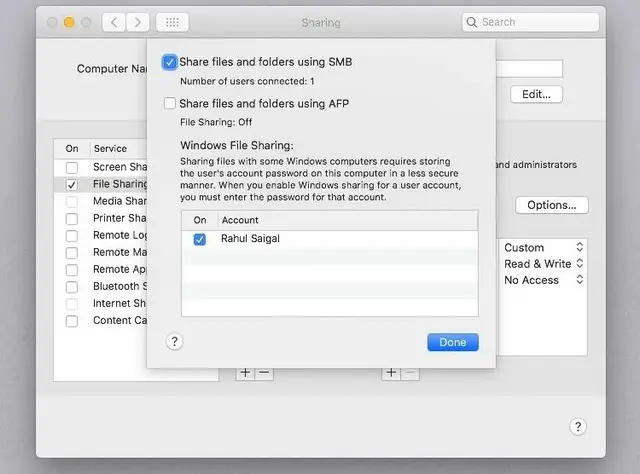
Click the button Options and, in the window that appears, check the box next to Share files and folders using SMB. In macOS Big Sur, Apple removed the ability to share volumes through AFP. Although Catalina retained this capability, it could not share APFS-formatted volumes through AFP.
In the section Windows file sharing then check the box next to each user whose files you want to share. Enter the user passwords and click Finished.
Note: When you share files with Windows computers, your Mac stores users’ passwords less securely. Once complete, we recommend unchecking the user boxes.
You will now return to the sharing window. Next, you need to choose the folders and users that you are going to share with your Windows PC. Click on the buttons Plus (+) y Minus (-) below shared folders to adjust your preferences.
Once you’ve shared a folder, review the user permissions and groups that should have access to the data in the list of shared folders.
Remember that all network access is controlled by the computer with the shares (in this case, it’s your Mac); therefore, you need to understand what Mac permissions have been applied to a folder. Finally, you need to write down the IP address of your Mac. You will see it below the message. File Sharing: Enabled.
Access Mac files on Windows
Now it’s time to head over to your Windows PC. Follow the instructions below to transfer files from Mac to Windows:
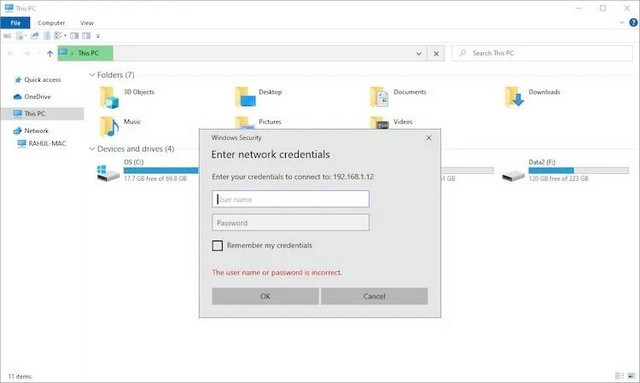
open theFile Browser. In the address bar at the top of the window, type followed by the IP address of your Mac. When you’re done, it should look like this: 192.168.1.68. A new window will appear asking for a username and password. Enter the user credentials exactly as they appear on your Mac.
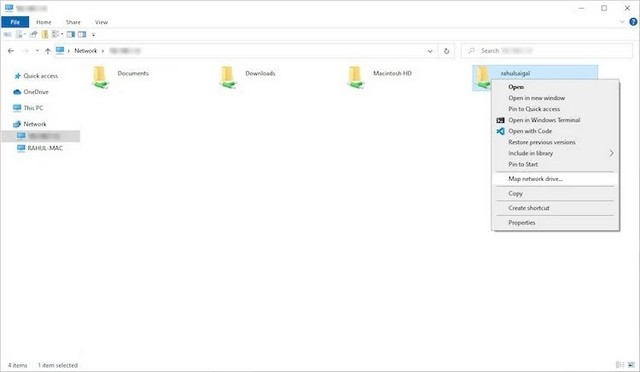
File Explorer will display all the folders and users that you have added to the lists of folders shared andshared users of your Mac. You can map this folder as a network drive to move, edit, and copy folders like any other Windows folder.
network drive card
Mapping a network folder makes other applications see that the folder is part of your PC. Windows maps a drive to the mapped folder and you will see it as a drive in File Explorer.
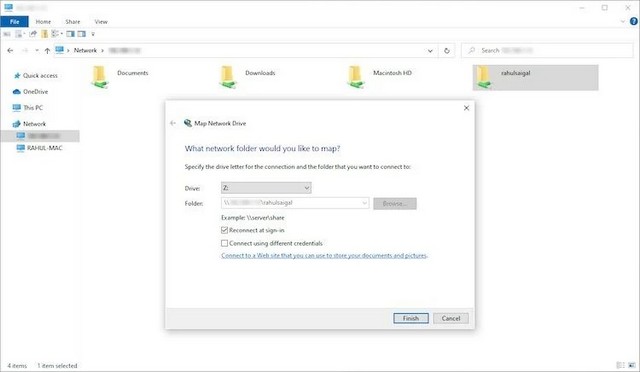
Right click on the shared folder and click network drive. Select a drive from the list of drives. You can choose any letter that is not already in use.
Box folders contains all the information preloaded. don’t forget to mark Reconnect at login if you want Windows to automatically connect to this shared folder at the beginning of each login session.
Once you’re done, drag and drop files into any of your local folders to transfer files from your Mac to your Windows PC.
How to transfer files from PC to Mac
It wasn’t too hard, right? Now let’s see the reverse process: how to transfer files from Windows to Mac.
Set up file sharing in Windows
To get started, you need to make sure that network discovery is enabled on Windows. Turn on your Windows PC and follow the steps below:
open the app settings and access Networks and Internet. In the left pane, click ethernet Where wirelesslater under Change advanced sharing options located below Related Parameters.
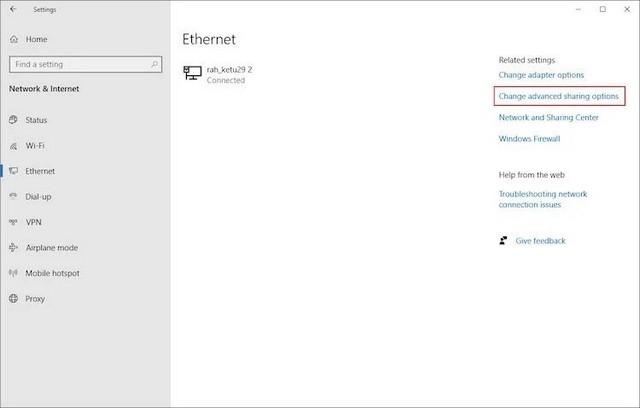
expand menu Private network and check the boxes next to Enable network discovery y Enable file and printer sharing. Then click Save Changes.

Note: We do not recommend enabling network discovery or file sharing on public networks. They are generally much less secure than private networks.
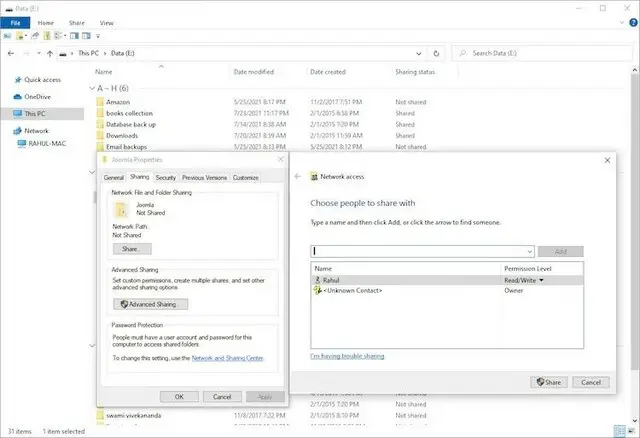
To share folders on a case-by-case basis, right-click the folder name and navigate to Properties > Sharing > Sharing files and folders on the network > Sharing. You can also use advanced sharing settings if you need or prefer full control over sharing.
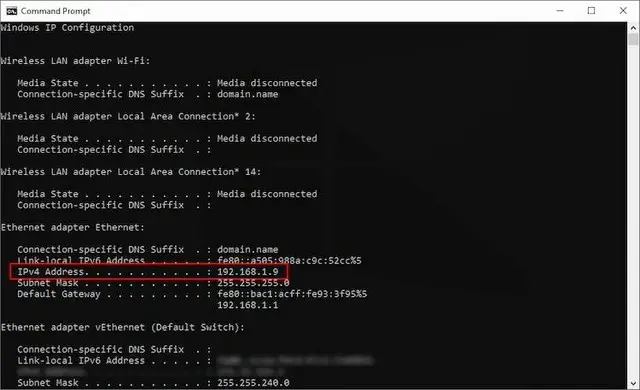
You will also need to note the IP address of your Windows PC. lean on Earn + X and choose Symbol of the system Where PowerShell de Windows. To take ipconfig and write down the IPv4 address.
Access Windows files on Mac
Once you’re happy with your sharing options, it’s time to transfer your files from a Windows PC to a Mac. Follow the steps below on your Mac to do this:
open the app Discoverer. In the menu bar at the top of the screen, select Go > Connect to server. To take smb://[adresse IP] Where smb://[nom de l’ordinateur] and press Prohibited. You will be prompted to enter your Windows username and password. Click on To connect.
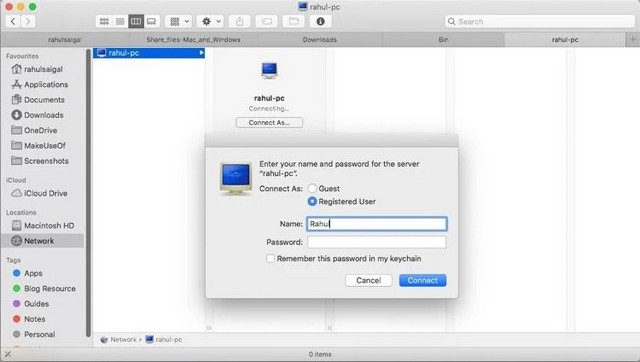
Your shared Windows content will be available in the section Share of the Seeker. To share files between Mac and Windows PC, simply drag and drop as needed.
The above methods work fine if Mac and Windows PC are on the same network. However, if not, try these methods and choose the ones that work best for you.
1. Use a cloud storage service
Mailbox, Google Drive, and OneDrive have dedicated apps available for Windows and macOS. Simply install them on both systems and upload or download your files as needed. Be aware of how much space these apps take up and whether you’re running low on disk space.
2. Use a USB flash drive
A simple yet effective solution for anyone who needs to quickly transfer files from Mac to Windows PC is to use a USB flash drive. Remember to choose the exFAT file format as it is compatible with both operating systems and allows you to easily share large files.
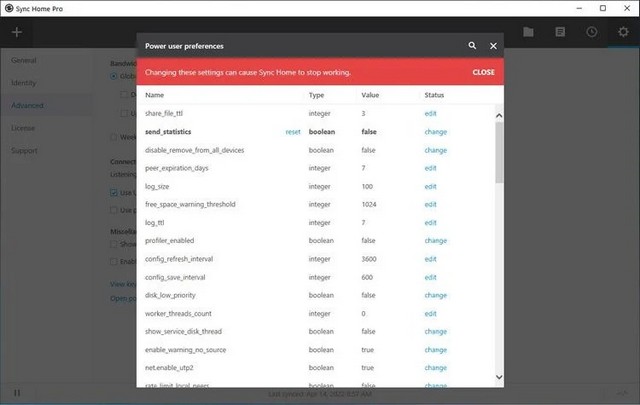
Resilio Sync and Syncing are file synchronization applications that allow you to share files between Windows PCs and Macs. They use an encrypted key to manage the connection between devices. All you have to do is set up a sync folder and create a key. Share the key with your other machine and name a folder. Both apps allow you to set read/write permissions.
We face many security challenges when it comes to cloud storage. This author has been using Resilio Sync for many years. By setting permissions, setting sync to force LAN sync, and using Archive for file versioning, you ensure that data transfers take place over your network and save money.
Conclusion: Sharing files between Mac and Windows PC
I hope the various methods we have discussed will help you easily share files between Mac and PC. If you need to do it with your smartphone too, learn about the easiest ways to transfer files between computers and mobile devices.
Related posts:
 How to access Steam games without an internet connection
  How to view FPS with Xbox Game Bar in Windows 10: Steps Made Easy
  Hacked account? How to check and remedy
  How to make video calls from WhatsApp Web
  How to increase the RAM memory of a desktop or laptop + Tips and Tricks
  How to organize your YouTube subscriptions into categories
+ Tips and Tricks
How to organize your YouTube subscriptions into categories
+ Tips and Tricks


