


How to take a screenshot on iPhone 13
To capture an image of what you see on the screen of your iPhone 13, it is easy to take a screenshot. We’ll show you how to do it with instructions that also work for the iPhone 13 Mini, iPhone 13 Pro, and iPhone 13 Pro Max.
How to take a screenshot on iPhone 13
The easiest way to take a screenshot on the iPhone 13 is to use two buttons on each side of the phone. To do this, briefly press the volume up button (on the left side of the iPhone) and the side button (on the right side) at the same time.
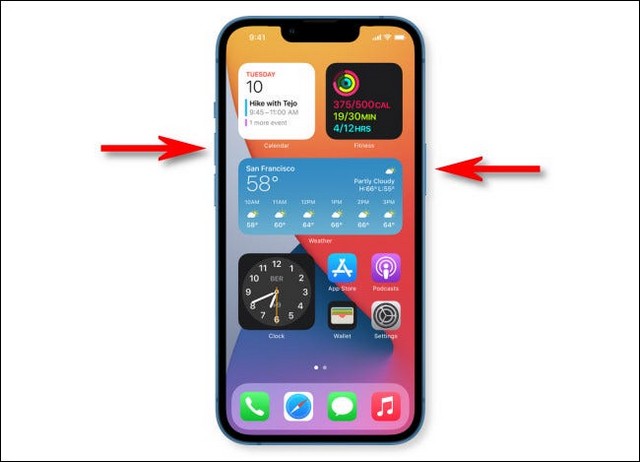
It can be a bit tricky, but if you press them both at exactly the same time, you’ll hear a shutter sound effect (unless your volume is muted). The screen you just took will appear in the lower left corner of the screen.
If you ignore the thumbnail in the corner, it will disappear after a while. Or you can drag it to the left to get rid of it.
When the thumbnail disappears, your iPhone 13 will automatically save the image to your Photos app. As of December 2021, there is no way to disable thumbnail preview, but that may change in a future version of iOS.
How to edit a screenshot on iPhone
Do you remember the thumbnail that appears in the corner of the screen after taking a screenshot? If you touch it, you will see a special edit mode where you can crop, rotate, or annotate the image before saving.
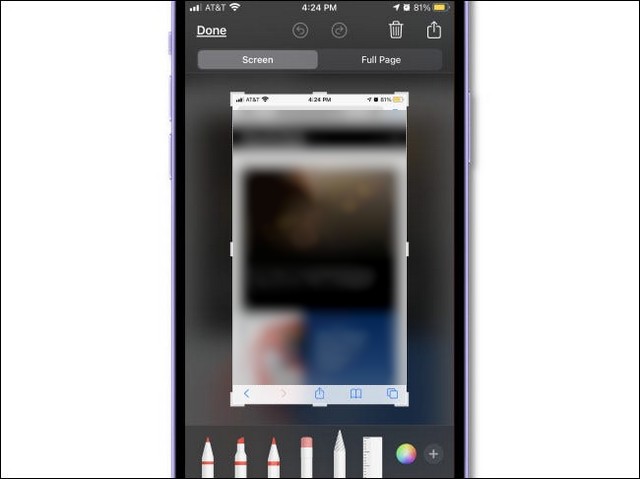
You can also delete the screenshot if you don’t like it right now – just hit the trash can icon in the top right corner. Edit mode, press “Done” in the corner of the screen and then select “Save to Photos”. The edited screenshot will be saved in the Photos app.
If you are having trouble pressing both buttons at the same time to take a screenshot (or if one of your buttons is broken), there are several ways to take a screenshot. © without the need for buttons.
The first way is to press down on the back of your iPhone through a feature called “Back Touch.” To set it up, open Settings and go to Accessibility> Touch> Back Touch. Assign “Screenshot” to a double or triple tap option, and you can tap the back of your iPhone to take a screenshot.

The AssistiveTouch function will also allow you to take a screenshot without having to combine two buttons. To set it up, open the Settings app and go to Accessibility> Touch> AssistiveTouch. Once there, assign ‘Screenshot’ to a custom action. Or you can take a screenshot directly from the AssistiveTouch menu by opening the menu and pressing Device, More, then Screenshot.
Where are screenshots saved on iPhone 13?
On an iPhone 13, any screenshots you take will automatically be saved as PNG files in your Photos album, which you can view by opening the Photos app. You can see a thumbnail list of all your screenshots by going to Album> Screenshots.

To view a screenshot in Photos, touch its thumbnail and it will appear larger on your screen. Once there, you can edit it (crop, rotate, add filters, etc.) or easily share it with your friends using the on-screen toolbar. delete an unwanted screenshot, select it, and then tap the trash can icon.
conclusion
In this guide, you have learned how to take screenshots on iPhone 13. If you have any questions or suggestions, please let us know in the comments. Also, check out this guide as well if you want to learn how to mute keyboard sound on Android and iPhone.
Related posts:
 How to access Steam games without an internet connection
  How to view FPS with Xbox Game Bar in Windows 10: Steps Made Easy
  Hacked account? How to check and remedy
  How to make video calls from WhatsApp Web
  How to increase the RAM memory of a desktop or laptop + Tips and Tricks
  How to organize your YouTube subscriptions into categories
+ Tips and Tricks
How to organize your YouTube subscriptions into categories
+ Tips and Tricks


