


How to turn on the heat with a Nest thermostat
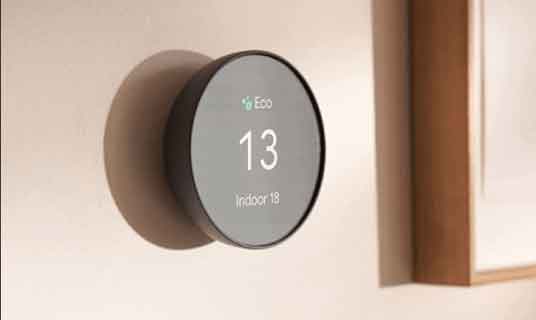
Google’s Nest Thermostat saves energy and money while ensuring comfort. The device monitors your behavior and adjusts temperatures according to your preferences. However, in some cases the Nest thermostat won’t turn on when it should. In this article, we’ll show you how to turn on the heat with a Nest thermostat.
How to turn on the heat with a Nest thermostat
Turning on the heat with a Nest thermostat is as simple as pressing the “Heat Link” button in the center of the device.
On the Nest Thermostat E, you need to press the button twice. Note that you only need to press the button once for the second and third generation of the device. If activated manually, the Nest thermostat will continue to heat your home until you decide to turn it off.
You can only use manual heating if you have unplugged the Heat Link from the thermostat. Plus, turning on manual heat will also turn on hot water if your Nest device controls the water heater.
Finally, your Nest thermostat won’t be able to follow its normal schedule if you’ve turned the heat on manually.
How to turn on auxiliary heating on a Nest thermostat
Auxiliary heat (Aux) is a secondary heat source used during the cold season, when heat pumps are unable to heat a home as quickly as usual.
Activating auxiliary heating is less energy efficient, but causes your home to heat up faster.
There are three ways to control auxiliary heating on the Nest thermostat:
Activation of the auxiliary heat with the thermostat
- Press the thermostat ring and open the Quick View menu.
- Choose the “Settings” option, which is indicated by a small gear icon.
- Select “Nest Sensor”.
- Choose “Heat pump balance” and select the auxiliary heating setting from this screen.
Activate auxiliary heating via the Nest app
- Open the app and tap the “Settings” icon.
- Choose your thermostat
- Tap the “Heat pump balance” option.
- Select an auxiliary heating setting.
Activation of auxiliary heating via the Home app
Google recommends downloading and using the Home app if you have a Nest thermostat. To activate auxiliary heating using this app, do the following:
- Open the app and select your thermostat.
- Tap the gear icon to get to the “Settings” screen.
- Select the “Temperature Preferences” option.
- Choose “Heat pump balance”.
As a final note, you can also set the Nest thermostat to ‘Maximum Comfort’ mode. It will make the thermostat automatically activate auxiliary heating whenever it is needed. However, this also means that you will have less control in activating this expensive option.
Additional FAQs
1. Why doesn’t the Nest thermostat turn on the heat?
There are several reasons why the Nest thermostat may not turn on the heat:
- There are compatibility issues between your heating system and the device. Many older heating systems, such as high voltage and solid fuel systems, are incompatible with the Nest thermostat.
- There is a blown fuse somewhere preventing the circuit from supplying power. If so, locate it and replace it with one of the same model and voltage.
- There’s a problem with your Nest device.
For this third possible cause, several problems can affect the Nest thermostat and prevent it from turning on:
- The thermostat cannot connect to Wi-Fi.
- The Nest runs slower than usual.
- There is a connection problem between the device and its base.
- The battery is dead.
You can fix this by removing the Nest thermostat from its base and then resetting it to connect. If that doesn’t work, unplug your device and charge it using the supplied USB cable.
If a fully charged device still doesn’t work, you can perform a reset:
- Press the thermostat ring of the device to open the “Quick View” menu.
- Select the “Settings” gear icon.
- Choose “Restore” and press “Select”.
The device will take a couple of minutes to reset. Once done, plug it back into its base to see if it works. If the problem persists, you may need to call a professional for help.
Does the Nest thermostat automatically switch from hot to cold?
Did you configure it this way?
- Open the Nest app and choose your thermostat from the home screen.
- Check the lower left corner of the screen to see the current thermostat setting. It will say “Hot” or “Cold”.
- Tap that setting to activate a pop-up window.
- Choose the “Hot-Cold” option.
- Select the temperature range you want to have in your home.
The Nest thermostat will now automatically switch from heating to cooling mode to maintain your chosen temperature.
You can also enable this setting using the Nest thermostat itself:
- Press the thermostat ring of the device to open the “Quick Menu”.
- Select the “Thermostat” option.
- Select the “Warm-Cool” setting.
What heating systems is the Nest thermostat compatible with?
The Nest thermostat is compatible with a wide range of heating systems, including:
- Hot water tanks
- Combined boilers
- Heat only boilers
- System boilers
- Zone heating systems
- Floor hydronic systems
- Systems using OpenTherm technology
- Air and geothermal heat pumps
If you’re not sure if you have a compatible heating system, check it out Nest’s compatibility guide.
Related posts:
 How to access Steam games without an internet connection
  How to view FPS with Xbox Game Bar in Windows 10: Steps Made Easy
  Hacked account? How to check and remedy
  How to make video calls from WhatsApp Web
  How to increase the RAM memory of a desktop or laptop + Tips and Tricks
  How to organize your YouTube subscriptions into categories
+ Tips and Tricks
How to organize your YouTube subscriptions into categories
+ Tips and Tricks


