


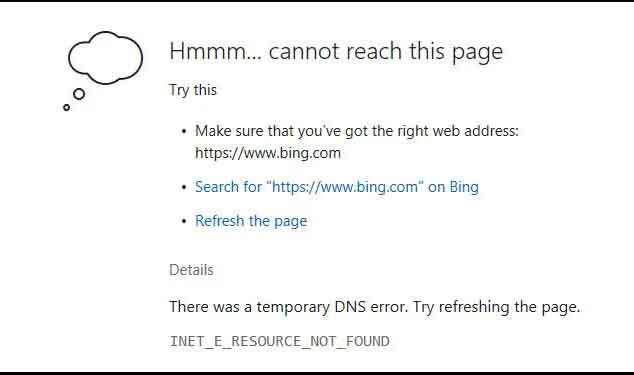
How To Fix INET_E_RESOURCE_NOT_FOUND ERROR: Sometimes, your browser may show an INET_E_RESOURCE_NOT_FOUND error when it fails to load a web page online. A DNS error like this can affect any browser but is most commonly seen in MS Edge. In some cases, it may even affect just a specific page or website. The INET_E_RESOURCE_NOT_FOUND error can be easily resolved by changing the DNS server and clearing the DNS cache. You can find more details on these topics along with other solutions in our detailed guide below.
The error itself indicates the probable cause of the error. Problems in network settings, DNS server, and domain name are some likely causes. This happens when the DNS server you are using is temporarily unavailable or overloaded. Some specific problems that show this writing “A temporary DNS error has occurred. Try to refresh the page “, on your device screen can be:
- Changes to DNS or TCP / IP settings
- Failures in network drivers
- TCP Fast Open function in the browser
- Bugs not fixed with an update
- Problems in the Microsoft Edge application
- Website address not updated in the DNS cache
- Malware Infection – What Is Malware And How Does It Work?
- Corrupted registry or browser files
Many users have encountered the INET_E_RESOURCE_NOT_FOUND error even after Windows updates. Hence, there is no solution to the problem.
Solutions for the error “The server’s DNS address could not be resolved”
The best way to fix this error is change the DNS server. But before we get into the technical details, a quick fix to try is turn the modem off and on again. Turn off the modem, wait about 10 seconds and turn it back on. Restarting the router will clear the cache and fix most minor DNS problems. So, try using the navigation function in incognito/InPrivate and see if that helps.
1. How to change DNS
Your PC is set to automatically obtain the Domain Name System (DNS) by default. Changing the DNS server from automatic to custom DNS is one of the best ways to resolve the INET_E_RESOURCE_NOT_FOUND error. Some popular DNS servers that can be used for free include:
- Google:
Preferred DNS: 8.8.8.8
Alternate DNS: 8.8.4.4 - Cloudflare preferred DNS:
- Preferred DNS 1.1.1.1
Alternate DNS: 1.0.0.1 - OpenDNS:
Preferred DNS: 208.67.222.222
Alternate DNS: 208.67.220.220
To change your DNS, go at Control Panel> Network and Internet> Network and Sharing Center.
- Click yours Wi-Fi / Ethernet connection active.
- Push the button Property.
- Highlight Internet Protocol Version 4 (TCP / IPv4) by clicking on it. Then, hit the button Property.
- click on Use the following DNS server addresses.
- In the Preferred DNS Server box, enter: 8.8.8.8
- In the alternate DNS server box, enter: 8.8.4.4
- Awards Apply.
Restart your computer and see if the error is resolved.
2. Browse using the private window
Opening web pages in a private window can sometimes resolve the INET_E_RESOURCE_NOT_FOUND error. However, this method is only a temporary solution to the problem. Awards Ctrl + Maiusc + N to start a private browsing session in Microsoft Edge. You can also click triple dot icon and select New InPrivate window.
Read also: Fast DNS, where to find them
3. Reset network connection
Restoring network connections involves two main steps; clear the DNS e reset Winsock. DNS is a naming system that converts domain names (web page names) into forms that the computer can understand, such as IP addresses.
Your computer first asks for the site’s IP address when you connect to any website. So it keeps a local record of the site’s IP address to make the connection process faster next time.
DNS flushing clears this record, which means your computer has to go through the process from the beginning now. In case of network related errors or other similar ones, clearing the DNS is a quick and easy solution. To clear the DNS:
- Awards Windows + R to start Run.
- Digita cmd and press Enter to open the command prompt.
- Digita
ipconfig /flushdnsand press Enter.
Network settings are stored in the Windows Socket (Winsock) catalog. If the error was caused by a problem in Winsock, you can restore the default settings to fix the problem. Likewise, the commandint ip reset will reset TCP / IP. To do so:
- Awards Windows + R to start Run.
- Digita cmd and press Enter to open the command prompt.
- Type the following commands and hit enter after each:
netsh int ip resetnetsh winsock reset
4. Check if HTTP / 3 and QUIC are enabled
One of the most common causes of the error “A transient DNS error has occurred. Try refreshing the page ”, is the TCP Fast Open feature. Put simply, it made data transmission between server and client faster by improving TLS Handshake. But it had a number of flaws including a lack of documentation. TCP Fast Open was replaced by QUIC in 2021 as it is faster, safer and more reliable.
- Most browsers will have HTTP / 3 and QUIC enabled by default. You can manually check if your browser has HTTP / 3 and QUIC enabled by CLOUDFARE QUIC.
- In case HTTP / 3 and QUIC are disabled on your browser, you can find detailed instructions to enable them from the Cloudfare Tutorial page.
5. Rename the Connections folder in the registry
If resetting the network settings didn’t help, it’s worth checking the Windows registry. The Windows registry is a database of settings for the operating system and most applications. Many users have reported renaming the folder Connections via the registry editor fixed the problem. To do so:
- Awards Windows key + R and enter
regeditto open theRegistry Editor system. You can also search for and open Registry Editor with the search bar. - click on Yup if the prompt User Control Account is displayed.
- Click File and choose Export to back up the registry. If some problems occur, you can restore the registry from the backup.
- Go to:
ComputerHKEY_LOCAL_MACHINESOFTWAREMicrosoftWindowsCurrentVersionInternet SettingsConnections. - Right-click the folder Connections and select Rename. Rename connections to c lowercase.
- An error message similar to “Cannot rename: the specified key name already exists“. Press OK and continue.
- Save your changes and restart Edge.
6. Install system updates
Operating systems receive regular updates. These updates can fix problems and provide new functions to your system. It is recommended that you leave the automatic update features active to circumvent any system problems. You can also manually install system updates. For this, follow the instructions below:
- First, press Windows key + I to open the settings. You can also open the menu Start and click Settings (cogwheel symbol).
- click on Update and security.
- Here you can see if updates are available or not. If they are available, click Install now.
- Restart your PC after completing the update.
Read also: How to update Windows, programs and games
7. Change the account control settings
The primary function of User Account Control (UAC) is to maintain security by making sure that no unapproved changes are made. Setting UAC to always notify can sometimes cause errors. It is not advisable not to notify for security reasons either. To change the UAC settings,
- Type Account Control user O User Account Control in the search bar.
- click on Change user account control settings.
- Set the slider to Notify me only when apps try to make changes to my computer.
- Press apply.
8. Update your network drivers
Network drivers on your computer may also be causing this problem. You can install the latest version of the drivers to correct or avoid problems. Follow the instructions below:
- Awards Windows key + R and enter
devmgmt.mscto open Device management. You can also search for it with the search bar. - Expand Network cards by clicking on the ‘>’ symbol.
- Right-click the network card device and select Update Driver.
- You choose Automatically searches for drivers. Wait for the update to complete.
- Update the drivers for any adapters you use. You can also manually download the latest drivers for your devices from the manufacturer’s website.
9. Repair or reset Microsoft Edge
In some cases, only the Microsoft Edge browser shows this problem. The solution for this is to reset or repair this application. Follow the directions below:
- First, press Windows key + I to open the settings. You can also open the menu Start and click Settings (cogwheel symbol).
- click on App. Opens the settings menu of App and featureswhere you can find a list of all the programs installed on your PC.
- Scroll to locate Microsoft Edge and click on it. Then click Edit O Repair.
- Confirm the prompt that appears.
- Next time, if the repair doesn’t work, click Reset if you have this option after following the same steps.
10. Reinstall Microsoft Edge
If repairing or restoring Edge fails to fix this problem, you can try reinstalling it. This process is much simpler for the new one Microsoft Edge basato su Chromium. you can download the latest version from the official page and install it.
If you are using the legacy version, the method is more complicated. We recommend that you create a system restore point or backup your favorites in MS Edge. Follow the instructions below to uninstall and reinstall Edge:
- Enable the option to show hidden files. To do this, click View in File Explorer.
- Select the option Hidden objects in the group Show / hide.
- Go to location :.
C:Users“UserName”AppDataLocalPackagesUse your system username instead of “Username”. - Search and delete the folder.
Microsoft.MicrosoftEdge_8wekyb3d8bbwe - It may take a long time to prepare for elimination. Next, choose Yup in the confirmation dialog. click on Yup for all other dialog boxes as well.
- Restart your PC.
- After rebooting, search PowerShell in search bar. Right-click on Windows PowerShell and select Run as administrator.
- Enter the command,
cd C:users“UserName”replacing “UserName” with your username. - Type or copy and paste the following command and press Enter.
Get-AppXPackage -AllUsers -Name Microsoft.MicrosoftEdge | Foreach {Add-AppxPackage -DisableDevelopmentMode -Register “$($_.InstallLocation)AppXManifest.xml” -Verbose}- Restart your PC when the process is complete.
Related posts:
 How to access Steam games without an internet connection
  How to view FPS with Xbox Game Bar in Windows 10: Steps Made Easy
  Hacked account? How to check and remedy
  How to make video calls from WhatsApp Web
  How to increase the RAM memory of a desktop or laptop + Tips and Tricks
  How to organize your YouTube subscriptions into categories
+ Tips and Tricks
How to organize your YouTube subscriptions into categories
+ Tips and Tricks


