


There is no remove button to disconnect Microsoft account in Windows 11, 10
Windows users used to enjoy a very easy and fluid user management system in Windows 10. Those features have become more important in the new Windows 11, with a visual overhaul of everything. Now in some cases you may notice that the ‘Delete’ button is grayed out for specific user settings. This problem is very common and you need to take a few steps before you can remove a specific account from your system.
Solution 1: disconnect account from Settings
You need to discontinue the specific account (work or school account) from Settings and then only you can delete the account from your device.
1. First, press the Tecla de Windows + I keys together.
2. In the Settings window, tap «Accounts“In the left panel.
3. Now on the right side, scroll down and tap on the «Access to work or school“.
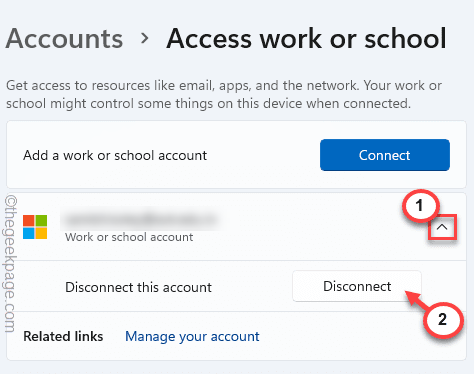
4. Once you are there, on the right hand side, you will see the work or school account you are using.
5. Simply touch the drop-down menu for the email account and touch «Disconnect”To disconnect email from your device.
Now, you can easily delete the account from your system or just leave it to remain disconnected.
Fix 2: remove the device
You can deauthorize any device on your system from Settings.
1. First, open the Settings application on your system.
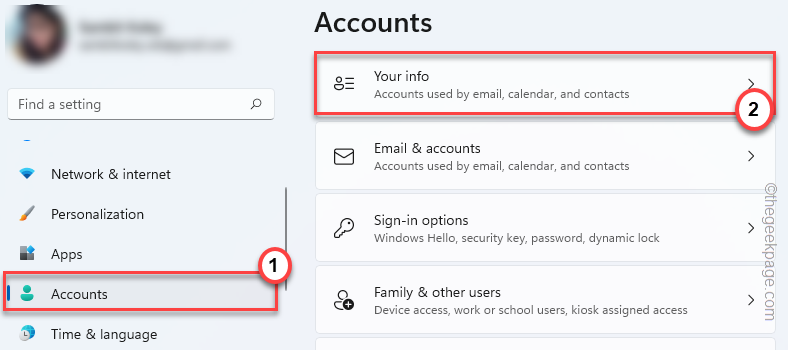
2. Now, tap on the «Accounts“In the left panel.
3. After that, click on «Your information“.
4. Then scroll down to the bottom of the screen and click on «Accounts“.
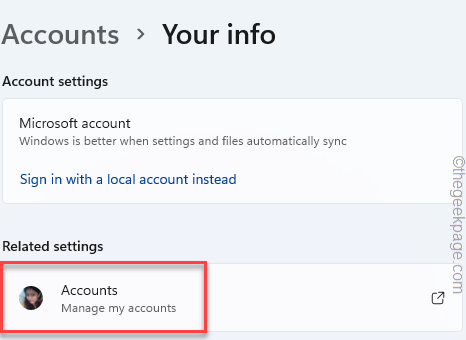
This will open your account in a browser window.
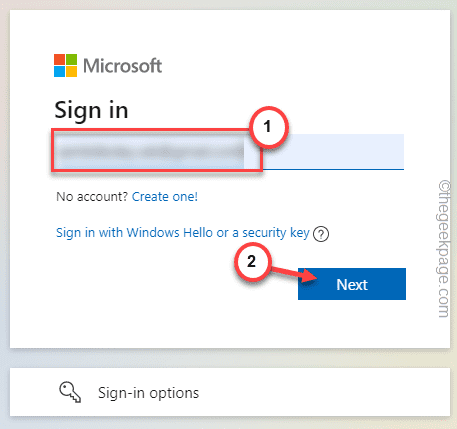
5. Now, the Microsoft login page will open. Then type your Gmail address in the box.
6. Then tap on the «next“To continue.
Use your account password and complete the signing process.
Once you have done that, the Microsoft accounts page will prevail.
7. Now, tap on the three-bar menu and tap «Devices”To locate the device list.
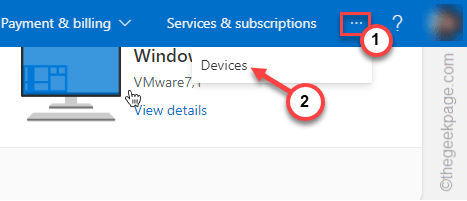
8. Then expand the device you have selected.
9. Then click on «Remove the device“.

10. Then cheque the “I am ready to remove this device“.
11. Finally, tap «Remove”To disconnect this device from your system.
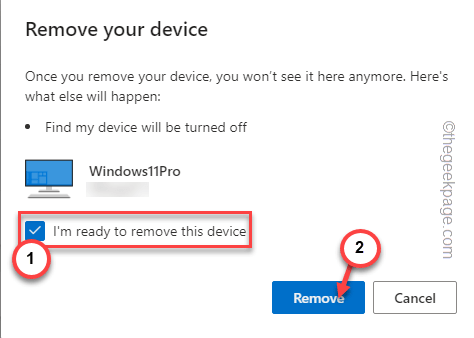
After doing this, close the Settings.
This will remove your account authentication from your system.
Solution 3: create a local account and delete the old one
Creating a local account and then deleting the old one should work.
Step 1: create a new local account
1. First, press the Tecla de Windows + I keys together.
2. Then, tap on the «Accounts“.
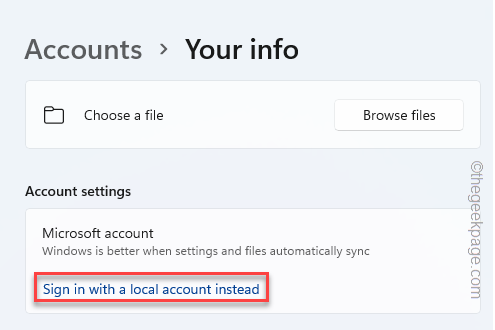
3. After that, click on «Your information“To access it.
4. Then on the right hand side you will find the option to create a local account.
5. Simply tap on the «Instead, log in with a local account“.
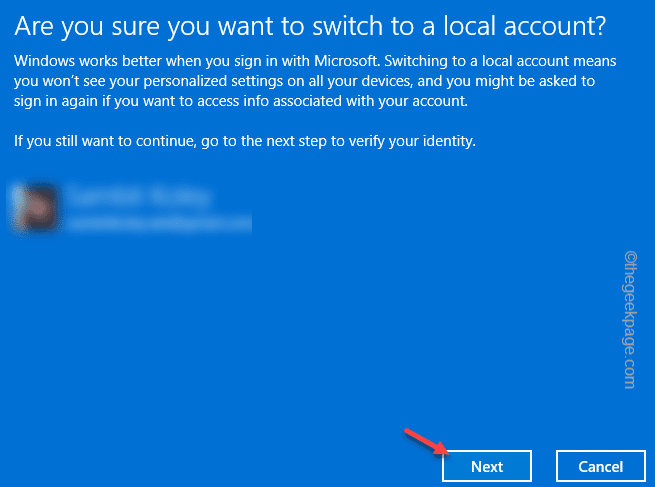
6. A blue panel will appear. Simply click on «next” to proceed.
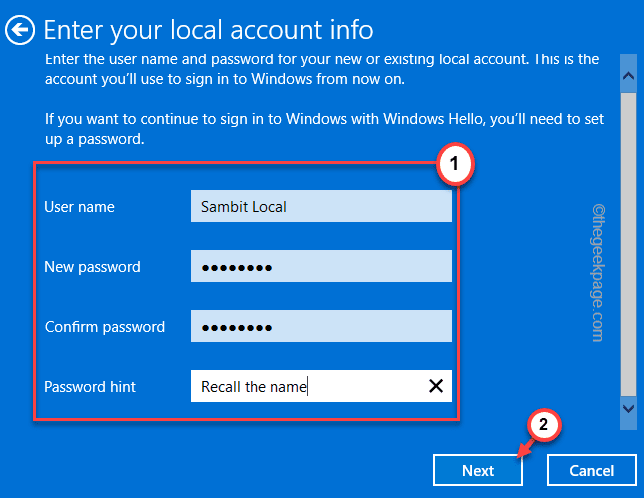
7. In the next step, enter a new name for your local account, a new password, and the password hint in the appropriate sections.
8. Finally, touch «next” to proceed.
9. Finally, click on «Log out and terminate“To complete the process.

This will remove you from your current account.
You should be back on the lock screen. Use the new password (or existing PIN) to log into this new local account.
Step 2 – Delete the old one
Now, it will be quite easy to remove the old account from your system.
1. Open Settings.
2. Then, tap on the «Accounts” On the left side.
3. After that, click on «E-mail accounts” On the right side.
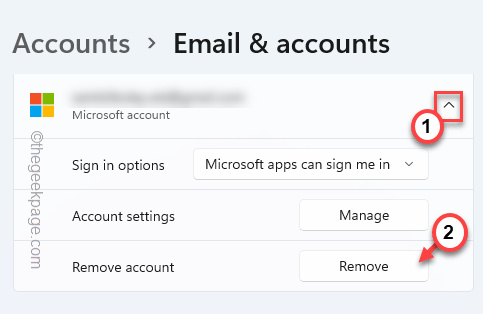
4. Now on the right side you will see the Microsoft account you were using.
5. Simply zoom in and touch «Remove“.
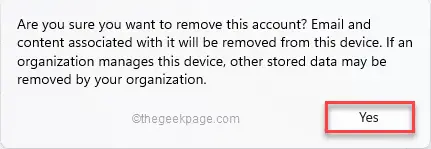
6. Now confirm your action with a tap on «Yes“.
This will definitely delete the account from your system.
[
NOTE –
If you want to sign in to your system using a Microsoft account, you can easily do it this way.
1. Open the Settings window.
2. Then, tap on the “Accounts” menu.
3. After that, open the “Your info” section to access it.
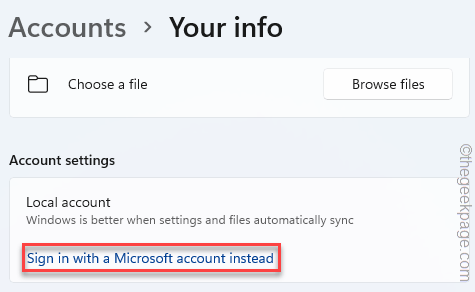
4. Now, scroll down and tap on “Sign in with a Microsoft account instead“.
Now, follow the on-screen instructions and login with your Microsoft account once again.
]
Solution 4: alter the account type
If you are removing the single administrative account from your system, you must revert it to a local account.
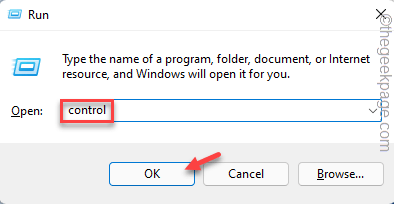
1. First, press the Tecla de Windows + R keys together.
2. Then write «control«In Run and touch»OK“.
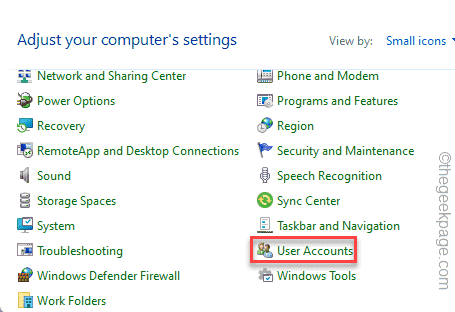
3. When the Control Panel opens, tap «User account“.
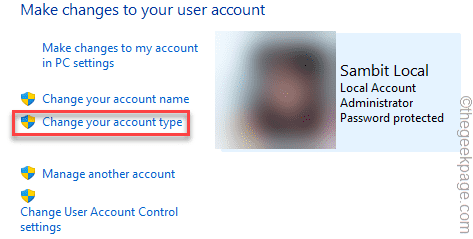
4. Now, in the left panel, click on «Change your account type“.
5. Then click on «Administrator“.
6. Finally, tap «Change account type“.
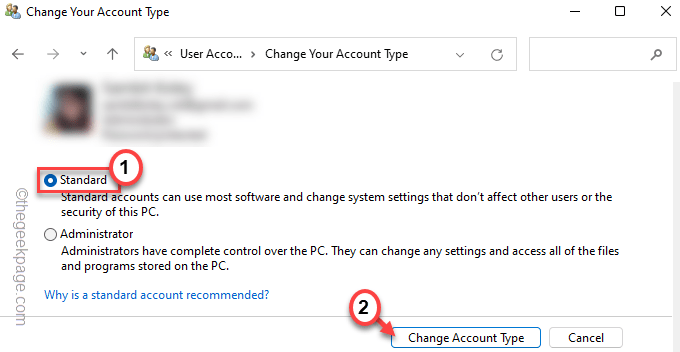
This will change the account type. After this, you can easily remove the Microsoft account from your system.
Related posts:
 How to access Steam games without an internet connection
  How to view FPS with Xbox Game Bar in Windows 10: Steps Made Easy
  Hacked account? How to check and remedy
  How to make video calls from WhatsApp Web
  How to increase the RAM memory of a desktop or laptop + Tips and Tricks
  How to organize your YouTube subscriptions into categories
+ Tips and Tricks
How to organize your YouTube subscriptions into categories
+ Tips and Tricks


