


Windows Defender error code 0x800b0100 in Windows 11
Windows Defender is a built-in antivirus service offered by Microsoft, which keeps your PC safe from any virus or malware attacks or any other external threats. However, it has to be ON to continue protecting your PC. So when you try to start Windows Defender or try to turn it on, you might encounter an error code 0x800b0100 that says “A program error occurred during initialization”. If this problem continues, contact your system administrator.”
This could be a concern, because this error prevents you from enabling the Windows Defender feature, thus exposing your PC to risks. There could be many reasons why you may see this error, for example, your PC may be infected with a virus or malware, third-party antivirus software may be interfering with system function, or some of your system files may be corrupted or damaged. corrupted. .
Fortunately, there are a couple of solutions that can help you fix Windows Defender error code 0x800b0100 on your Windows 11 PC, so you can continue to protect your PC from any threats. Let’s see how:
Method 1: Perform a clean boot
Clean boot helps the Windows PC to start with minimal services and this in turn helps you to check if the problem is caused by a third-party application. If you notice that the Windows Defender problem is fixed and working properly after completing the clean boot process, it means that the problem is caused by a third-party application. Here’s how to perform a clean boot:
Step 1: Press the Earn + R keys simultaneously on our PC to open the Run command window
Step 2 – In the Run command window, type msconfig in the search bar and press Enter to open the System Configuration window.
Step 3: In the System Configuration window, go to the General tab and select the selective start option.
Make sure the Load system services and Load startup items options are checked.

Step 4: Then go to the Services tab and check the box next to Hide all Microsoft services option at the bottom left.
Also, press the button Deactivate everyone button at the bottom right.

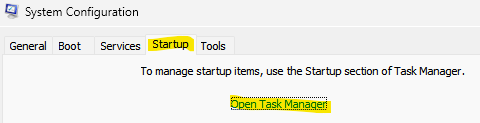
Step 5: Now navigate to the Start up tab and click Open Task Manager.
Step 6 – In the Task Manager window that opens, right-click on all services and select enable for all.

Repeat this step for all services listed in Task Manager.
Step 7: Now, exit the Task Manager window and hit OK on the System Configuration window to save changes and exit.
Once done, restart your PC and check if you are still facing the issue with Windows Defender. If the issue is fixed then it happened due to a third party application and that is mainly third party antivirus software. Make sure to disable any third-party antivirus software on your PC and check if you still see the 0x800b0100 error. Once the problem is fixed, you should revert the System Configuration changes again and restart your PC to make sure it boots normally. That is how:
*Note – Follow steps 1 and 2 as above to open the System Configuration window. Now follow the steps below to revert the settings:
Step 1 – In the System Configuration window, under the General tab, select the Normal startup option.
Step 2: Now, select the Services tab and uncheck the box next to Hide all Microsoft services option.
Also, click the Enable All button
Step 3: Next, click on the Startup tab and click on the Open Task Manager link.
Step 4: Now in the Task Manager window, right-click on each of the Services and select Enable for all of them.
Once done, restart your PC and it should start normally now with all services enabled.
Now open Windows Defender and you should no longer encounter the error.
Method 2 – Check the Windows Defender service
It is possible that the Windows Defender service is disabled and is causing the 0x800b0100 error when you try to open Windows Defender. Follow the instructions below to activate the service:
Step 1: Press the Earn + R keys together on your PC to open the Run command window
Step 2 – In the search bar of the Run command, type services.msc and press OK to open the Services window.
Step 3 – In the Service Manager window, go to the right side and under the Name column, find Windows Defender Firewall or Microsoft Defender Antivirus Service.
Double-click on it to open its Properties window.
Step 4 – In the Microsoft Defender Antivirus Service Properties dialog box, on the General tab, go to the Startup type field and check if it is set to Automatic.
If not, select Automatic from the dropdown menu next to it.
Step 5: Also, make sure that the status of the Service shows Running.
Otherwise, click Start to begin running the service.
Press Apply and then OK to save the changes.
Now exit the Services Manager window and check if Windows Defender is now working.
Method 3 – Run a system file check
Sometimes certain error appears due to corrupted or damaged system files and running a system file check or SFC scan can help to fix the files. Let’s see how:
Step 1: Press the gain + R hotkeys on our keyboard to launch the Run command box.
Step 2: In the search field, type cmd and press the button Ctrl + Mayús + Intro keys together on your keyboard to open the elevated Command Prompt window.
Step 3 – In the Command Prompt (Admin) window, type the following command and press Enter:
sfc /scannow
The scan takes some time, so please wait patiently until it finishes. Once it has repaired the damaged system files, it will display a success message.
Now, close the elevated Command Prompt window, restart your PC and the Windows Defender issue should be fixed.
Method 4: Run DISM
In addition, you can also run the DISM (Deployment Image Servicing and Management) tool to find damaged system files and replace them with new ones. Here’s how to run the tool:
Step 1 – Navigate to Start, right-click on it and click Run.
Step 2: This will open the Run command window.
here, write cmd in the search field and press Enter to open the Command Prompt window with administrator rights.
Step 3 – In the elevated Command Prompt window, run the following command and press Enter:
dism.exe /Online /Cleanup-image /Restorehealth
Now, wait until the process is finished as it takes some time. Once the process is finished and you see the success message, exit the Command Prompt window, restart your PC and check if the Windows Defender error code 0x800b0100 still appears.
Method 5: Reset Defender settings to default
Step 1: Press the Earn + R shortcut keys on your keyboard to open Run.
Step 2: This opens the Run command window
In the search bar, type firewall.cpl and press OK to open the Windows Defender Firewall window.

Step 3 – In the Windows Defender Firewall window, click the Restore failures option on the left side of the panel.
Step 4: Next, in the Restore Defaults window, click on the Restore defaults button.

Step 5: Press yes to confirm the action as soon as you see the prompt.
Once done, close the Windows Defender Firewall window and check if the issue still occurs.
*Note – Alternatively, you can refer to this article for more ways to reset Windows Defender settings.
Method 7 – Reset this PC
Step 1: Press the win + me together on your recovery PC to launch the Settings app.
Step 2 – In the Settings window, click the System option on the left.
Step 3: Now, navigate to the right side, scroll down and click on Recovery.
Step 4 – In the recovery settings window, go to the right side and below the recovery options window, go to Reset this PC and click the Reset PC button next to it.

Once the process is done, your PC will reboot and you will have a brand new system and you should no longer see Windows Defender Error: 0x800b0100.
At the same time, try running an antivirus scan on your PC to check if your system is affected by malware or under virus attack. Accordingly, let the software quarantine your PC.
However, if none of the above methods work, you can perform a repair upgrade by downloading the Windows ISO file from the official Microsoft website or by creating a Windows installation media (USB drive/DVD). Alternatively, you can also run a startup repair through the advanced options in advanced troubleshooting.
Related posts:
 How to access Steam games without an internet connection
  How to view FPS with Xbox Game Bar in Windows 10: Steps Made Easy
  Hacked account? How to check and remedy
  How to make video calls from WhatsApp Web
  How to increase the RAM memory of a desktop or laptop + Tips and Tricks
  How to organize your YouTube subscriptions into categories
+ Tips and Tricks
How to organize your YouTube subscriptions into categories
+ Tips and Tricks


