


“Archinstall”, a friendlier installation of Arch Linux
Arch Linux It is a distribution that has always tried to stay true to the KISS philosophy, but at the same time it is the best known of those that are aimed at advanced users. In fact, the developers’ intention to keep Arch Linux as a highly customizable, KISS operating system took a twist in 2012, when they decided to remove the installer to replace it with a more manual process supported by pacstrap.
Not everyone liked the removal of the installer, but the distributors stood their ground and in the end the manual installation was standardized with a few nuances. However, nine years later, those responsible for Arch Linux have decided include a simplified official installer in the last system image for those users who choke on manual installation (although with a little practice it is not that difficult either).
The installer is called “archinstall”And its purpose is to facilitate the installation of Arch Linux, although the process is still through the console. No, there is no semi-graphical interface here like there was in the installer that was discontinued in 2012, but at least it makes the process a lot less harsh for those intermediate users who Arch Linux can do something great.
In other words, what “archinstall” does is establish through the command console some guided steps to install Arch Linux without complications, but without coming close to what Debian, Ubuntu, Fedora and the many distributions that use Calamares offer.
And how much “archinstall” really makes installation easier? In order to give all the information, we will briefly describe the steps with a VirtualBox virtual machine.
Installing Arch Linux with “archinstall”
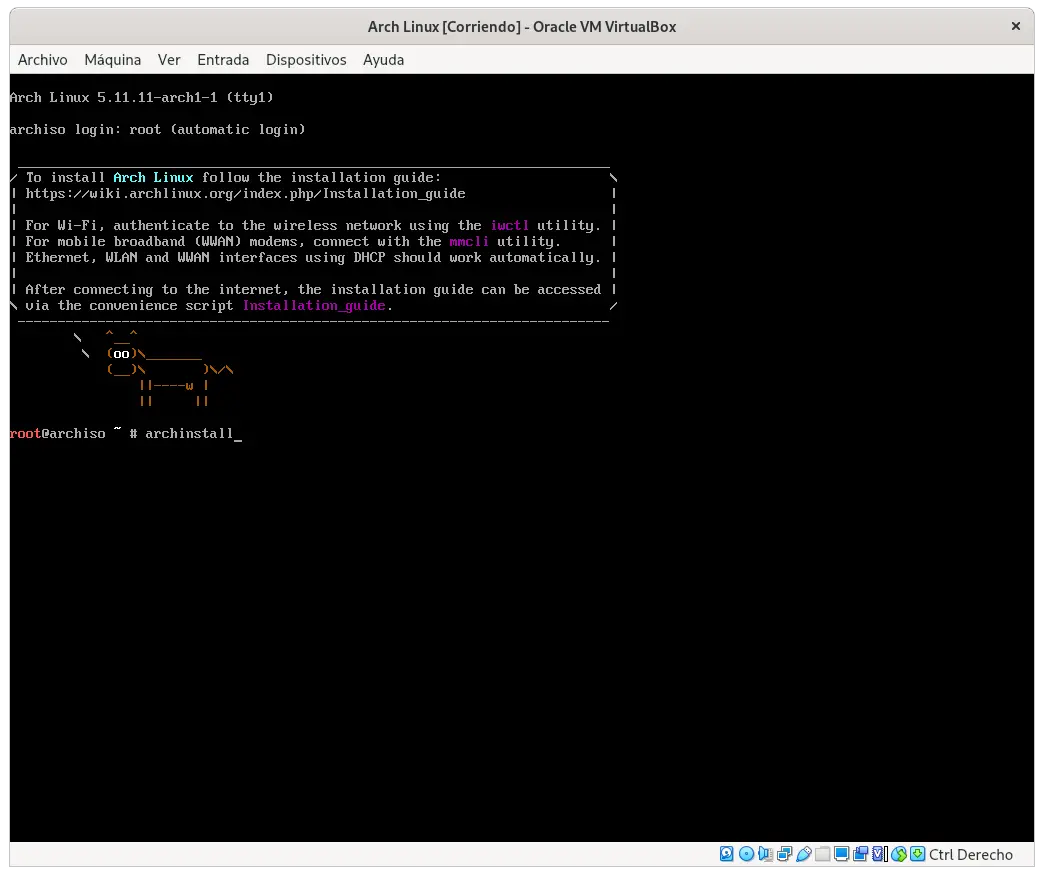
To begin, you have to download the Arch Linux image and boot the computer from it (the pendrive or DVD where it was inserted) to start the installation process. As soon as you can use the console, you have to enter the command “archinstall”.
archinstall
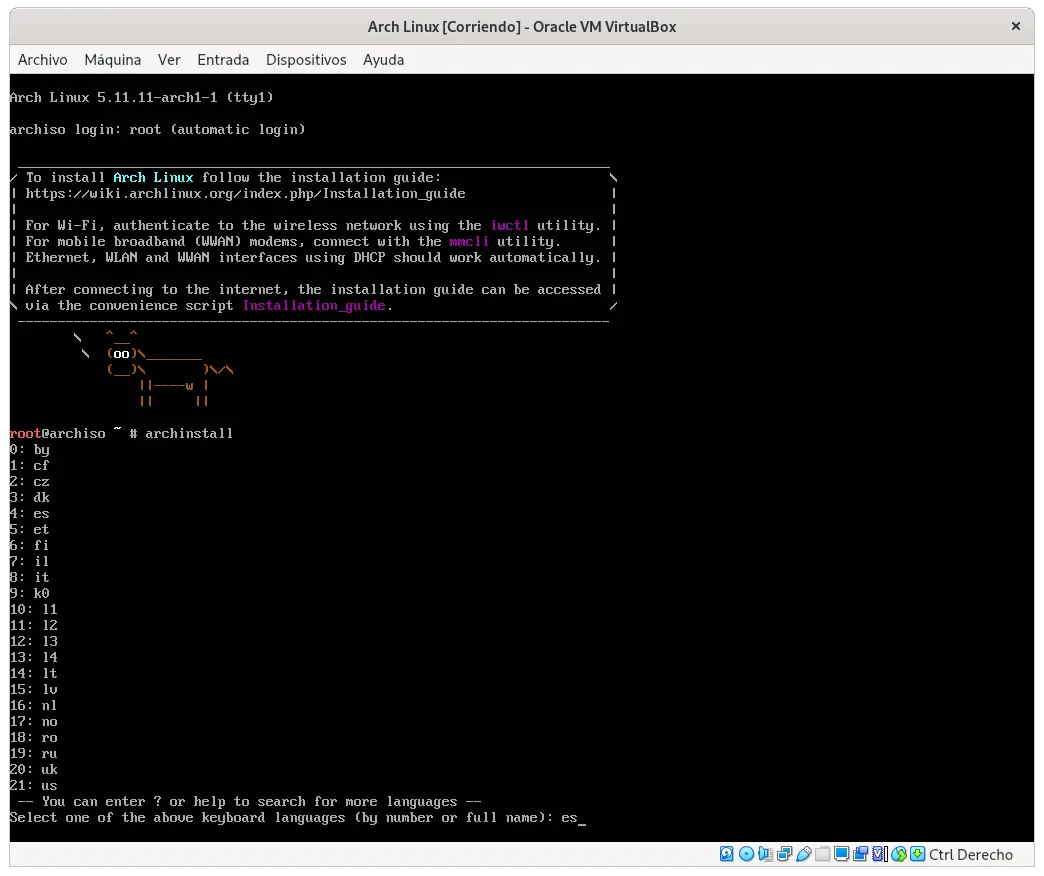
The first step of “archinstall” consists of set keyboard language, which in our case is “es” in reference to Spanish. After typing “is” you have to press the enter key.
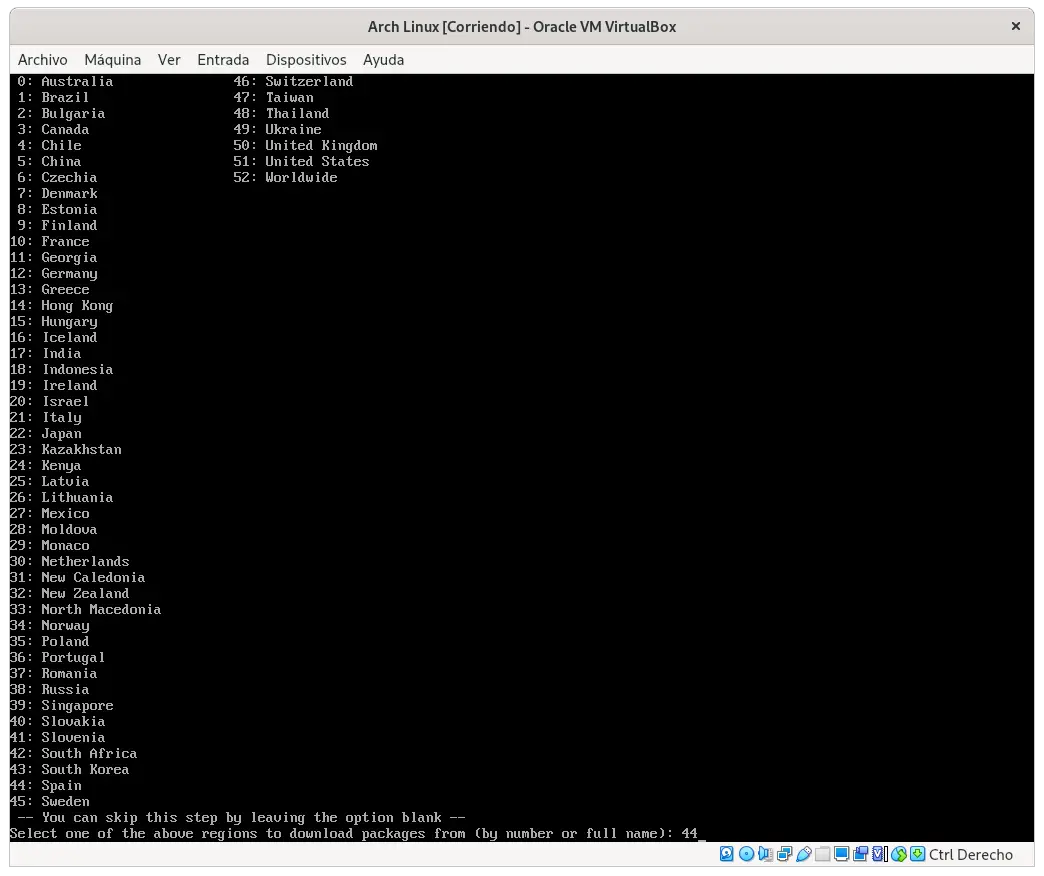
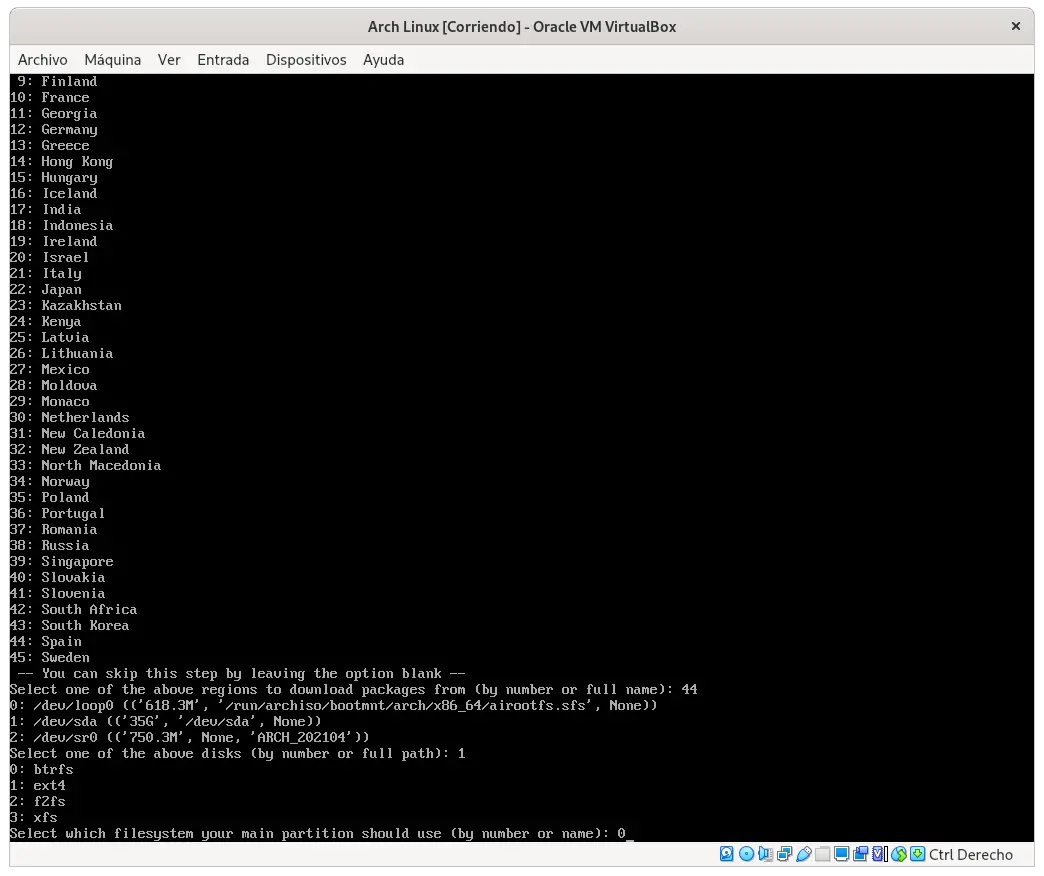
The second step consists of select region. As MuyLinux is a Spanish portal, we have entered the number 44 (Spain) and pressed enter.
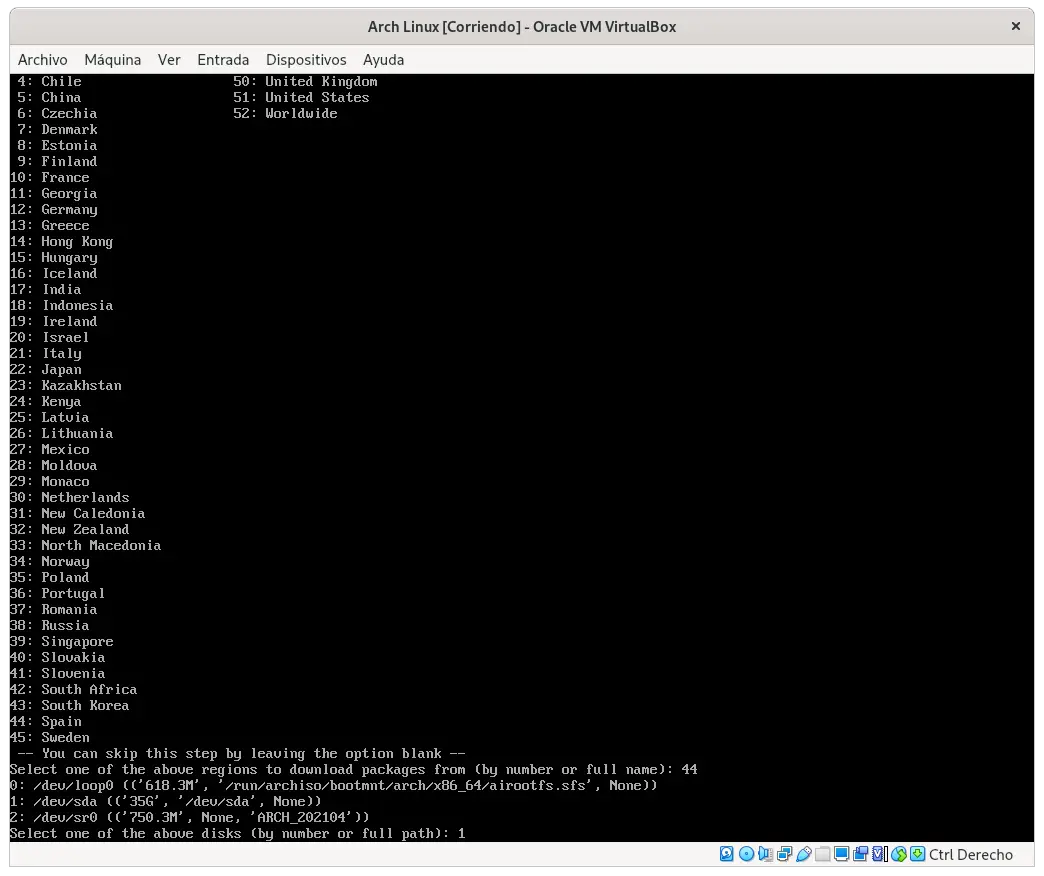
Then you have to choose the medium on which you want to install Arch Linux. In our, option 1 (/ dev / sda). It goes without saying that, if you want to carry this on a real production machine, you have to back up all your personal data on an external drive (an external hard drive for example) before starting the installation to avoid annoyances.
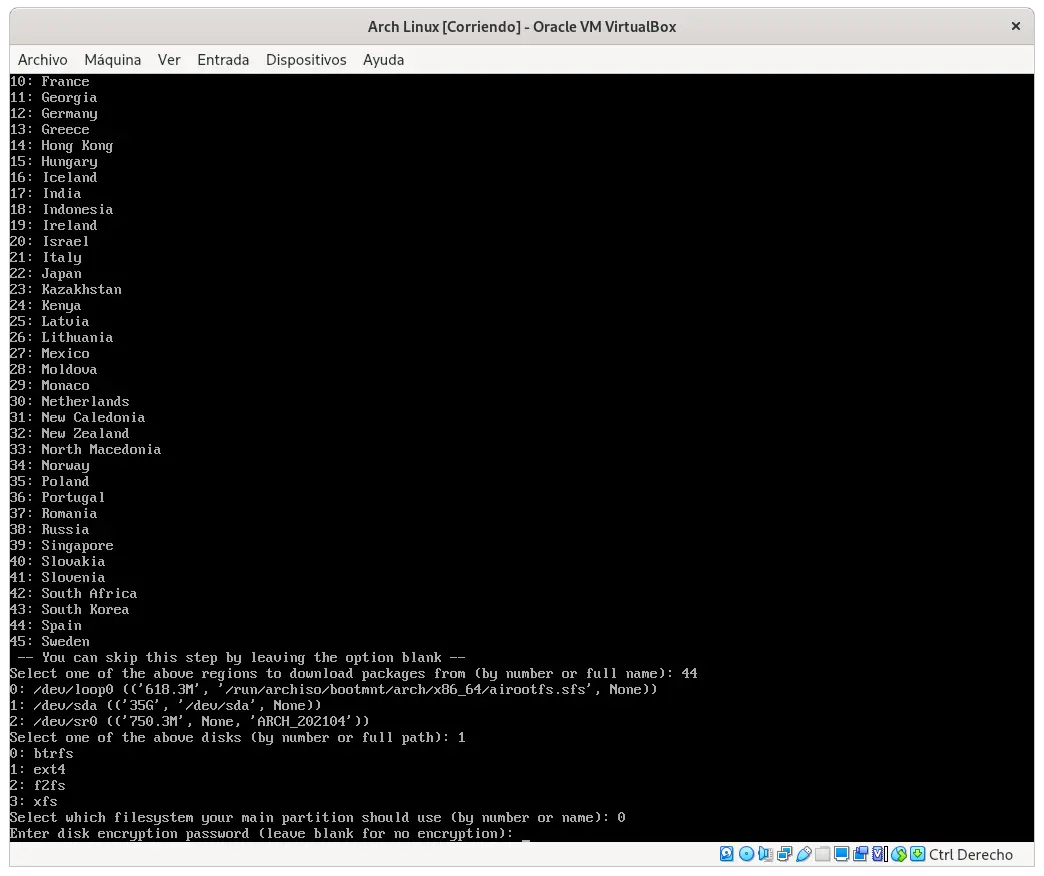
As a fourth step we have the file system selection. Although we have selected Btrfs, this is entirely up to the user, although we recommend XFS in case of using a mechanical hard drive to improve read and write speeds.
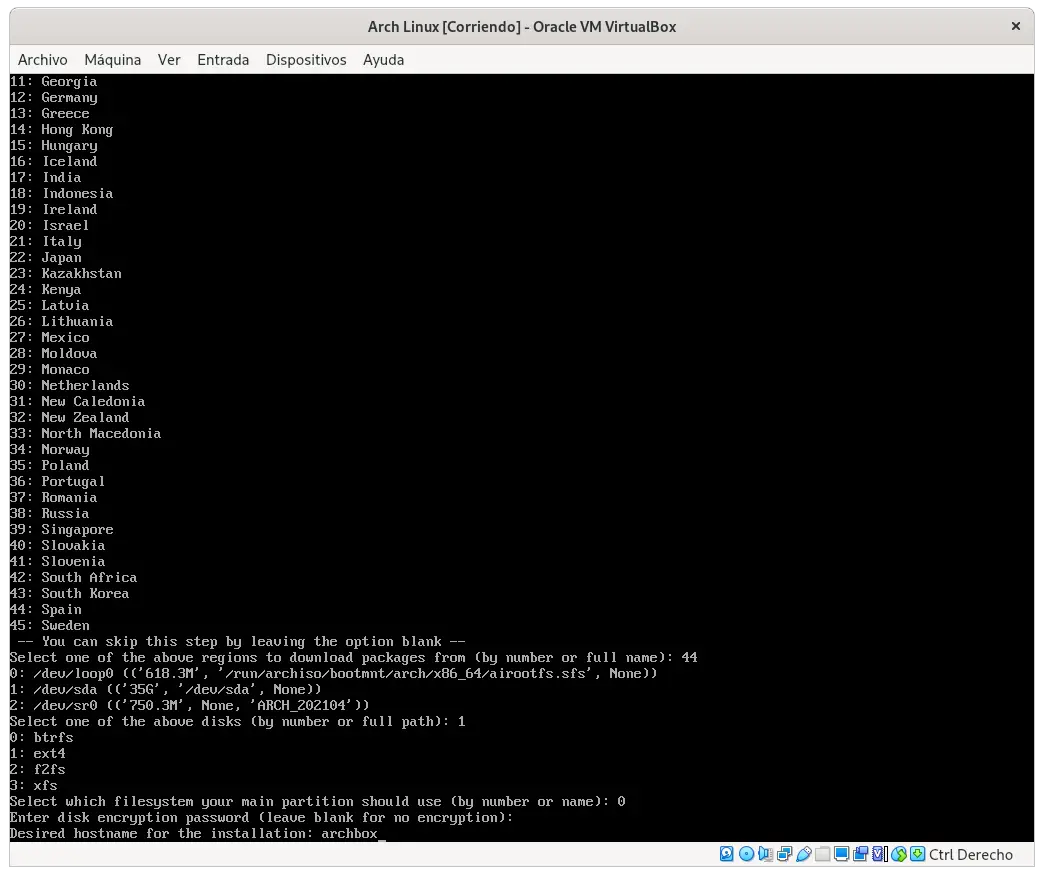
Optionally an encryption password can be set, something that we highly recommend if the computer is a laptop that usually leaves the home, because despite the fact that GNU / Linux offers certain advantages at the security level compared to Windows, none of that works if the partitions where the data is stored are not encrypted.
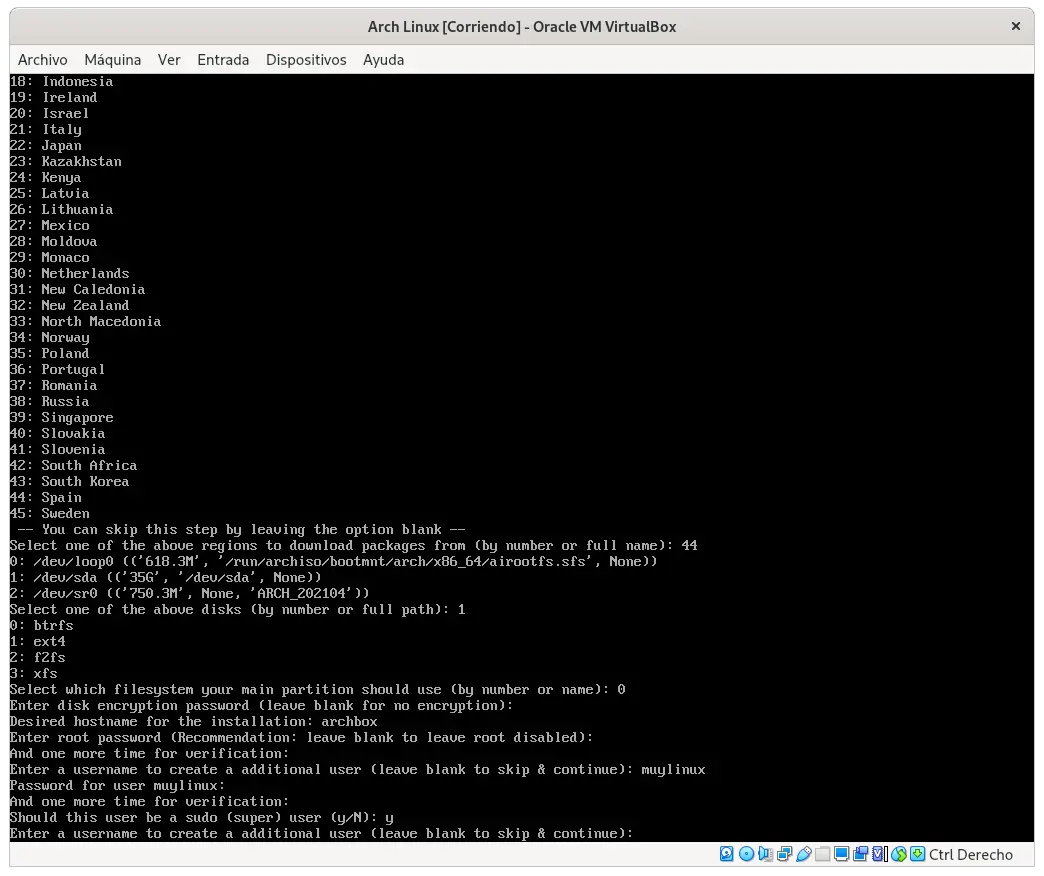
The establishment of name of host it is a classic that some systems like Fedora Workstation have eliminated (although it can be adjusted later from the GNOME configuration).
Arch Linux is a distribution that wants to offer total flexibility, so the user can choose to enable root or not (establishing a password or not) or create or not a common user and make them “sudoers”. Once again, we are not going to go into valuations.
And here we come to one of the most important parts for those looking for an easy installation: the desktop selection. If you leave the field blank and click on enter, the desktop environment installation process will be skipped, but in our case we have chosen GNOME (option 2).
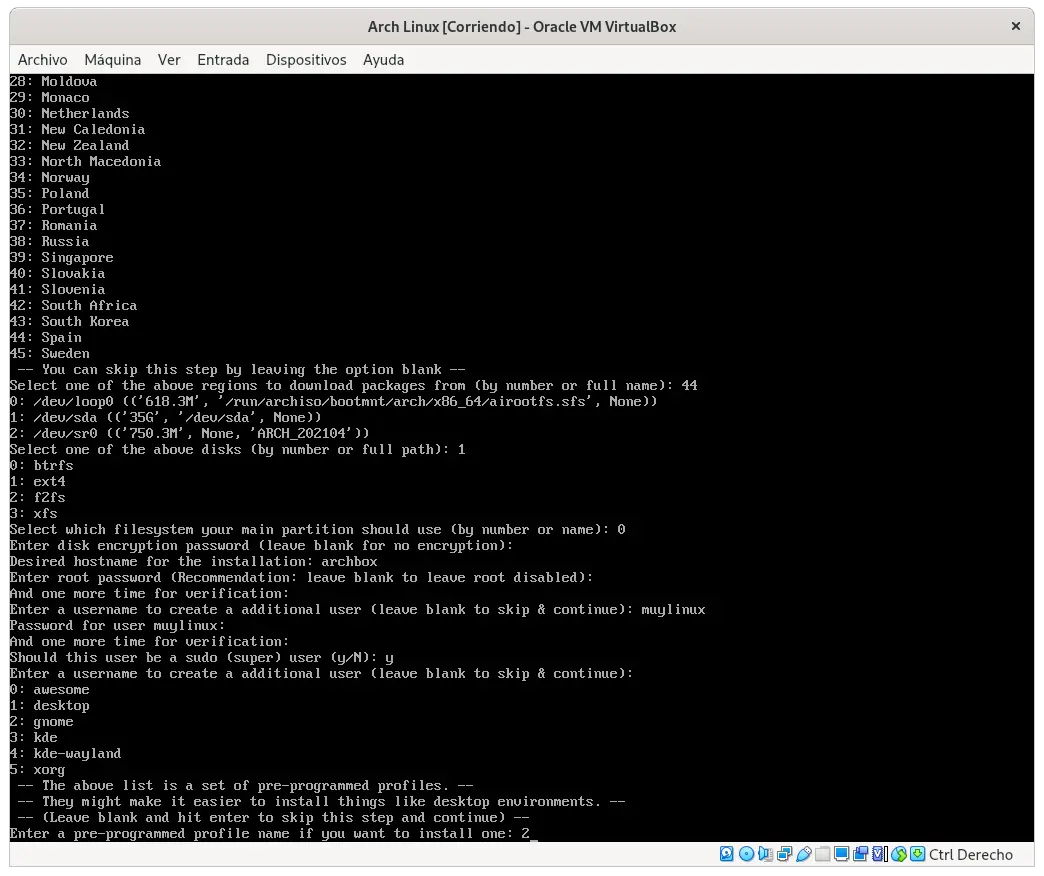
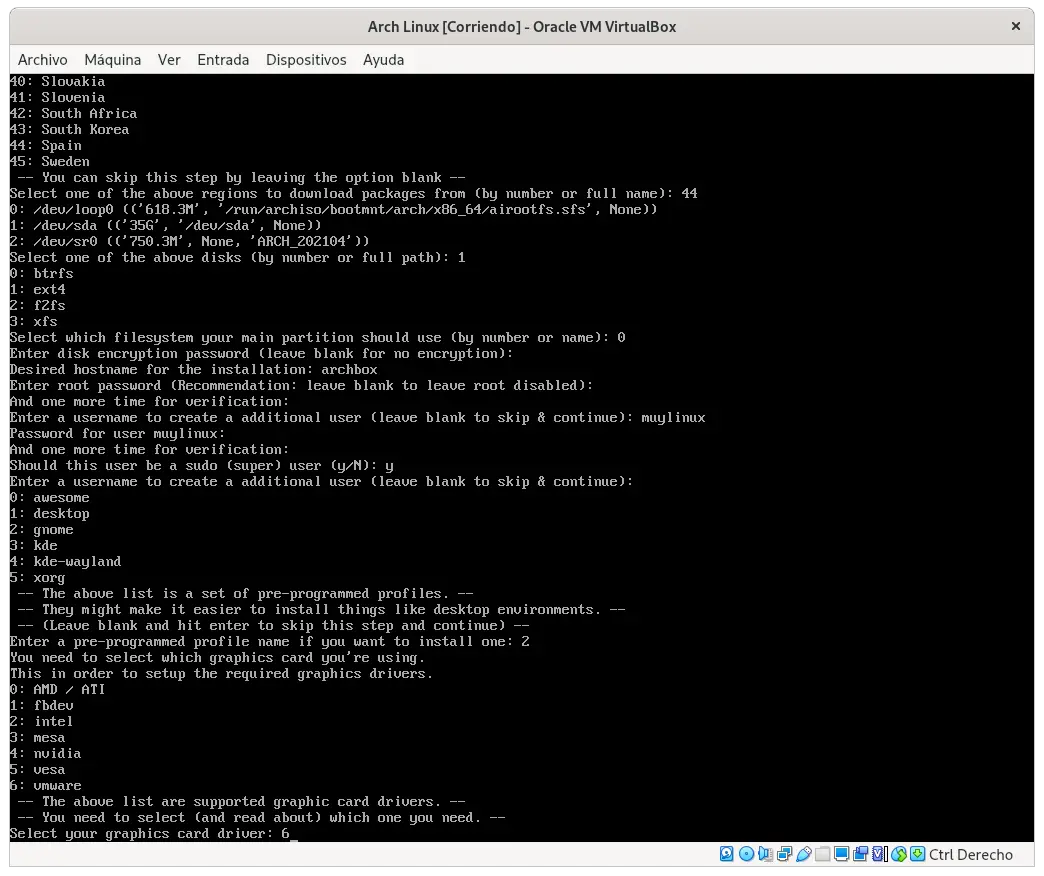
In the ninth step you have to select the drivers for the brand of the graphics present on computer. Because we have used VirtualBox, we select VMware (option 6).
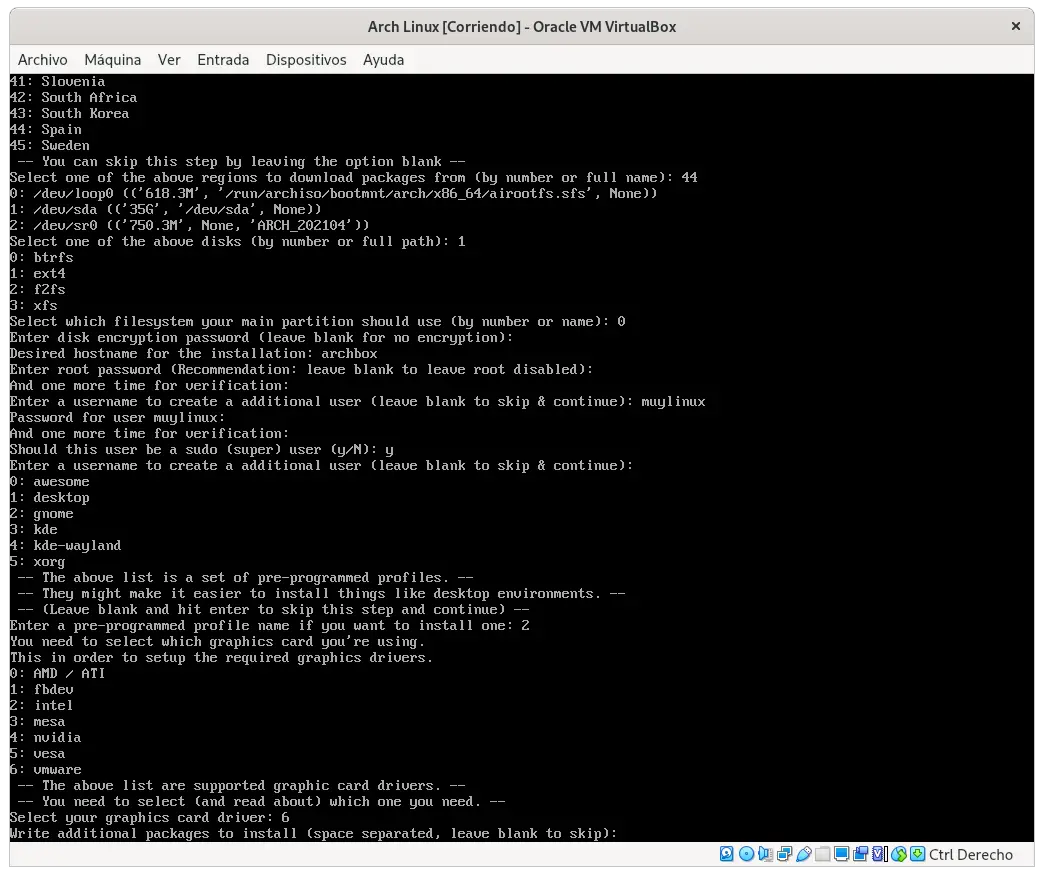
After the user you can select additional packages you want to install, which have to be separated only with blank spaces.
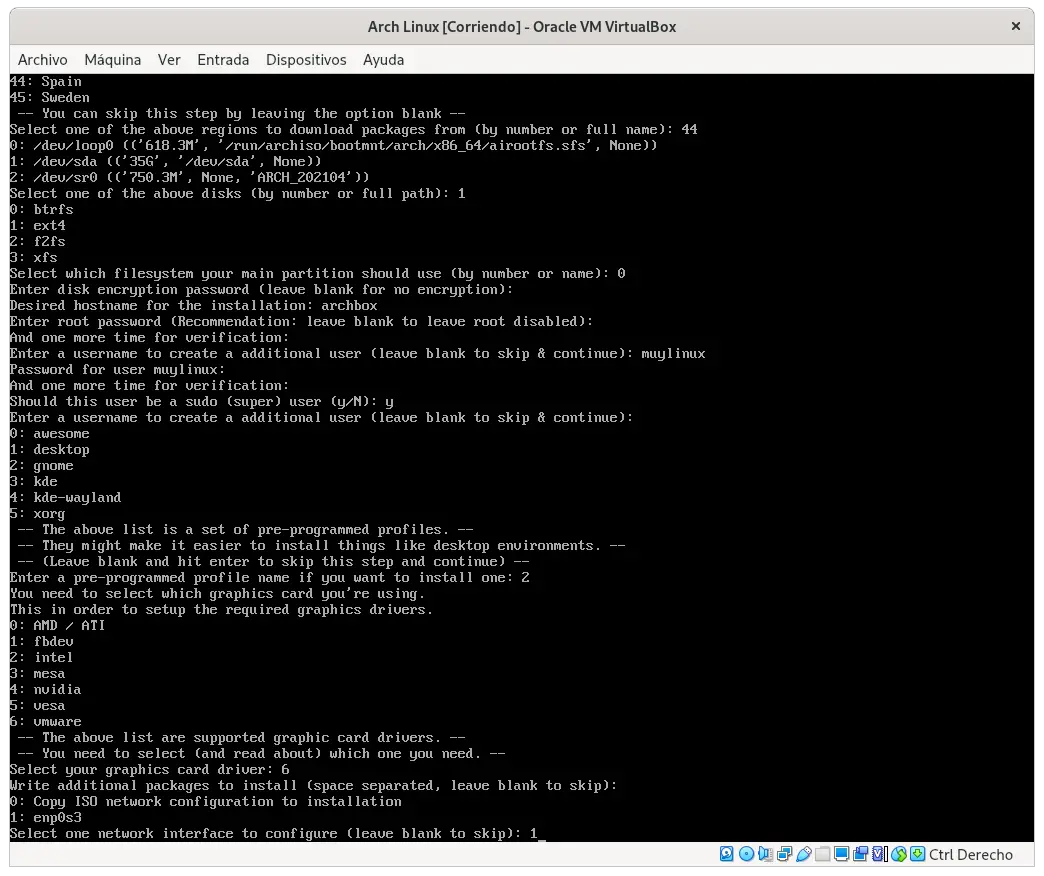
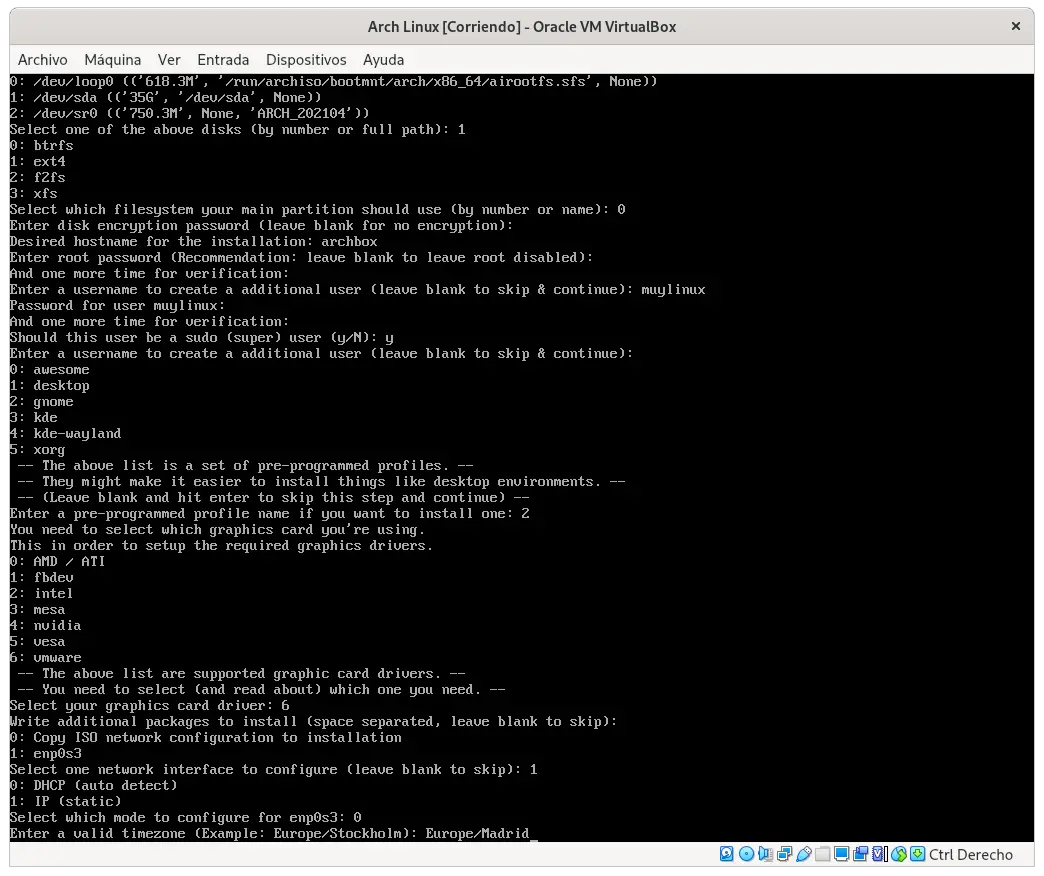
In the network interface We have selected the Ethernet generated by VirtualBox (option 1) and configure it using DHCP.
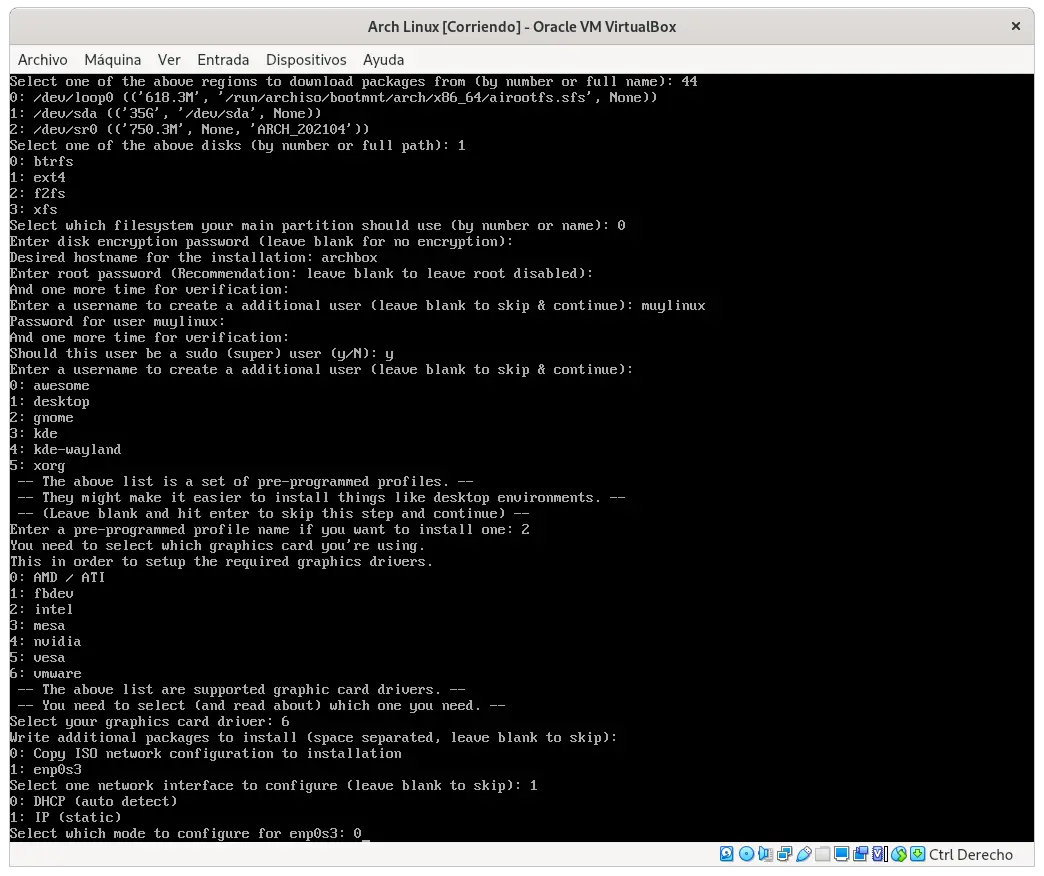
As a last step you have to enter a valid time zone for the system. In our case it is “Europe / Madrid”.
Europe/Madrid
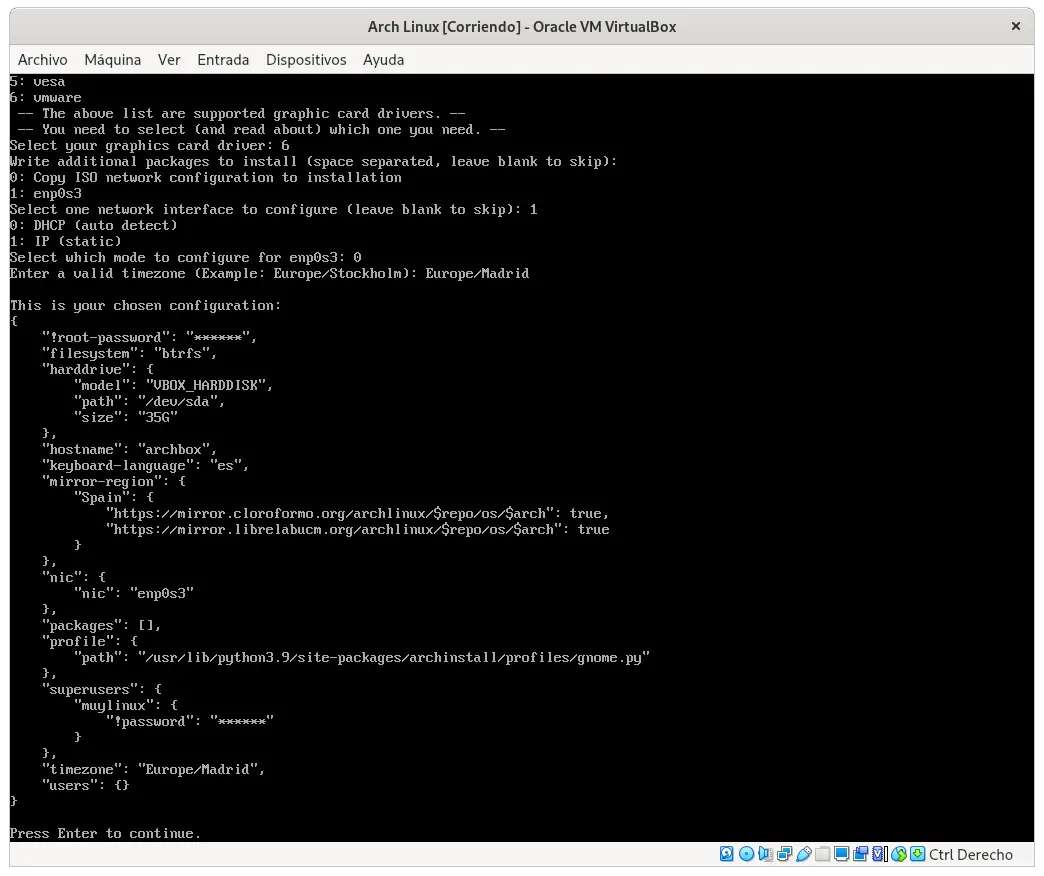
After performing the relevant steps (which do not have to be the same for all users), the installation summary and the ability to start the process by pressing the enter key.
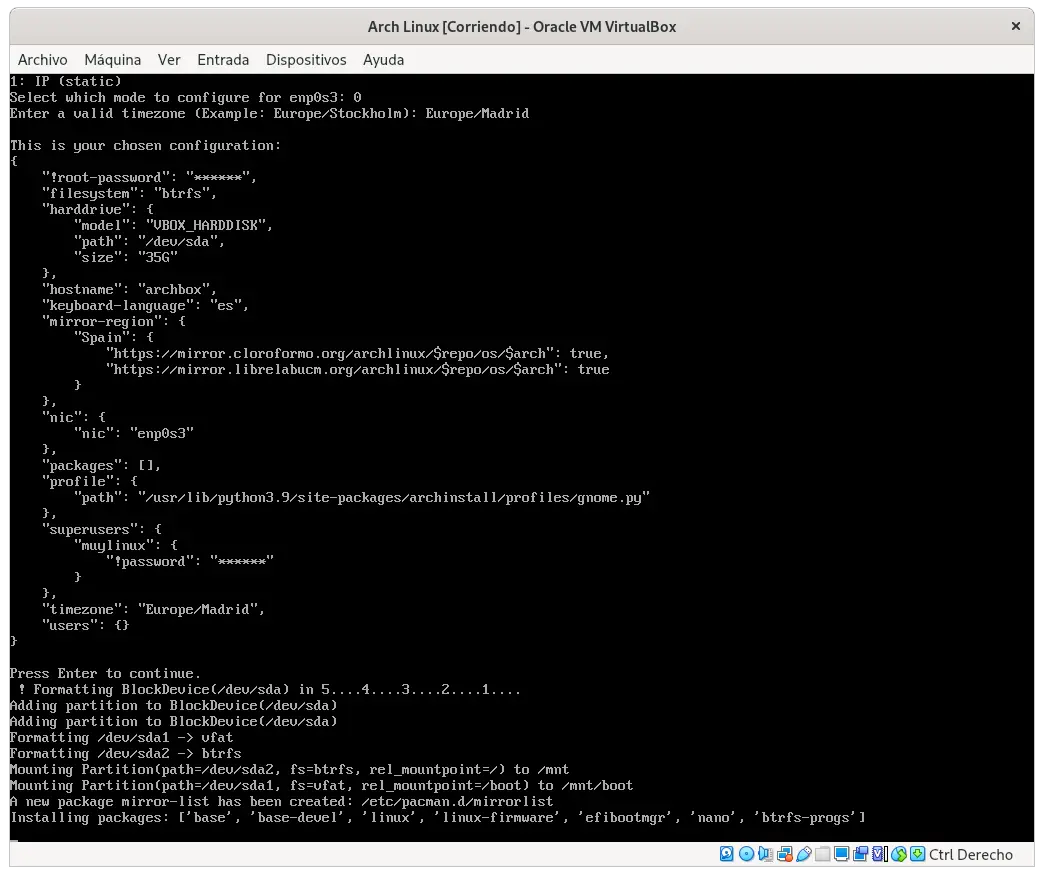
And with this we already have our Arch Linux installed through “archinstall”. From what you see, the process is fully guided, so the user does not have to have very advanced knowledge to do it, although those who prefer manual installation through pacstrap can continue to do it as usual.
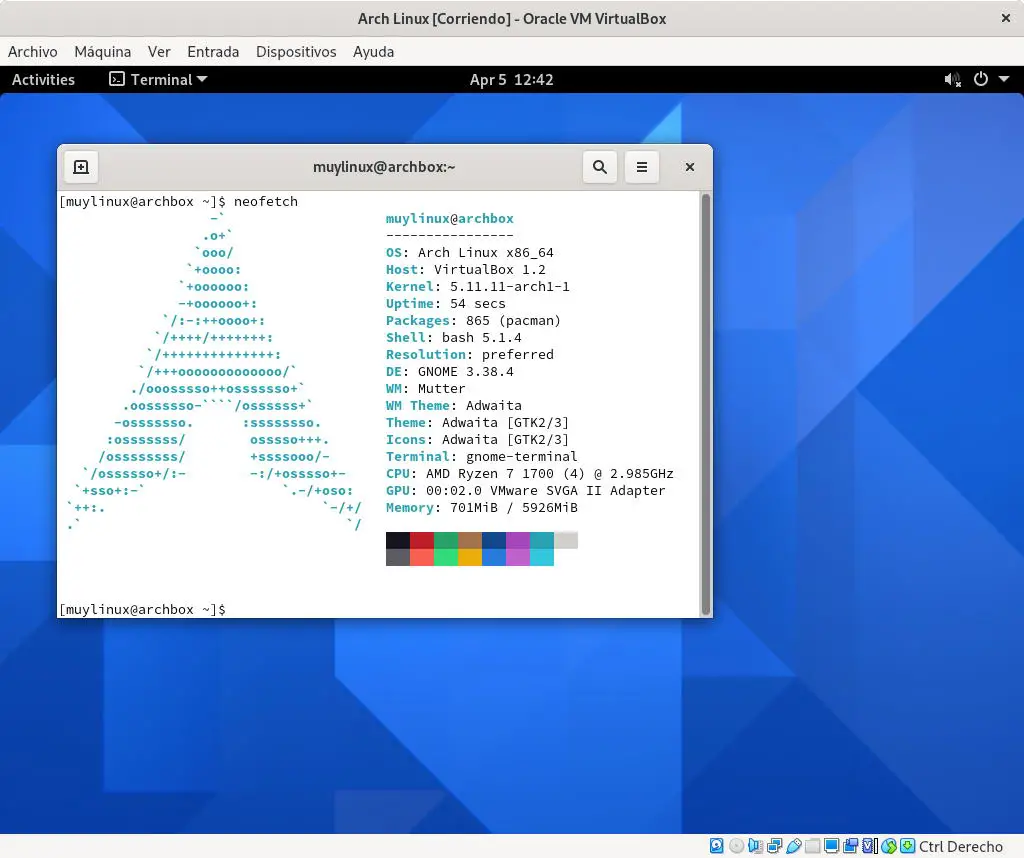
Arch Linux with GNOME installed with archinstall
Related posts:
 How to access Steam games without an internet connection
  How to view FPS with Xbox Game Bar in Windows 10: Steps Made Easy
  Hacked account? How to check and remedy
  How to make video calls from WhatsApp Web
  How to increase the RAM memory of a desktop or laptop + Tips and Tricks
  How to organize your YouTube subscriptions into categories
+ Tips and Tricks
How to organize your YouTube subscriptions into categories
+ Tips and Tricks


