


How to disable Microsoft Teams from appearing automatically in Windows 11/10
In this pandemic era, going online for everything is a good way to fight this virus. Therefore, all meetings, classes, and other gatherings are held online through some software applications like Microsoft Teams, Zoom, or Google Meet, etc. Most of the corporate companies have adapted Microsoft Teams for better user experience and software development. Many of the Windows users have reported that Microsoft Teams app unexpectedly opens automatically on their system. No matter what they do, it happens every time they’re working on something else. If you are also facing this same problem, don’t worry. We have analyzed this situation and found a bunch of solutions in this post, which will definitely help you in some way.
Solution 1 – Shutting down Microsoft Teams from startup
You can disable Microsoft Teams app from startup in 2 ways i.e Settings app and Task Manager. We have explained both ways below.
Method 1: Using the Settings app
Step 1: Press windows + me keys together on your keyboard to open Settings app directly.
Step 2: Then click Applications on the left side of the menu in the Settings app window.
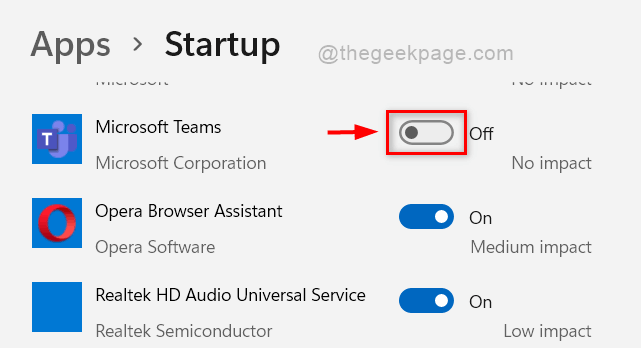
Step 3: Select Start up option available at the bottom of the apps page, as shown in the screenshot below.

Step 4 – On the home page, scroll down and locate Microsoft Teams application
Step 5: Then click activation button in front of Microsoft Teams to convert it Off As shown below.
Step 6: Close the Settings window.
That’s it.
Method 2 – Use Task Manager
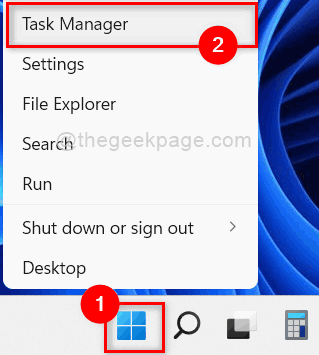
Step 1: Right click on Start button present on the taskbar.
Step 2: Then select Task Manager from the context menu as shown below.
NOTE:- you can also use keyboard shortcut to open Task Manager directly pressing CTRL + MAYÚS + ESC keys together.
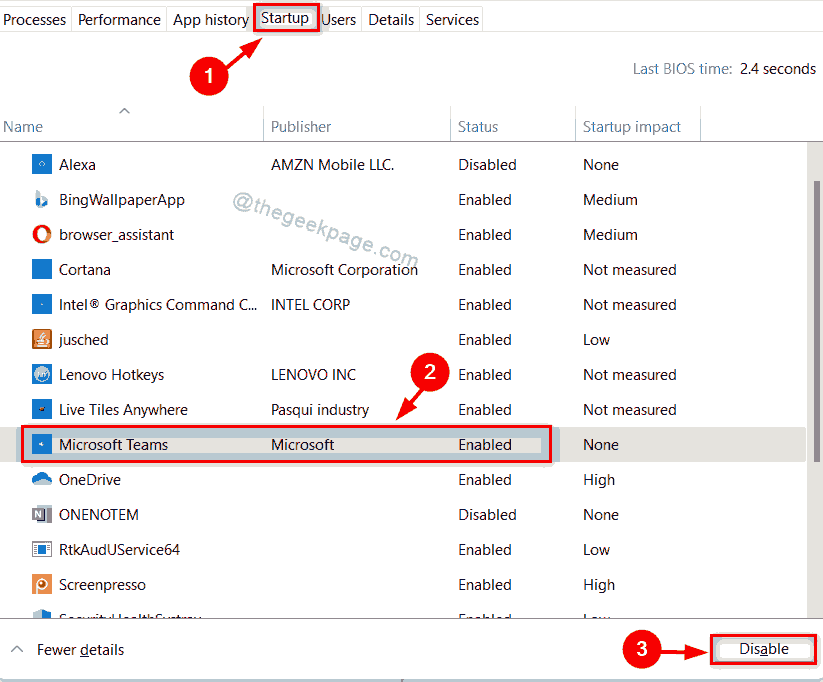
Step 3 – In the Task Manager window, click Start up and scroll down the list of apps.
Step 4: Search Microsoft Teams application in the list and select it by clicking once.
Step 5 – After selecting Microsoft Teams, click Deactivate at the bottom of the window as shown below.
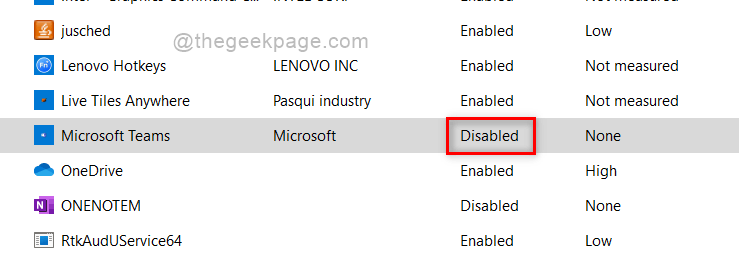
Step 6 – After clicking the Disable button, Microsoft Teams will change to Disabled as shown in the following screenshot.
Step 7 – Close Task Manager.
That’s it.
Hope this solution helped you.
Solution 2 – Make sure the Microsoft Teams app is up to date
Step 1: In the Microsoft Teams app, click three horizontal dots (show more options) at the top of the app as shown below.

Step 2: Then select Search for updates option from the list as shown below.

Step 3 – Then follow the on-screen instructions to update Microsoft Teams.
Step 4 – If you are already up to date, the small settings window will close and the Microsoft Teams app will open directly.
Step 5 – If the app finished updating to the latest version, click Upgrade now. link that appears at the top of the Microsoft Teams app as shown below.

After clicking the Update Now link, the Microsoft Teams app will launch again with the latest version.
That’s it.
I hope this has solved your problem.
Solution 3 – Delete the Microsoft Teams registry key using Registry Editor
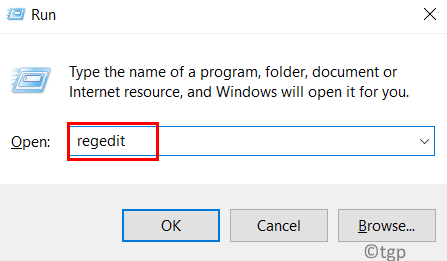
Step 1: Press Windows + R keys together on your keyboard to open To run cash register.
Step 2: Write regeditar in the run box and press the button Get into key to open the Registry editor as shown below.
Step 3: Click Yes at the UAC prompt to continue.
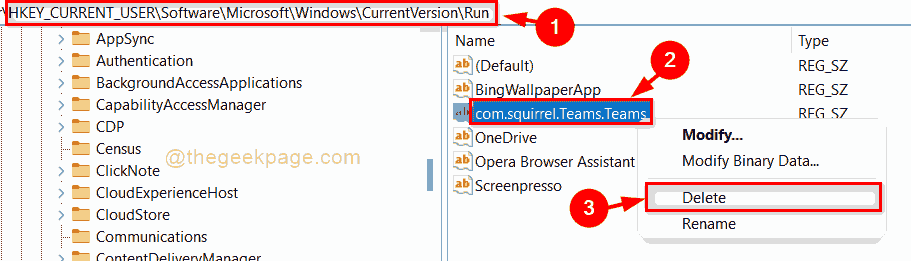
Step 4 – Copy and paste the below path to the clear and empty address bar of the registry editor and press Get into wrench.
HKEY_CURRENT_USERSOFTWAREMicrosoftWindowsCurrentVersionRun
Step 5: Right click on com.squirrel.Teams.Teams Register key.
Step 6: Click Delete context menu option as shown in the following screenshot.
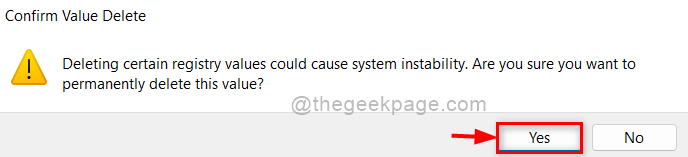
Step 7: Then click Yes in the Confirm Delete Value window to delete the registry key as shown below.
Step 8: Close the Registry editor window.
Step 9 – Reboot your system once and once it boots up, check if the app comes up automatically.
I hope this has solved your problem.
Solution 4 – Update the Microsoft Outlook app
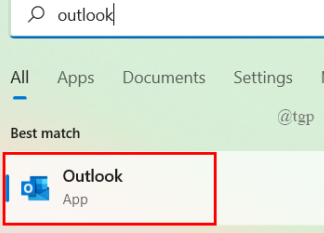
Step 1: Press Windows key on your keyboard and type panorama.
Step 2: Then select panorama application from the search results as shown below.
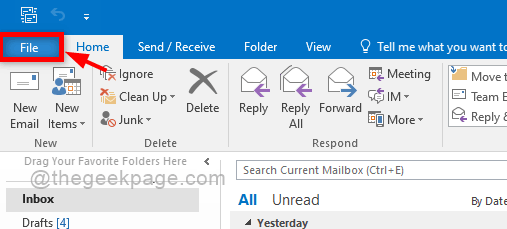
Step 3: Click Archive option present in the top menu bar of the Outlook application as shown below.
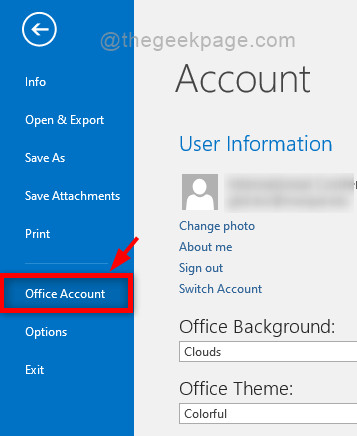
Step 4: Then select office account option in the left side menu bar as shown.
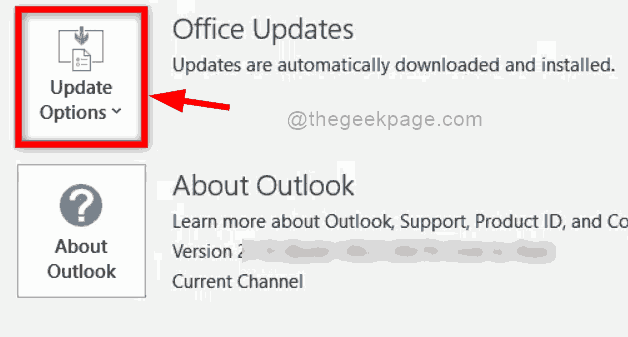
Step 5: Click upgrade options drop-down button on the Office Account page.
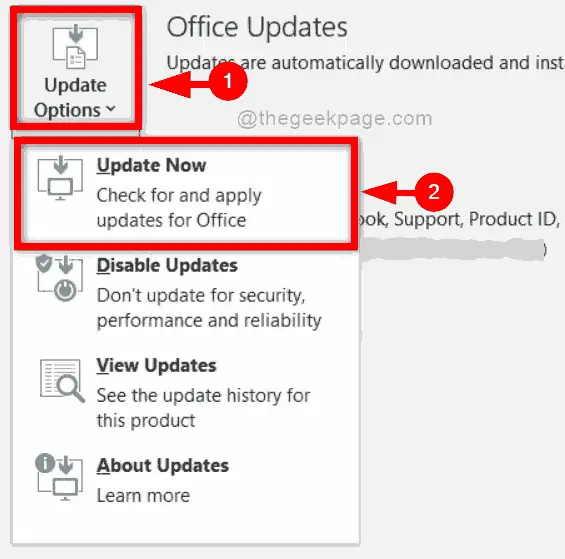
Step 6: Then click Update now in the dropdown list as shown in the following screenshot.
Step 7: Next, follow the on-screen instructions to update MS Outlook app on your system.
That’s all guys.
I hope this article has been helpful and informative. Please leave us your comments below.
Thanks!
Related posts:
 How to access Steam games without an internet connection
  How to view FPS with Xbox Game Bar in Windows 10: Steps Made Easy
  Hacked account? How to check and remedy
  How to make video calls from WhatsApp Web
  How to increase the RAM memory of a desktop or laptop + Tips and Tricks
  How to organize your YouTube subscriptions into categories
+ Tips and Tricks
How to organize your YouTube subscriptions into categories
+ Tips and Tricks


