


How to download and install fonts in GIMP
GIMP is a popular free open source image editing software used for photo retouching and other assorted image / photo related tasks. You can download and install new fonts in GIMP if you need them. In this tutorial, you will find the method you need to follow to install new fonts in GIMP (the latest version 2.10.28 Has been used).
Step 1: search the web for sources
At first, you should look for websites that allow you to download fonts for free to use in GIMP. There are a lot of resources available online, but Google Fonts it is more reliable and provides a lot of information about the sources. Google Fonts allows you to search for the necessary fonts, test them, see the available styles, and then download them to your PC. Here we will discuss the steps to use Google Fonts.
Step 2: download and extract the font on your PC
1. With your browser, go to the Google Fonts home page.
2. Click the drop-down menu associated with Categories: to select the type of fonts you are interested in.
3. Mark off the boxes associated with Serif, Handwriting, and Monoespacio. These are the categories that we don’t want to see in the list of sources.
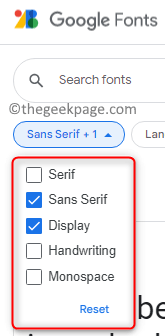
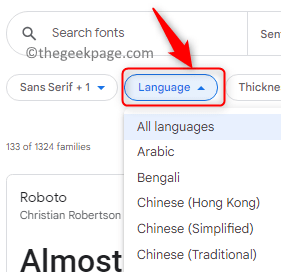
There are also other options to select the Idiom you want for the source.
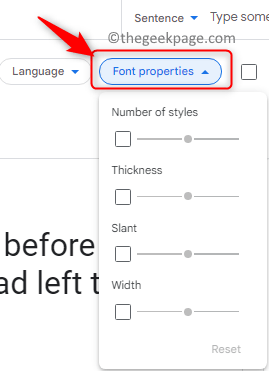
Also, there is a drop down menu for Font properties such as the number of styles, thickness, slant and width that can be selected to filter the fonts.
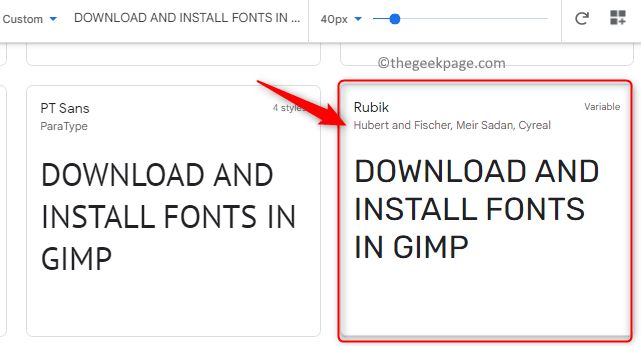
4. In the text box at the top, you can type a trial sentence you want to see in the various sources displayed.
5. There is a slider for increase or decrease the font size to take a look at the fonts before selecting them.

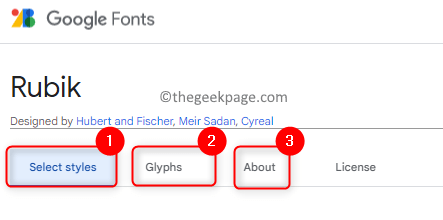
6. Select a font of your choice, for example, we are selecting Rubik.
7. Click on the source to view its details.
8. On this page, you will see the different styles in Select styles, all characters supported by this font under the Glyphs tab, and all other information related to the source in Upon.
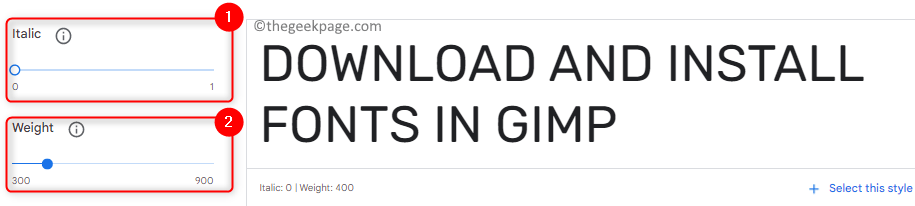
9. If you scroll down, you can change it to Italic or increase your Weight (bold) to check how the font is displayed.
10. On this page there is an option to select a single font style or download the entire font family.
a. If you want to download the entire font family, click on the Download family button at the top. Save money this file on your PC.

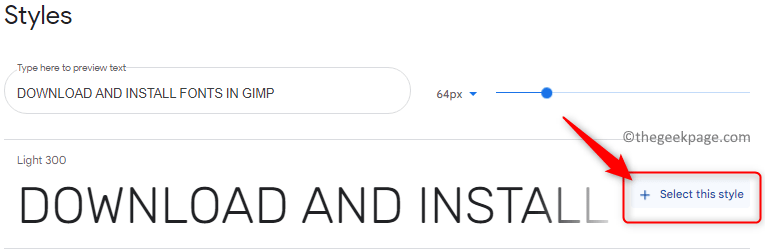
B. If you just want some select styles:
- Click on Select this style associated with each font style.
- Once you have selected the required styles, click the See the icon of the selected families on top.
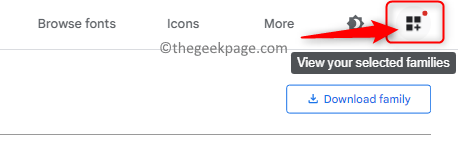
- You will see a review of styles selected and options for remove or add more styles if required.
- To download these styles, click Download all button at the bottom.
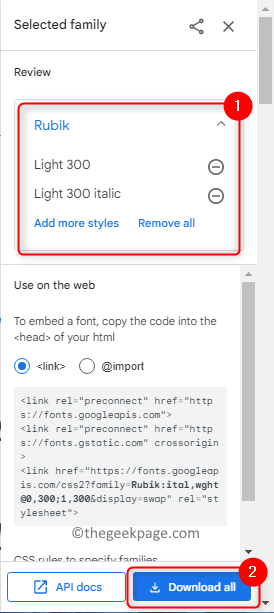
- Save it to a known location on your PC.
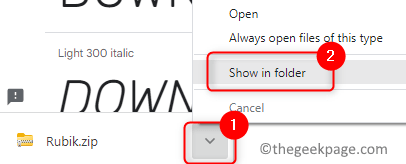
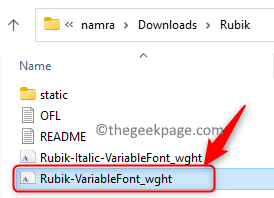
11. Downloaded font files will always come in a POSTAL CODE Format. Find the ZIP file by clicking on the Arrow down next to the downloaded file at the bottom of the browser and then click Show in folder.
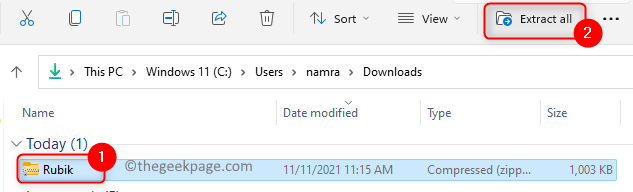
12. Select the ZIP folder for the source, and then click Remove all at the top of File Explorer.
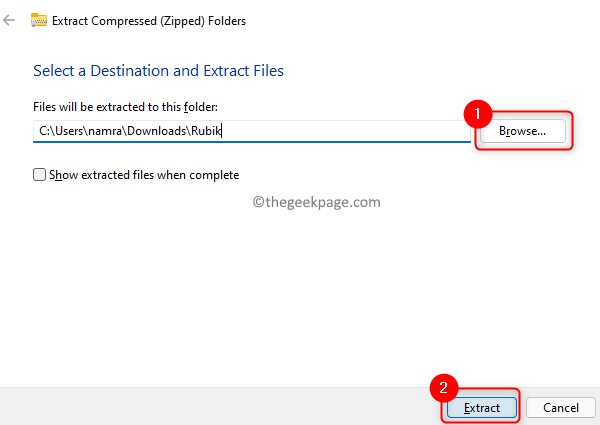
13. Browse and choose the folder location where you want to extract the font files.
14. Click the Extract button.
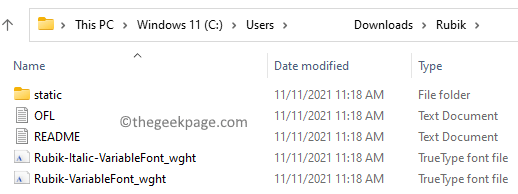
15. Now if you open the folder, you will see the extracted fonts.
Step 3: install the font
1. Open the GIMP application on your computer.
2. Select the Edit menu and choose preferences in the menu list.

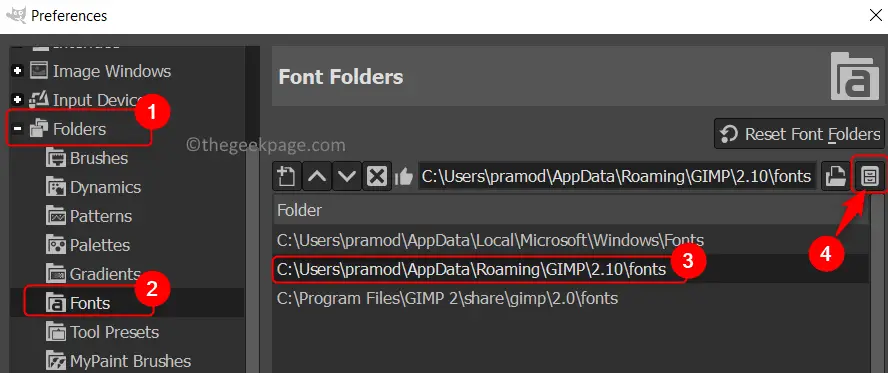
3. In the preferences window, can you see the Folders tab on the left side.
4. Click the plus sign close Folders to expand it. Scroll down and select the Sources file.
5. You will see three font folders in the right pane. Select the folder with Roaming on their way.
6. Once you select the font folder, click on the Show file location in file manager icon on top.
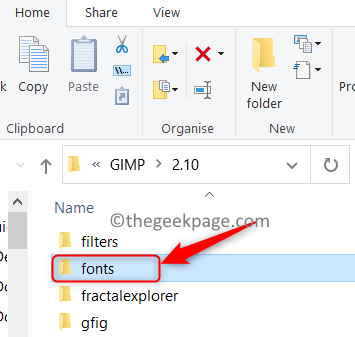
7. Open the File Manager with the location of the fonts folder. Double click about him sources folder to open it.
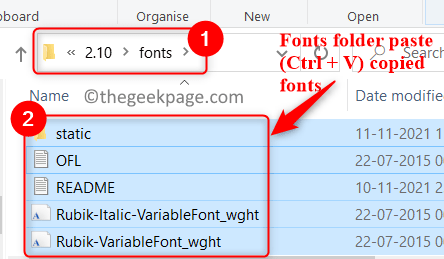
8. Go to the extracted fonts folder (Rubik font in our case). Select all files using Ctrl + A and then copy the files using Ctrl + C.
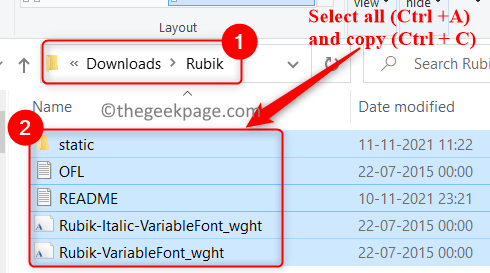
9. Go back to the open source folder in Paso 7 and press Ctrl + V to paste all font files here.
10. Close File Explorer and return to GIMP. Click on OK to close the Preferences window.
11. Now click on the Windows menu. Choose Dockable dialogs and then click Sources on the list.
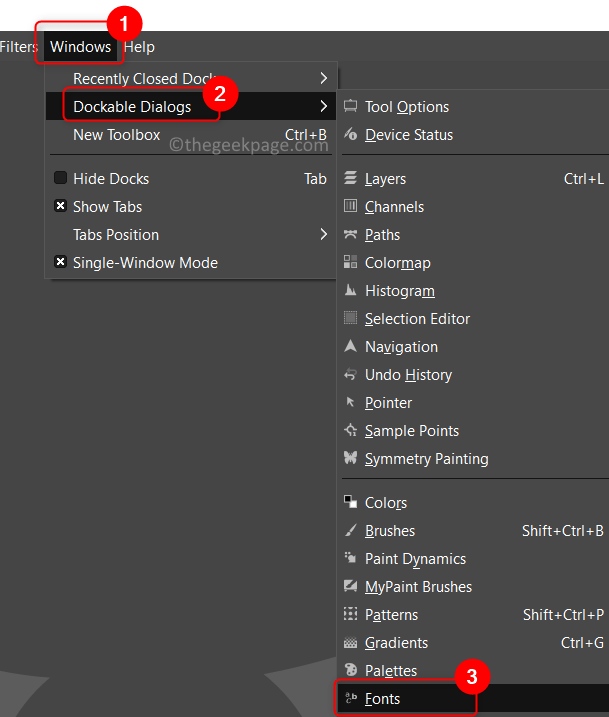
12. You will now see a font dialog at the far right of the GIMP window.
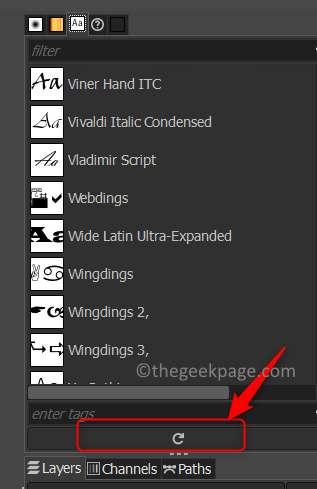
13. Click the Rescan all fonts icon below the fonts dialog to reload all fonts into GIMP.
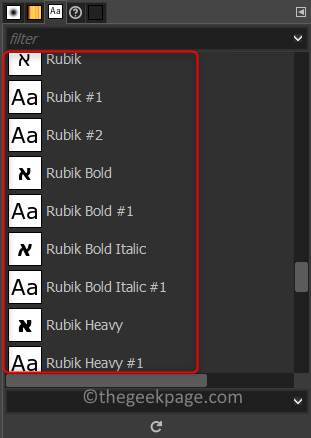
14. Scroll through it and you will find the new font (Rubik) with all font styles in the dialog.
If you want only install single font then follow the steps below.
1. Once you download and extract the fonts, double click in the source file.
2. Click the Install on pc at the top of the fountain window.
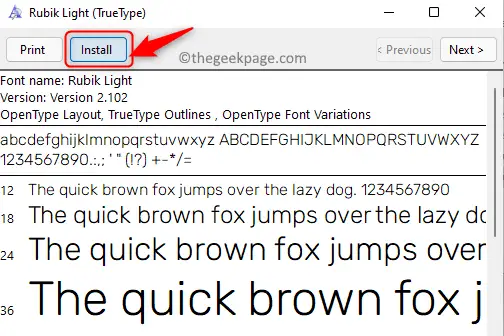
3. This will install the font on your computer. When you upgrade the dockable fonts dialog in GIMP will display the new font.
Step 4: use a new font in GIMP
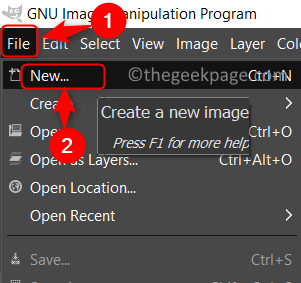
1. Click File -> New to create a new document.
2. Select the font you want to use from the Dockable font dialog.
3. Click the Text tool and draw a Text’s box.
4. Enter a text. To line up the text with the alignment tool.
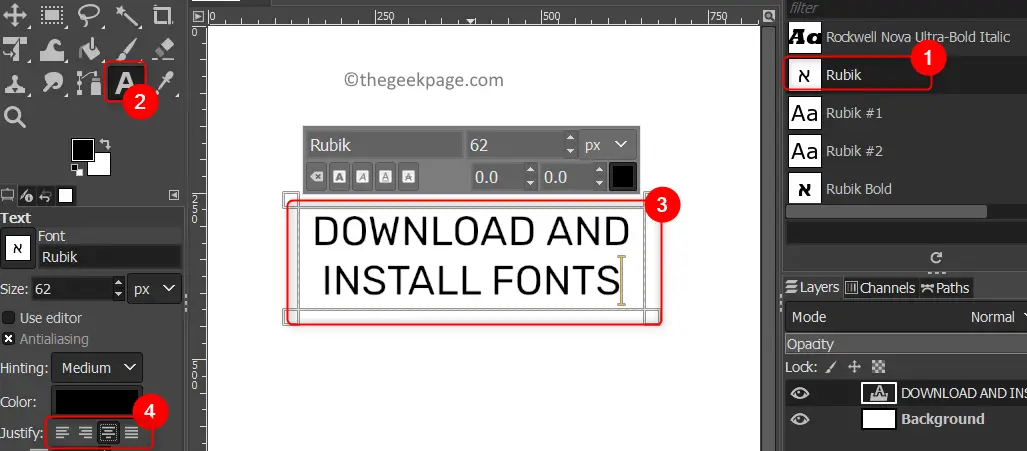
5. Now you can select the text and try the different styles of this particular font.
That is all!
We hope that you can now download and install fonts in GIMP without any difficulties.
Related posts:
 How to access Steam games without an internet connection
  How to view FPS with Xbox Game Bar in Windows 10: Steps Made Easy
  Hacked account? How to check and remedy
  How to make video calls from WhatsApp Web
  How to increase the RAM memory of a desktop or laptop + Tips and Tricks
  How to organize your YouTube subscriptions into categories
+ Tips and Tricks
How to organize your YouTube subscriptions into categories
+ Tips and Tricks


