


How to enable / disable metered connection on 11 PCs
When starting the Windows 8 operating system, Microsoft created a feature called Metered Connection, which actually prevents your data plan from having unnecessary online activity. This connection, measured when turned on, makes sure that the data plan you got from the cell company is not exceeded and gives you a notice when you don’t have such an important update. If the metered connection is turned off and your data packet ends before the end of the month, your broadband connection speed will drop and you will not have a stable connection. So in this article we will guide you on how to enable or disable metered connections for known networks on your system.
How to enable metered connection in Windows 11
Paso 1: Press Win + me keys together on your keyboard to open Settings app.
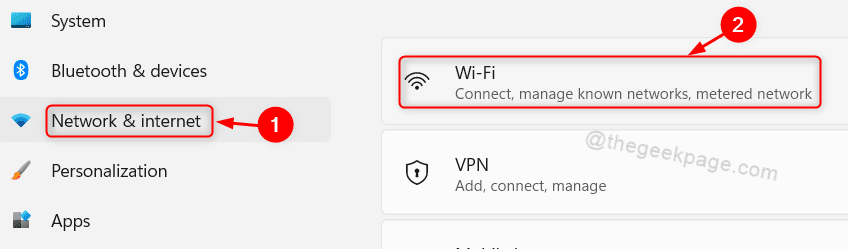
Paso 2: Click on Red and Internet on the left side of the settings window.
Paso 3: Then click Wifi on the right side as shown in the following screenshot.
Paso 4: Select Manage known networks on the Wi-Fi page.

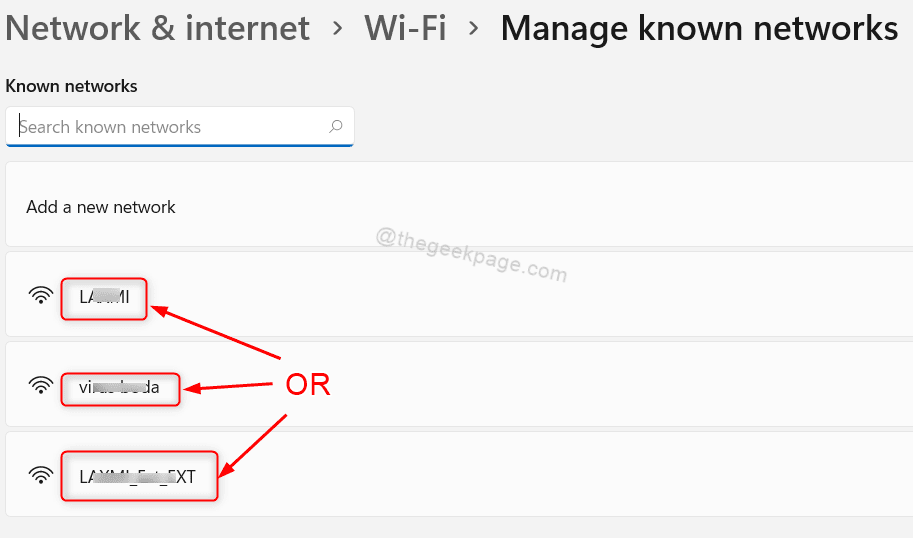
Paso 5: Then select any of the known networks on your system listed as shown below.
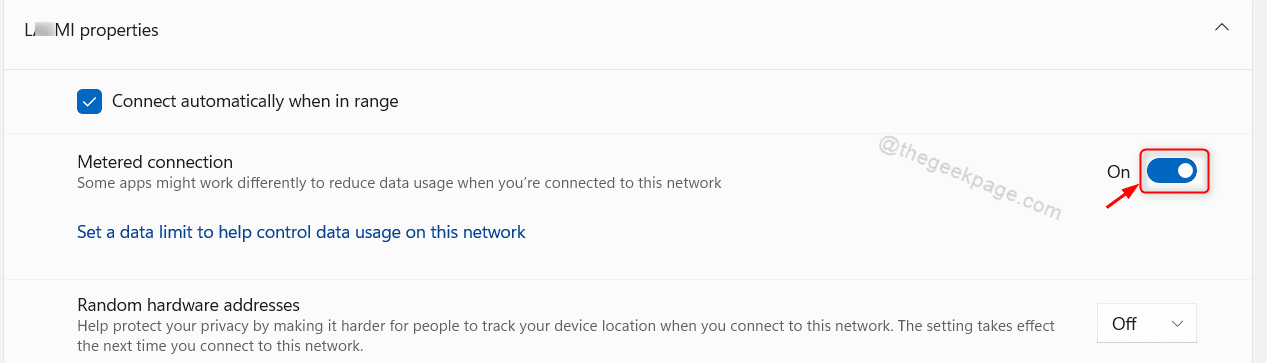
Paso 6: Click the toggle button that says Measured connection to turn it on as shown below.
Paso 7: Please repeat Paso 6 for all known networks you want.
Paso 8: Close the Settings window.
Now the metered connection is configured for all those networks on your system.
How to disable metered connection on a Windows 11 PC
Paso 1: Press Win + me keys together on your keyboard to open Settings app.
Paso 2: Then go to Red and Internet on the left side of the Settings application window.
Paso 3: Click on Wifi on the right side as shown in the following screenshot.
Paso 4: Then click Manage known networks options available on the Wi-Fi page.
Paso 5: Select any of the known networks on your system as shown below.
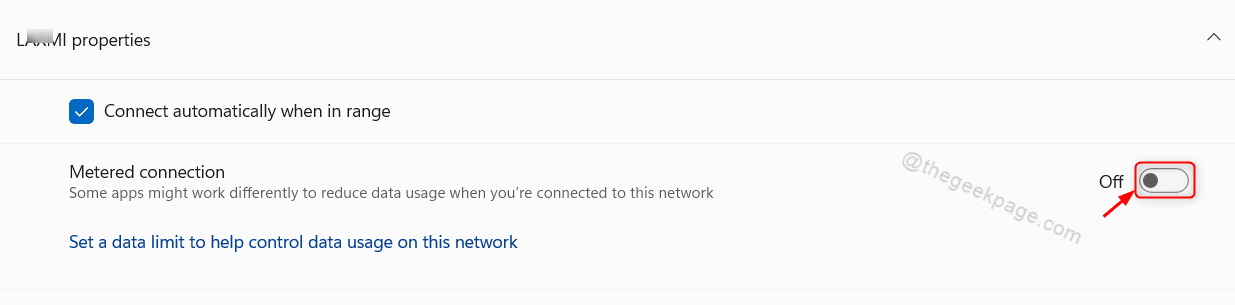
Paso 6: Click the Metered Connection toggle button to disable it on the network properties page as shown.
Paso 7: Repeat the same for all known networks where you want to change the measured connection.
Paso 8: Once done, close the configuration window.
Now the Metered connection is disabled for all the networks you wanted.
How to enable Download updates via metered connection option in Windows 11
Paso 1: Press Win + me keys together on your keyboard to open the settings app.
Paso 2: Click on Windows update option on the left side of the window.
Paso 3: Then select Advanced Options on the right side of the Windows update page as shown below.
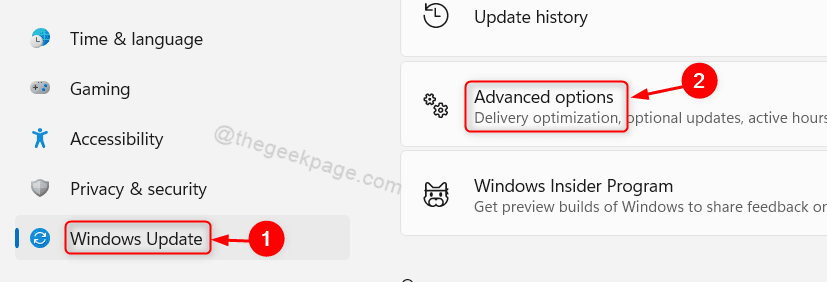
Paso 4: Click on Download updates through metered connections toggle button to turn it on as shown in the given screenshot.

Paso 5: Close the Settings window.
By enabling it, this will ensure that all Windows updates are downloaded through the metered connections on your system.
That’s it guys.
I hope you liked this article and found it informative.
Please leave us comments below for any questions.
Thanks!
Related posts:
 How to access Steam games without an internet connection
  How to view FPS with Xbox Game Bar in Windows 10: Steps Made Easy
  Hacked account? How to check and remedy
  How to make video calls from WhatsApp Web
  How to increase the RAM memory of a desktop or laptop + Tips and Tricks
  How to organize your YouTube subscriptions into categories
+ Tips and Tricks
How to organize your YouTube subscriptions into categories
+ Tips and Tricks


