1. Windows 10 CPU 100 Solution with Services
Step 1
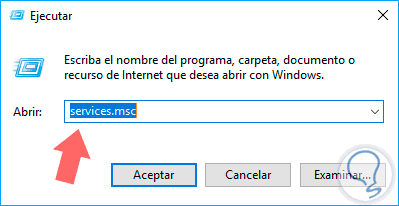
The first method is to edit the service in question. For this we will use the following key combination and in the displayed window we enter the term services.msc:
+ R
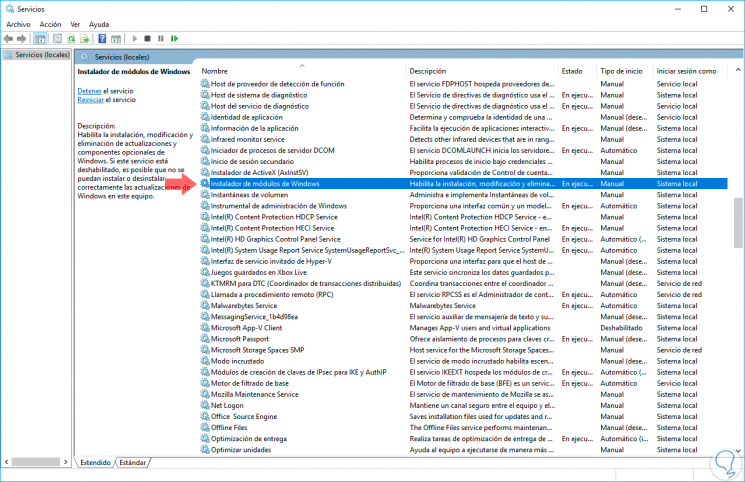
Step 2
Click on OK or press Enter and in the displayed services window we will locate the Windows Module Installer service:
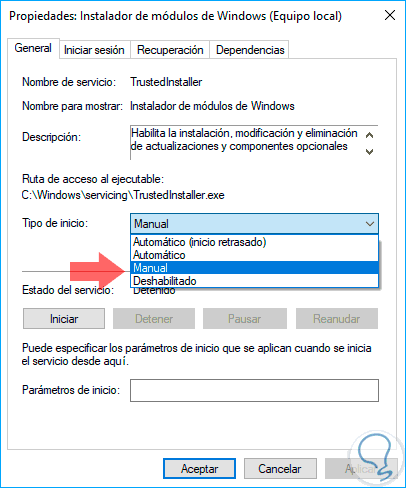
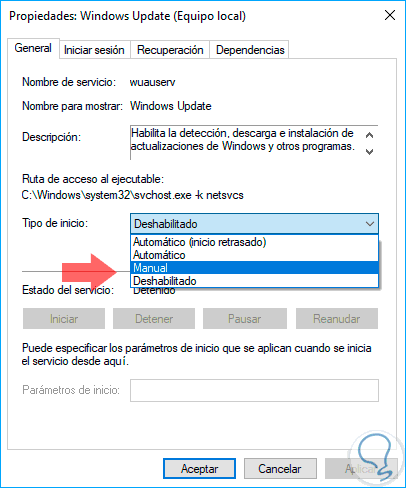
Step 3
There we will double click on it and in the displayed window we select the Manual option in the Startup type field:
Step 4
We repeat this same process with the process called Windows Update. Click on Apply and then OK to save the changes.
Step 5
In this way these services will not be started automatically but we will be the ones who determine when they have to be enabled.
Once these services are configured manually, we must disable the operating system updates, for this we will do the following:
On Wi-Fi connections We go to the path Start / Settings / Internet and network and we go to the Wi-Fi section:
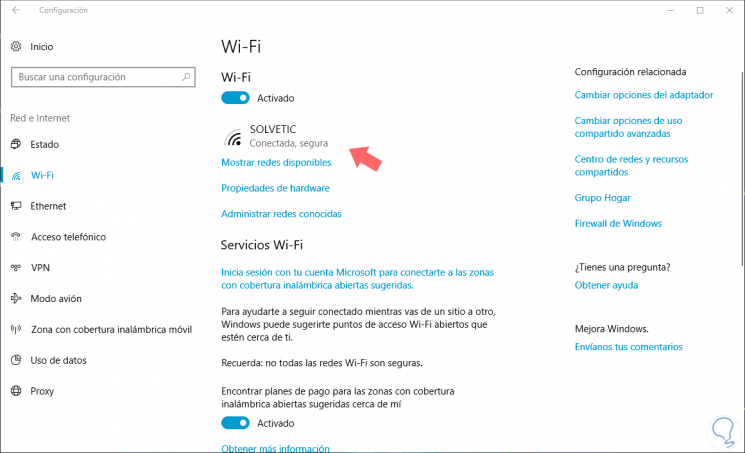
There we will click on the W-Fi network currently connected and in the new window we activate the Metered use connections switch:
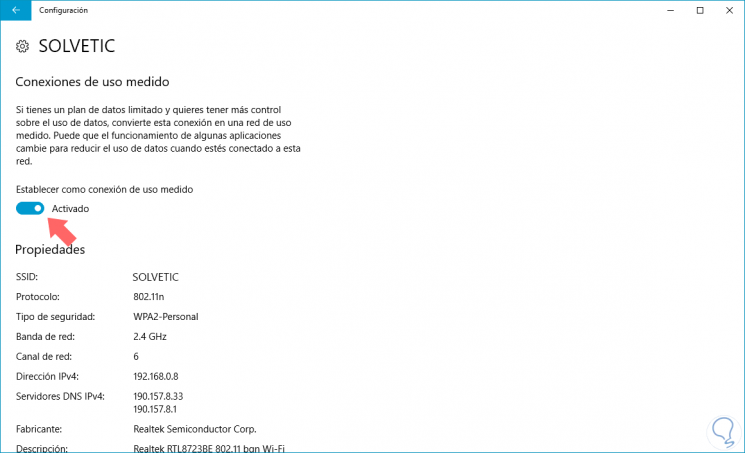
By activating this option we will prevent Windows 10 from automatically downloading system updates.
On Ethernet connections In the case of Ethernet connections, it will be necessary to edit a registry and for this we use the following key combination and enter the regedit command and press Enter. In the displayed window we go to the following route:
+ R
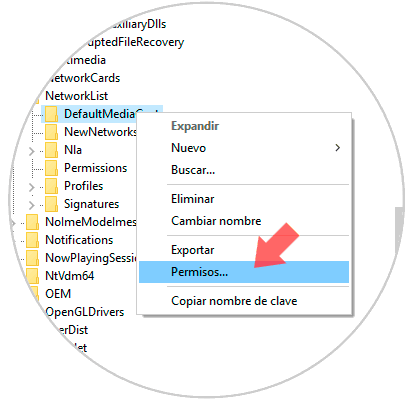
HKEY_LOCAL_MACHINE/SOFTWARE/Microsoft/WindowsNT/CurrentVersion/ NetworkList/DefaultMediaCost[attachment=39153:8-DefaultMediaCost.png]
There we will right-click on the DefaultMediaCost folder and in the displayed list we select the Permissions option:
The following window will be displayed:
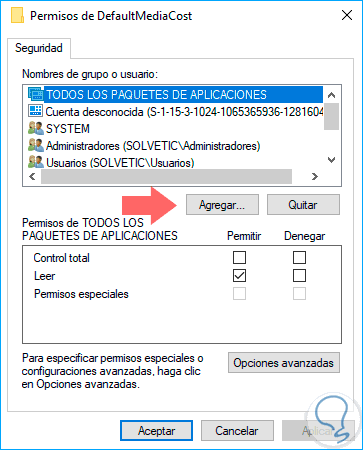
There we click on the Add option and in the displayed box we locate our user and click on Check names:
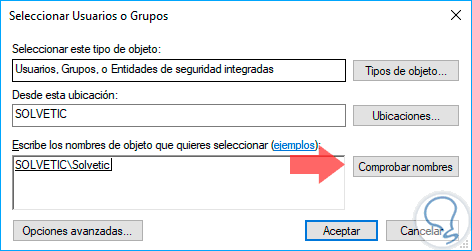
Now click on OK to add the respective user.
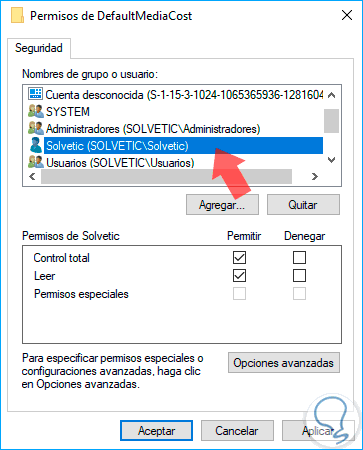
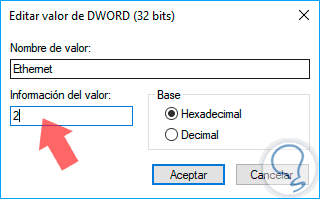
We activate the Full Control box and click on Apply and OK to save the changes and exit the wizard. Now we must edit the Ethernet register by double clicking on it and in the Value information field we will assign the number 2. Click on OK to apply the changes. Once this is done, it will be necessary to restart the operating system for this error to be solved.