


How to force your game or application to use the dedicated GPU in Windows 11
The Windows operating system released a new feature that allows games and applications to use the dedicated GPU instead of the Integrated Graphics Processor. This feature is also prevalent in Windows 11. At the same time, most computers are equipped with two dedicated GPUs along with an integrated graphics unit (Intel) if the motherboard supports it.
While games and applications automatically use the dedicated GPU (Nvidia / AMD), some games tend to bypass the dedicated GPU and use the integrated GPU. But, as a gamer or while using an app, you may want to use the dedicated GPU for a smoother experience. But while playing games or using an application, you have no idea what graphics card is in use. While there have been fixes for the older Windows operating system, with the release of Windows 11, users are a bit confused with the changes in some features and settings, making it difficult to use the dedicated GPU.
This post will walk you through the process on how to force your Game or Application to use the dedicated GPU in Windows 11.
How to select dedicated graphics card through settings
Paso 1: press the Win + me keys together on your keyboard to open the Settings app.
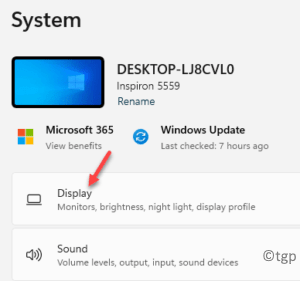
Paso 2: At Settings window, click the System option on the left.
Paso 3: Now, travel to the right side and click Monitor.
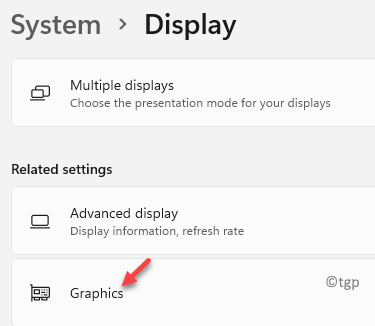
Paso 4: At Monitor setup screen, scroll down and click Graphics.
Paso 5: Then in the Graphics screen, under the Custom options for applications section, go to Add an app.
Here, click on the Browse button below.

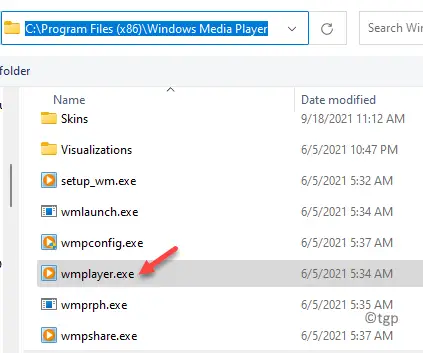
Paso 6: Now, navigate to the location of the application (which you want should use the dedicated GPU) in Windows Explorer and select it.
Here we want the windows media player to use the dedicated GPU and therefore select it in File Explorer.
It will be added to the list of applications.
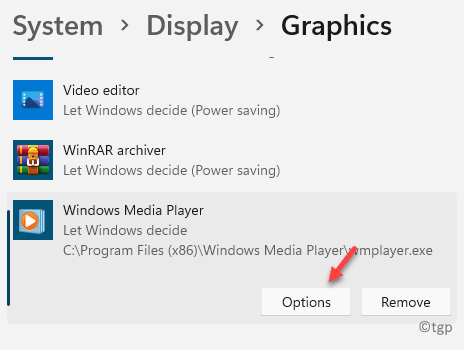
Paso 7: Then select the application from the application list in the Monitor > Graphics section and click Choices.
Paso 8: This will open the Graphics preference pop-up window.
Here, select the High performance option.
press Save money to save the changes.
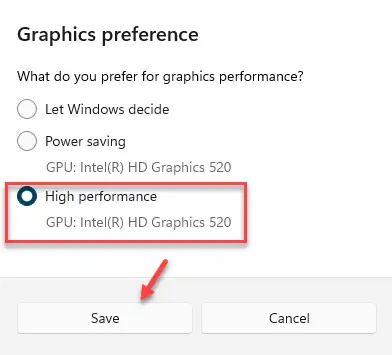
*Note – the Energy saving The option is assigned to your PC’s Integrated GPU (Intel) by default and the High performance The option is for the dedicated GPU (Nvidia / AMD).
Now get out of the Settings application, and then when you open the application, it will run using the dedicated GPU.
How to force a game to choose the dedicated graphics card
If it is a game that you want to run with the dedicated graphics card like Nvidia, you can use this method to select the graphics card of your choice for the game. Follow the instructions below to enable the option for the Nvidia video card:
Paso 1: Launch the Nvidia control panel and navigate to the menu bar at the top.
Here, click on the Vista tab and select Add the option “Run with graphics processor” to the context menu.
This will activate the Run with graphics processor option and it will now appear in the right-click context menu.
Now when you right click on any app or game, you will see the Run with graphics processor option in the context menu.
Paso 2: Now, go to the game shortcut icon on your desktop, right click on it, select Run with graphics processor and then select High-performance Nvidia processor to run the selected application using the dedicated GPU.
Related posts:
 How to access Steam games without an internet connection
  How to view FPS with Xbox Game Bar in Windows 10: Steps Made Easy
  Hacked account? How to check and remedy
  How to make video calls from WhatsApp Web
  How to increase the RAM memory of a desktop or laptop + Tips and Tricks
  How to organize your YouTube subscriptions into categories
+ Tips and Tricks
How to organize your YouTube subscriptions into categories
+ Tips and Tricks


