


How to install SSD, all models
Installing SSD (Solid State Drive) on laptop or desktop PC is a must, as its benefits are simply too many to ignore. Without an SSD, your computer will have a slower operating system startup time and slower application startup time. There is also a significant difference in application startup time on a non-SSD system. Although installing SSD is simple, people unfamiliar with this type of operation may have a hard time detecting the SSD port and inserting cables. With that in mind, we are here to walk you through the process of installing the SSD to the motherboard. It’s easy to install SSD on notebooks and desktop PCs, let’s see how it’s done.
Read also: How to update SSD firmware
SSD models
Before getting started, you should know that there are five different types of SSD drives. We will walk you through the process of connecting each of these drives to the motherboard. However, it’s always a good idea to have your motherboard manufacturer’s user manual handy when following these steps.
- 2.5″ SSD
- SSD mSATA
- SSD M.2 NVMe
- SSD M.2 SATA
- SSD PCIe
Among these types of solid state drives, mSATA and M.2 SATA are used in laptops and tablets. Therefore, we will not talk in detail about the installation of these components. However, since installing them is quite simple and similar to installing NVMe, we will briefly talk about how to install SSD on desktop and laptop PC.
Installation of different types of SSDs
We have explained how to install solid state drives on motherboard based on drive type below.
How to mount 2.5 inch SSD on desktop and laptop PC
The 2.5-inch SSD is one of the most commonly used storage devices when building a PC. In terms of budget, this is the first choice of most PC builders. However, installing them can be a hassle as it requires two cables.
- SATA cable (connects motherboard and SSD)
- Power cord
Insert the 2.5-inch SSD into the mounting bracket
The SATA cable is usually supplied with the motherboard and the power cable is supplied by the power supply unit (PSU). Before connecting them, you must first screw the SSD onto the CPU case.
- Place the SSD on the 3.5-inch metal mounting bracket that came with the CPU case. These rectangular brackets hold storage devices such as SSDs and HDDs.
- Now line up and screw the screw holes of the SSD into the holes in the bracket.
When fixing the SSD into the bracket, make sure the ports of the SSD are easily accessible, as you need to plug in the power and SATA cable.
Connect the SSD with the motherboard and power supply
After securing the SSD into the bracket, it’s time to insert the cables. You need to plug two cables into the SSD when connecting it to the motherboard. One is the SATA cable and the other is for thePower supply. The port where the power cable plugs into is relatively larger than the SATA port, so it will be easier to differentiate the two. The motherboard usually includes the SATA cables and not the SSD. Both ends of the SATA cable are the same, so it doesn’t matter which end you plug into the SSD.
- Plug one end of this cable into the SSD. You can only insert these cables one way, so if you can’t insert them a certain way, reverse the cable and try again.
- To insert the other end of the SATA cable into the motherboard, you need to find the SATA port first. A simple method is to inspect the SATA cable.
The cable will have an L-shaped port. Then, on the motherboard, look for any L-shaped headers. These SATA headers are typically found on one side of the motherboard. These SATA slots can also be parallel to each other. If you can’t find the SATA header on the motherboard, you always can refer to the user manual. Once you have located the SATA header on the motherboard, insert the other end of the cable into one of these slots.
Connect SSD with PSU
Now you need to power up the SSD by connecting it to the power supply.
- Find the cable coming from the power supply. This cable will have a wide end, which you can recognize by looking at the power port on the SSD.
- Again, the power cable from the power supply only goes inside the SSD one way, so if you can’t plug in the cable, reverse it and try again.
Then, enter your motherboard BIOS to check if your system detects the SSD. If not, make sure the power cables are fully inserted into both the power supply and the SSD.
Also Read: How to Clone Hard Drive to SSD
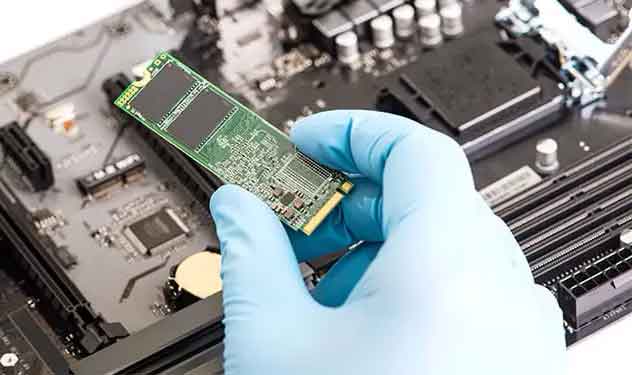
Install M.2 NVMe SSD on notebook
The M.2 NVMe (Non-volatile Memory Express) SSD is basically a compact version of a 2.5-inch SSD with a lot of additional features. This is a thin rectangular chip that you can place directly on the motherboard. Unlike the 2.5-inch SSD, the M.2 NVMe does not require a separate power source. Also, no cables are needed as it connects directly to the motherboard. There are basically two types of M.2 NVMe depending on the type of connectors:
- M + B key connector: this type of connector has two blanks.
- M key connector: they have a small slot on one side of the connector.
So, if you have an NVMe SSD with M-key connector, but your motherboard doesn’t have this slot, you may need to replace NVMe with an M + B key connector.
Find the NVMe slots
To install NVMe SSDs on the motherboard, you need to locate the NVMe slots first. The M.2 slots are usually located near the PCIe slot on the motherboard. You can recognize the PCIe slots on the motherboard by its long frame. However, PCIe slots look a lot like DIMM slots (which contain RAM). DIMM slots will have blocks at both ends and PCIe will have blocks at only one end.
If you can’t find the M.2 slots, there may be a thermal protector above it. A thermal shield is a metal heatsink included with most high-end motherboards, which sits on top of the M.2 NVMe. You need to remove this metal cover to reveal the M.2 NVMe slots. Refer to your motherboard user manual if you have trouble finding M.2 slots.
Once you have located the PCIe slots, you can easily locate the M.2 slots. Look for words like M2_1, M2_2 near the PCIe slots. These NVMe sticks are flat on the motherboard or horizontally, so the M.2 port is not to be confused with the PCIe x1 or x4 slots, which are located vertically.
M.2 NVMe SSD installation
After locating the NVMe slots on the motherboard, follow this procedure to insert the NVMe drive into the NVMe slots.
- Slide them by aligning the space on the NVMe chip with the space on the NVMe slot.
- Once the chip is firmly seated on the board, screw it into place. This screw is included with the motherboard.
- Do not tighten this screw as it only serves to prevent the SSD from coming loose.
- After screwing it into place, you will need to reinsert the metal heat sink if you had previously removed it.
Also Read: The Complete Guide to Solid State Drives [SSD]
Install PCIe SSD – Portable Memory for Notebook, Desktop PC and Tablet
This is a special solid state drive which is more expensive and has more features than the standard M.2 NVMe and 2.5-inch SSD. These drives are installed in the motherboard’s PCIe x4 slots. Like NVMe SSDs, they are powered by the motherboard and do not require a separate power cable.
Locate the PCIe x4 slots
The PCIe SSD goes inside the PCIe x4 slots on the motherboard. So in case this slot is not present on the motherboard, you may need to switch to another SSD. Finding the PCIe x4 slots is fairly straightforward as they are located next to the PCIe x16 slots (which contain the graphics card) and are nearly half its size. The PCIe SSD scan is another way to find the PCIe x4 slot.
Compare the length of the interface (the gold strips that connect it to the motherboard) with the length of the PCIe slots. If the lengths match, the slots are PCIe x4. If you are having trouble locating the PCIe x4 slot, you can always refer to your motherboard user manual.
Remove the rear PCIe slot cover and insert the SSD
To install PCIe SSDs, you must first remove the metal part that holds the PCIe bracket from the rear end of the CPU.
- Unscrew the two screws parallel to the PCIe x4 slots
- Remove the metal bracket.
- Now, insert the SSD into the PCIe x4 slots.
- Screw the SSD from the rear bracket of the PCIe SSD.
Since this SSD does not require a power cable, you can simply plug it in and configure it from the BIOS.
Related posts:
 How to access Steam games without an internet connection
  How to view FPS with Xbox Game Bar in Windows 10: Steps Made Easy
  Hacked account? How to check and remedy
  How to make video calls from WhatsApp Web
  How to increase the RAM memory of a desktop or laptop + Tips and Tricks
  How to organize your YouTube subscriptions into categories
+ Tips and Tricks
How to organize your YouTube subscriptions into categories
+ Tips and Tricks


