


How to Manually Assign a Static IP Address in Windows 11: 4 Methods
The static Internet Protocol (IP) address is basically a constant and does not change its address under any circumstances. This is very useful if you have a web hosting server and you want your client/clients to find you easily. The static IP address is assigned to each device and provided by the network company. Static IP address has its own advantages, such as easy remote access, server hosting, better communication for voice over Internet protocol, etc. This is beneficial if many employees are working remotely via VPN and are able to get their jobs done effectively. If you have a static IP address and are wondering how to configure it on your system, this post will help you.
How to manually configure a static IP address in Windows 11 using Command Prompt
Step 1: Press Windows + R keys together on your keyboard to open To run dialog box.
Step 2: Write cmd in the run dialog and press the button CTRL + MAYÚS + Intro keys together to open symbol of the system What management.
Step 3: Then click Yes at the UAC prompt to continue.
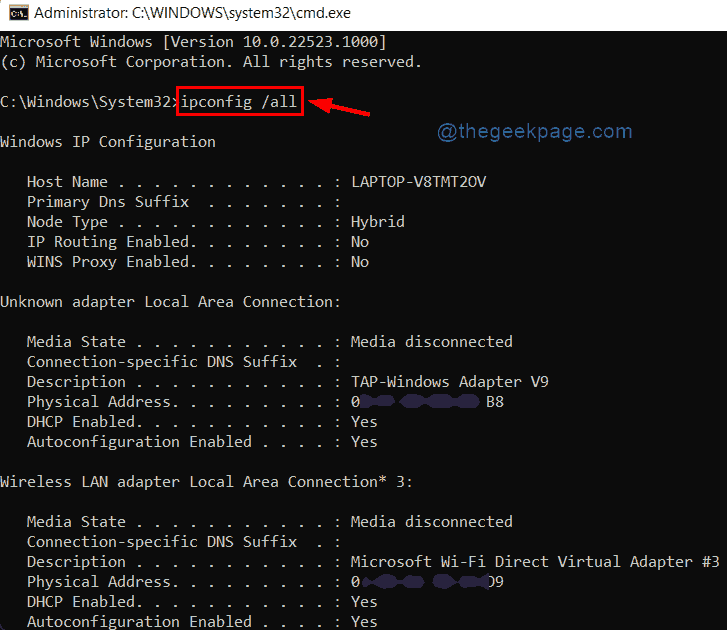
Step 4 – Copy and paste the following command into the command prompt and press the button Get into to see all IP configurations on your system.
ipconfig /all
Step 5: Next, modify, copy and then paste the following command in the command prompt.
Step 6: Press Get into on your keyboard to run the command to assign the static IP address.
netsh interface ip set address name="Wi-Fi" static 10.1.2.220 255.255.255.0 10.1.2.1
NOTE : Replace Wifi with the name of your network adapter in your system and 10.1.2.220 255.255.255.0 10.1.2.1 with the static IP address, subnet mask Y input address respectively provided by your network company.
Step 7: Also, run the command below to configure the DNS server address.
NOTE: replace Wifi with the name of your network adapter and also replace 10.1.2.1 with the DNS server address for your system.
netsh interface ip set dns name="Wi-Fi" static 10.1.2.1
Step 8 – If you want to add the alternate DNS server address, copy and paste the following command and press the button Get into wrench.
NOTE: Replace Wifi with the name of your network adapter and also, 8.8.8.8 with the alternate DNS server address on your system.
netsh interface ip add dns name="Wi-Fi" 8.8.8.8 index=2
Step 9 – After running the commands, close the command prompt.
That’s it.
This is how you can configure the static IP address on your system using the command prompt.
How to manually configure a static IP address in Windows 11 using the Settings app
Step 1: Press windows + me keys together to open the Settings app directly.
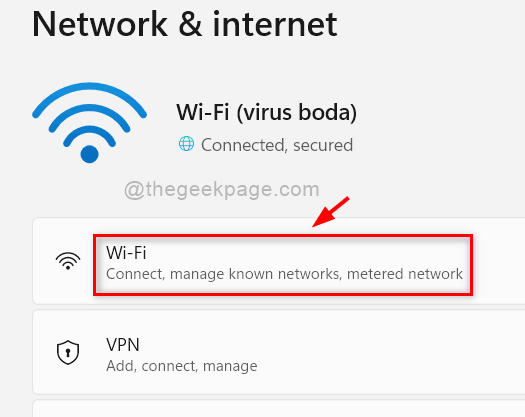
Step 2: Then click red and internet on the left side of the Settings app window.

Step 3 – On the right side of the Settings window, click Wifi as shown in the following screenshot.
NOTE:- If you are connected to the ethernet connection, then click ethernet option instead of Wi-Fi.
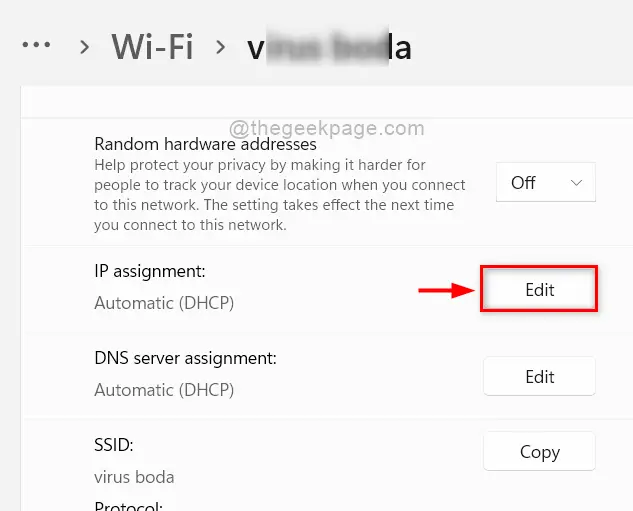
Step 4 Click on Current Wi-Fi Properties as shown below.

Step 5: Click Edit button IP assignment on the Wi-Fi properties page.
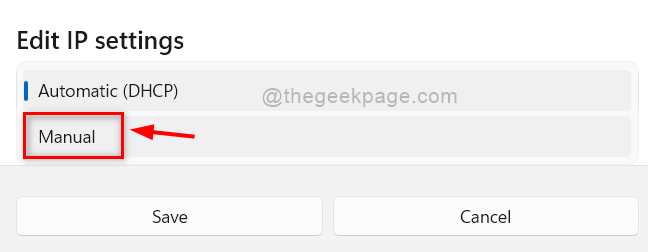
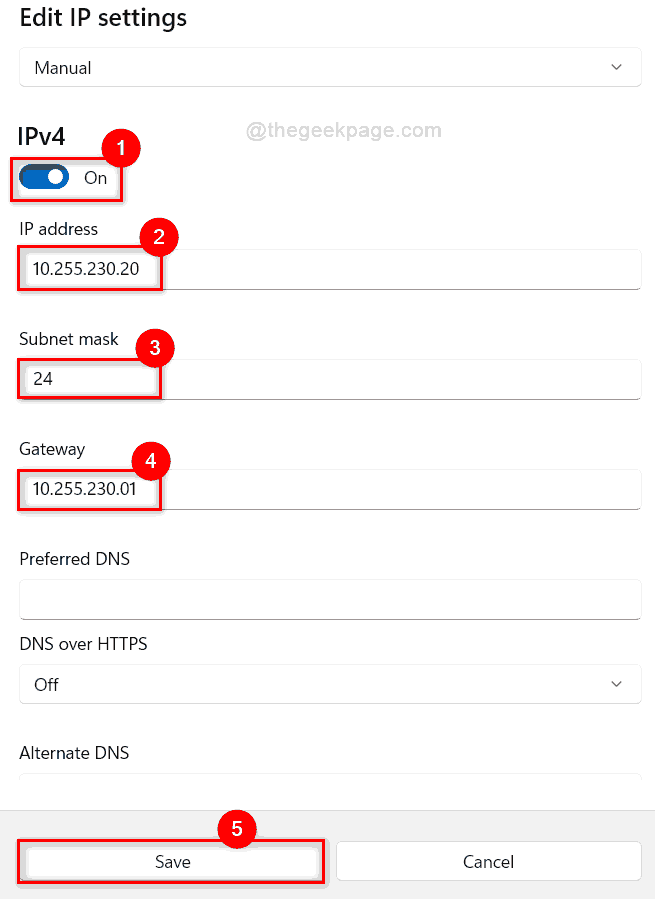
Step 6: Select Manual from the dropdown list as shown below.
Step 7: By selecting the Manual option, you will get two toggle buttons called IPv4 and IPv6.
Step 8: Click IPv4 toggle button to rotate it About.
Step 9: Then you will get some text boxes where you need to enter the values.
Step 10: Enter IP adress, Subnet mask Y Door values provided by your network service provider in their respective text boxes.
Step 11: Click Save money to apply the changes for the Wi-Fi adapter as shown in the image below.
Step 12: At last, close the Settings window.
In this way, you can set the static IP address on your system using the Settings app.
How to manually configure a static IP address in Windows 11 using the PowerShell app
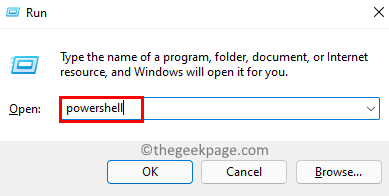
Step 1: Press Windows + R keys together on your keyboard to open To run dialog box.
Step 2: Write potencia Shell in the run dialog and press the button CTRL + MAYÚS + Intro keys together to open Potencia Shell app like management.
Step 3: Then click Yes at the UAC prompt to continue.
Step 4 – Copy and paste the following given command and hit the button Get into wrench.
Get-NetIPConfiguration

Step 5: Run the following command replacing 5 with the corresponding InterfaceIndex of your network adapter and replace other factors 10.1.2.220 , 24 Y 10.1.2.1 with those provided by your network service.
New-NetIPAddress -InterfaceIndex 5 -IPAddress 10.1.2.220 -PrefixLength 24 -DefaultGateway 10.1.2.1
Step 6 – Next, copy and paste the following command and hit the button Get into wrench.
NOTE: Replace 5 with the corresponding InterfaceIndex of your network adapter and also replace 10.1.2.1 with your DNS server address for your system.
Set-DnsClientServerAddress -InterfaceIndex 5 -ServerAddresses 10.1.2.1
Step 7: At last, run this command replacing 5 with the corresponding InterfaceIndex of your network adapter and 10.1.2.1, 8.8.8.8 to assign an alternate DNS server address.
Set-DnsClientServerAddress -InterfaceIndex 5 -ServerAddresses 10.1.2.1, 8.8.8.8
Step 8 – Finally, close the PowerShell app.
That’s all guys.
I hope this article has been informative and helpful.
Please leave us your comments below for any clarification needed.
Thanks!
Related posts:
 How to access Steam games without an internet connection
  How to view FPS with Xbox Game Bar in Windows 10: Steps Made Easy
  Hacked account? How to check and remedy
  How to make video calls from WhatsApp Web
  How to increase the RAM memory of a desktop or laptop + Tips and Tricks
  How to organize your YouTube subscriptions into categories
+ Tips and Tricks
How to organize your YouTube subscriptions into categories
+ Tips and Tricks


