


How to prevent user from deleting the printer in Windows 11.10
Looking for options to prevent users from deleting printers from Devices and Printer in Control Panel? As an administrator, you may need to grant access permissions to a particular set of users and restrict others from taking the action. Let’s see in this article how to prevent users from deleting printers from Control Panel.
Method 1: using the group policy editor
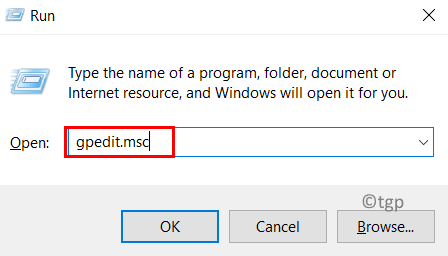
Step 1: Press Win + R then write gpedit.msc and press Get into. press Yes if prompted for the UAC (User Account Control) popup.
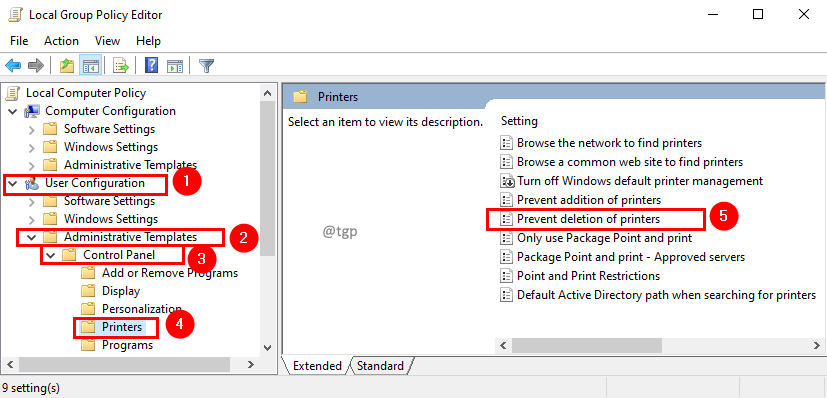
Step 2: Navigate to the following location in the Local Group Policy Editor window
User ConfigurationAdministrative TemplatesControl PanelPrinters
Paso 3: Double click upon Avoid removing printers.
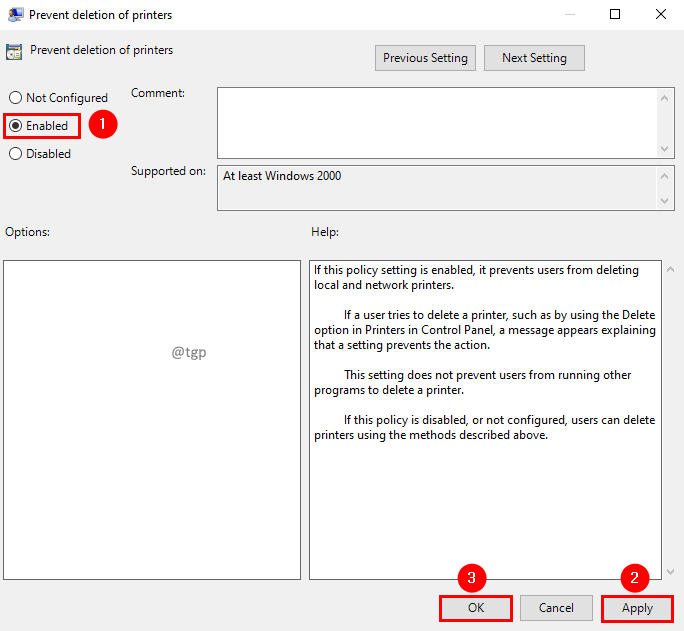
Step 4: In the Prevent Removal of Printers window, select Activated and click Request followed by OK.
Step 5: Now reboot your system for the changes to take effect.
Note:
- This policy setting will restrict the removal of printers from the Devices and Printers view only. Printers can still be removed using the Print Management Console, PowerShell, WMI interfaces, and any utility to perform the printer removal task.
- If this policy setting is enabled, it prevents users from deleting local and network printers.
- If a user tries to delete a printer, for example, by using the Delete option under Printers in the Control Panel, a message appears explaining that a setting is preventing the action.
Method 2: use Registry Editor
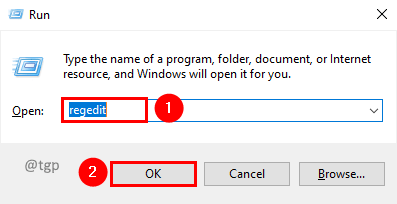
Step 1: Press Win + R, then write regedit and click OK. press Yes if prompted for the UAC (User Account Control) popup.
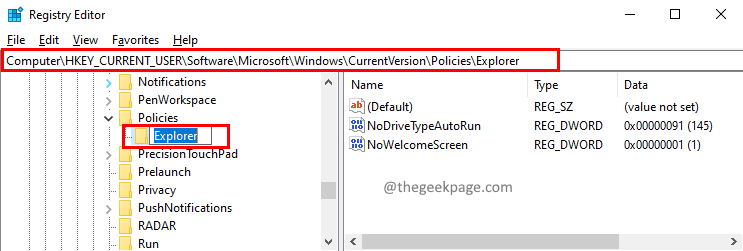
Step 2: navigate to the following registry key.
ComputerHKEY_CURRENT_USERSoftwareMicrosoftWindowsCurrentVersionPoliciesExplorer
Step 3: if you can’t find Explorer in the path, add the key. The right button of the mouse in the Policies folder and select New from the context menu. In the New submenu, select Wrench.

Step 4: A new folder will be created in the Policies folder. Give Explorer as a name for the new folder.
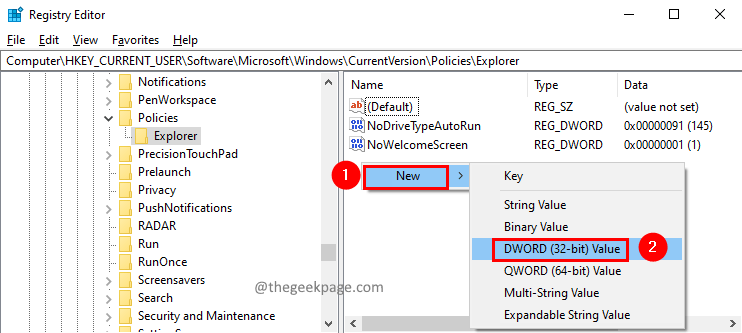
Step 5: Now add a DWORD value to Explorer. To do that, the right button of the mouse and select New in the context menu. In the New submenu, select Valor DWORD (32 bits).
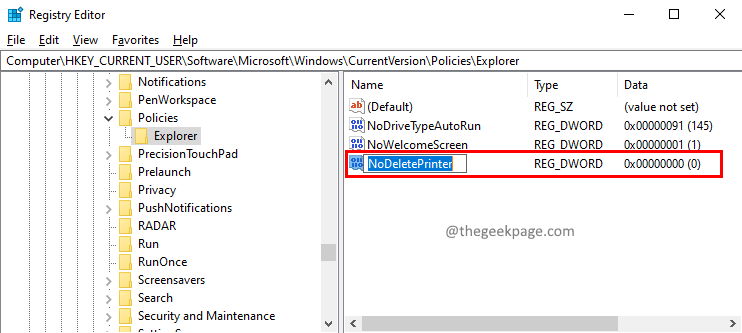
Step 6: Provide the name of the Dword value as NoDeletePrinter.
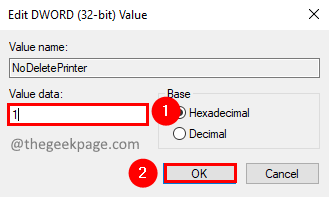
Paso 7: Double click about him NoDeletePrinter value to edit it. In the Edit DWORD Value (32-bit) window, set Data value at 1 to prevent the user from deleting the printer from the Control Panel. Click it’s okay.
That is all
We hope this article has been informative. Thank you for reading.
Please comment and let us know if you have found it useful.
Related posts:
 How to access Steam games without an internet connection
  How to view FPS with Xbox Game Bar in Windows 10: Steps Made Easy
  Hacked account? How to check and remedy
  How to make video calls from WhatsApp Web
  How to increase the RAM memory of a desktop or laptop + Tips and Tricks
  How to organize your YouTube subscriptions into categories
+ Tips and Tricks
How to organize your YouTube subscriptions into categories
+ Tips and Tricks


